My condolences Aron, I know how close we tend to become to our pets. Take some comfort from the knowledge that you and your family will certainly have extended the life of the lucky little fella by taking him into your home and showing him that some people are good and kind.
Take care.
V6 into a RHD Chrysler Neon mk1
Re: V6 into a RHD Chrysler Neon mk1
J
"Home is where you park it", so the saying goes. That may yet come true..
"Home is where you park it", so the saying goes. That may yet come true..
Re: V6 into a RHD Chrysler Neon mk1
Thats harsh mate.
At least you gave him a good home and life.
I rescued a underweight Doberman who I love to ibts but at only 2 years old the vet has already said he needs a hip replacement due to being malnurished as a puppy. Gutted as he loved to come walking accross the fields and he so wants to go out but hes hopping in pain after 5 mins running.
Dogs are defo a mans best friend!
-
junkyarddog

- Posts: 176
- Joined: Wed Jan 05, 2011 7:18 pm
- Location: Co,Limerick.Ireland.
Re: V6 into a RHD Chrysler Neon mk1
Very sad when a loved pet and companion passes away,
very sorry to hear of your loss
very sorry to hear of your loss
-
tractorman
- Posts: 1399
- Joined: Mon Feb 21, 2011 11:22 am
- Location: Wigton, Cumbria
Re: V6 into a RHD Chrysler Neon mk1
Sorry to hear the sad news. It won't be much consolation, but your family's love and care will have made the last few months of his life so much happier.

Re: V6 into a RHD Chrysler Neon mk1
Thanks guys, unfortunately Danny(Snotty) was got to keep Casey
company when her mother died. And both of them were the same age.
Cassey has not been interested in her treats and has really been moping
around as she knows where he is buried!
Mother will start looking around for another dog to keep her company next
week, which will be the worst of the relative house will be sorted out.
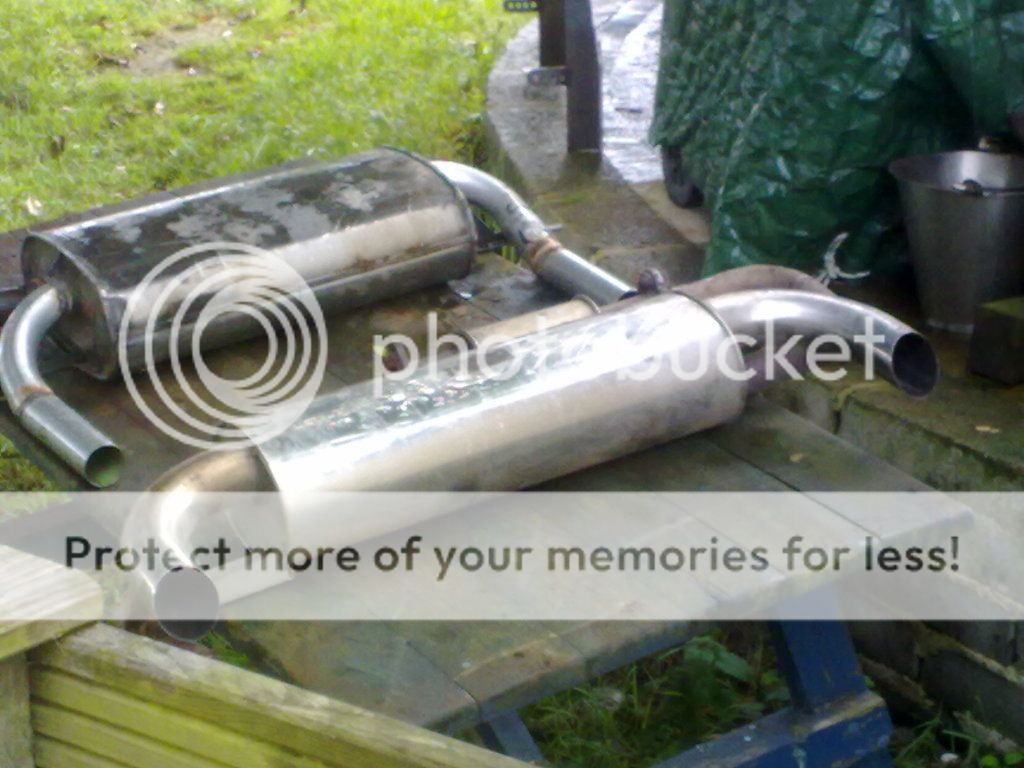
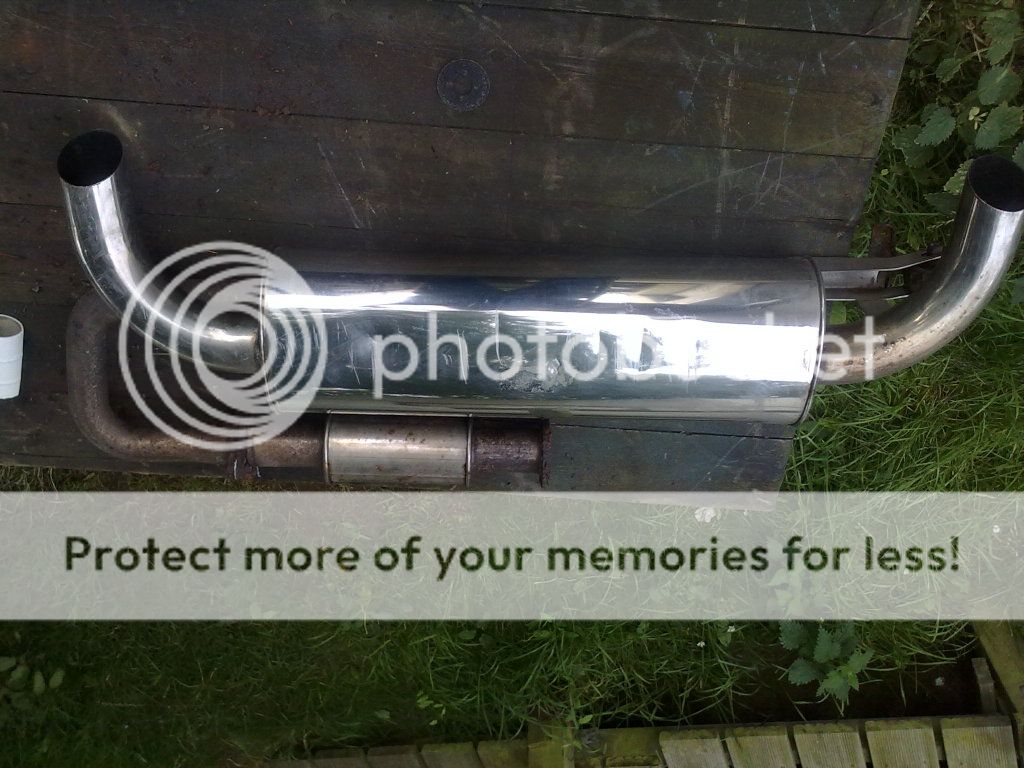
As for me I had to do something to stop me dwelling on the old boy all day.
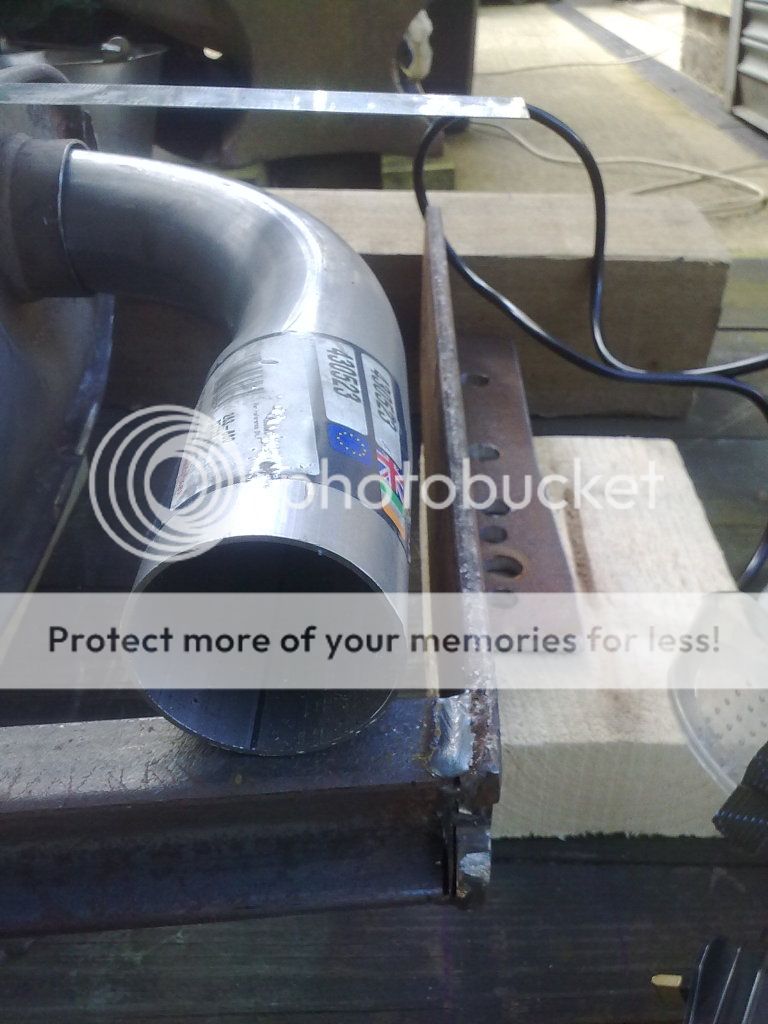
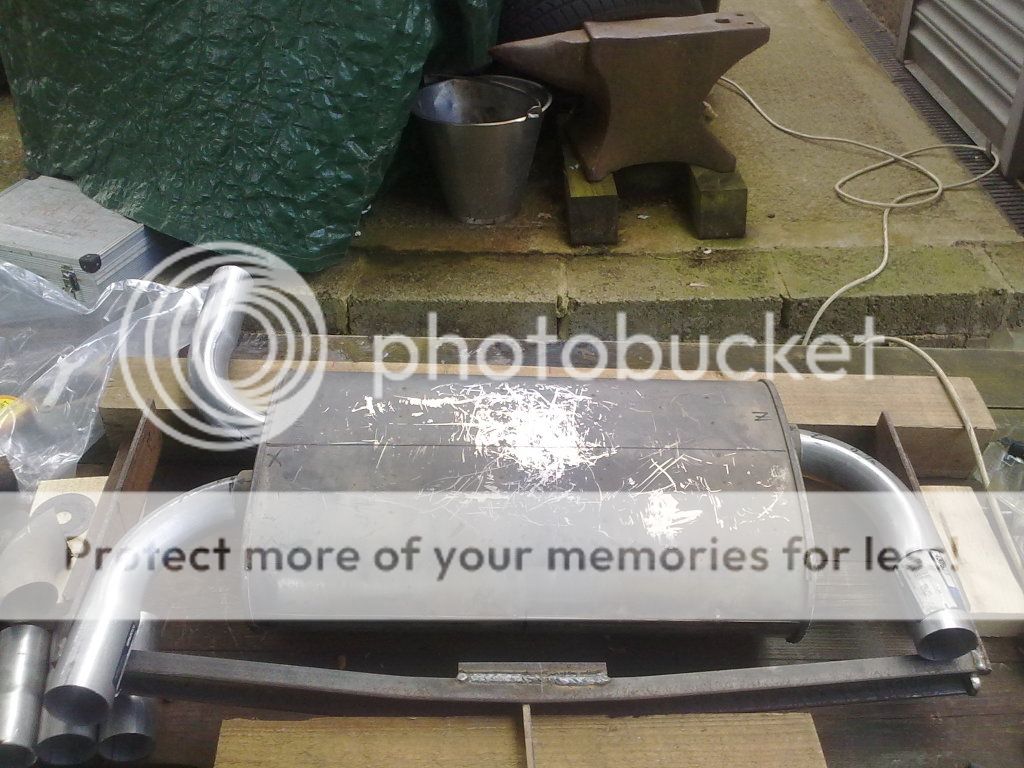
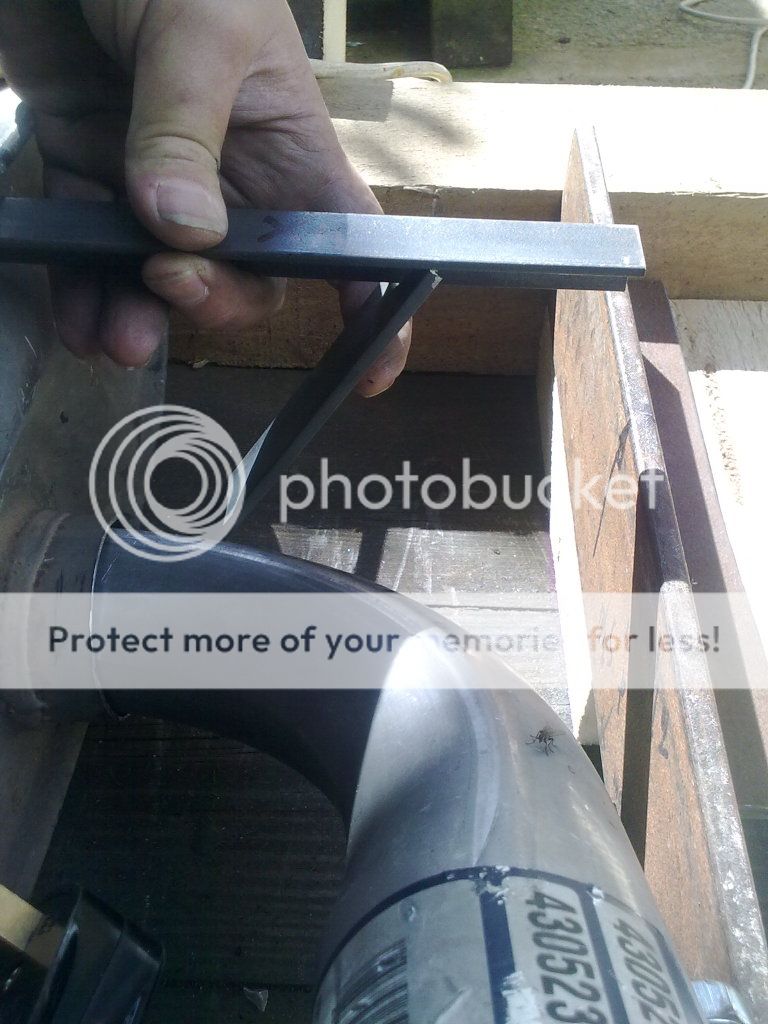
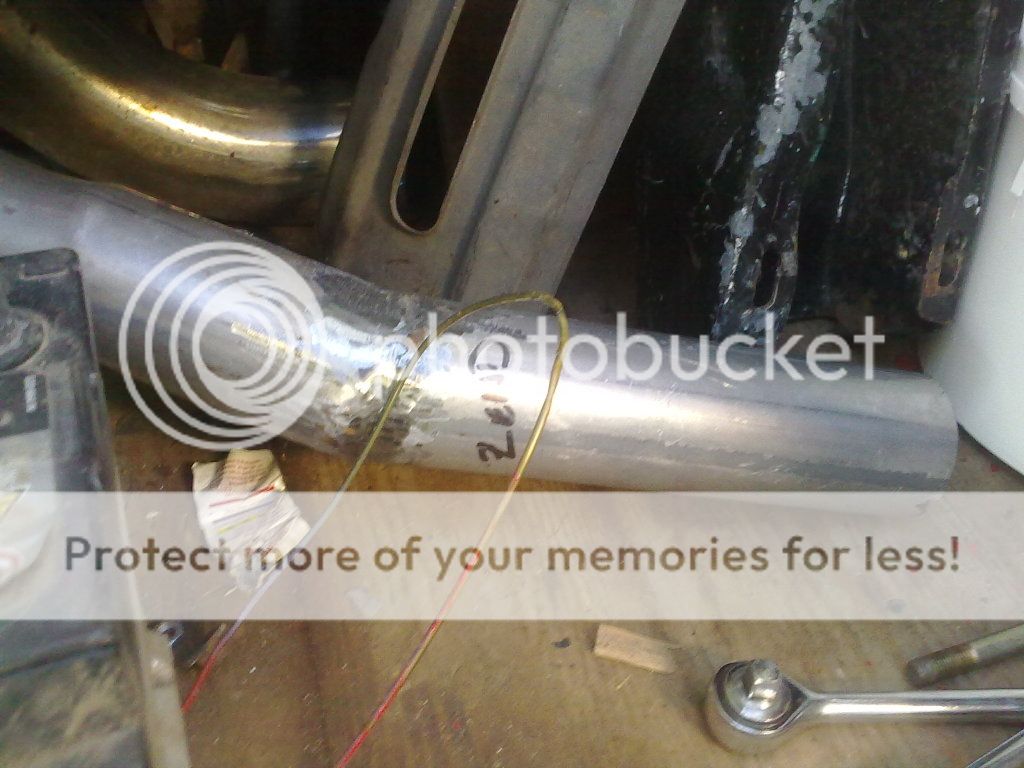
So to the exhaust pipe bends, one 2.25" (57mm) 90 degree bend and two
2 3/8" (60mm) 90 degree bend pipes.

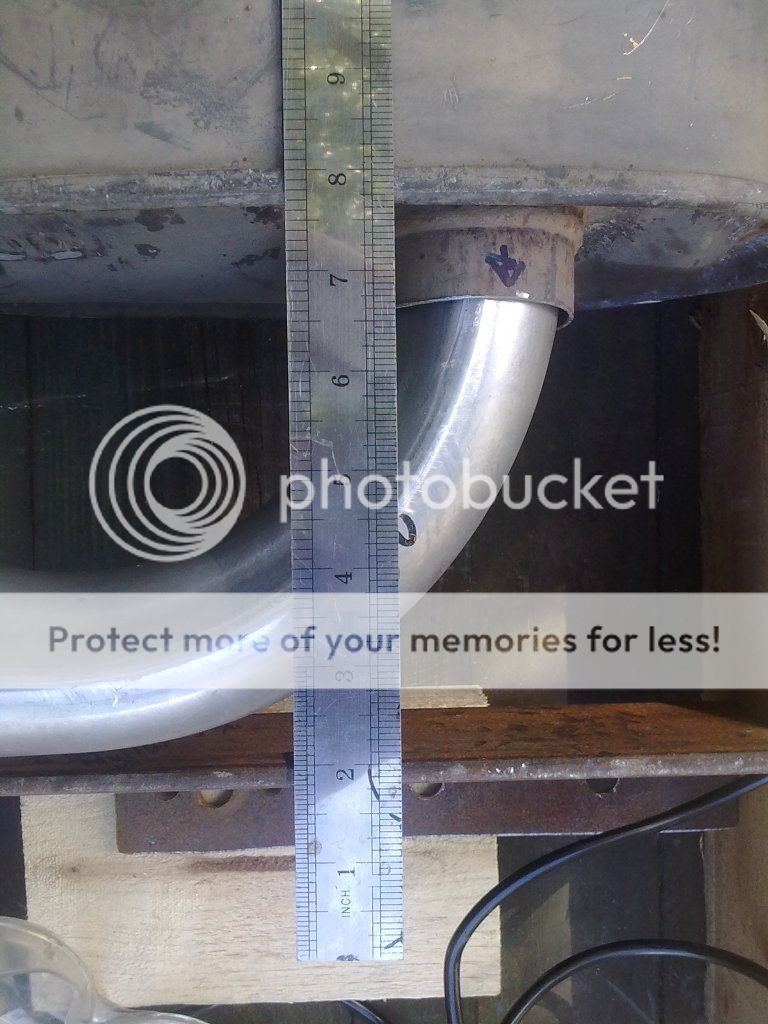
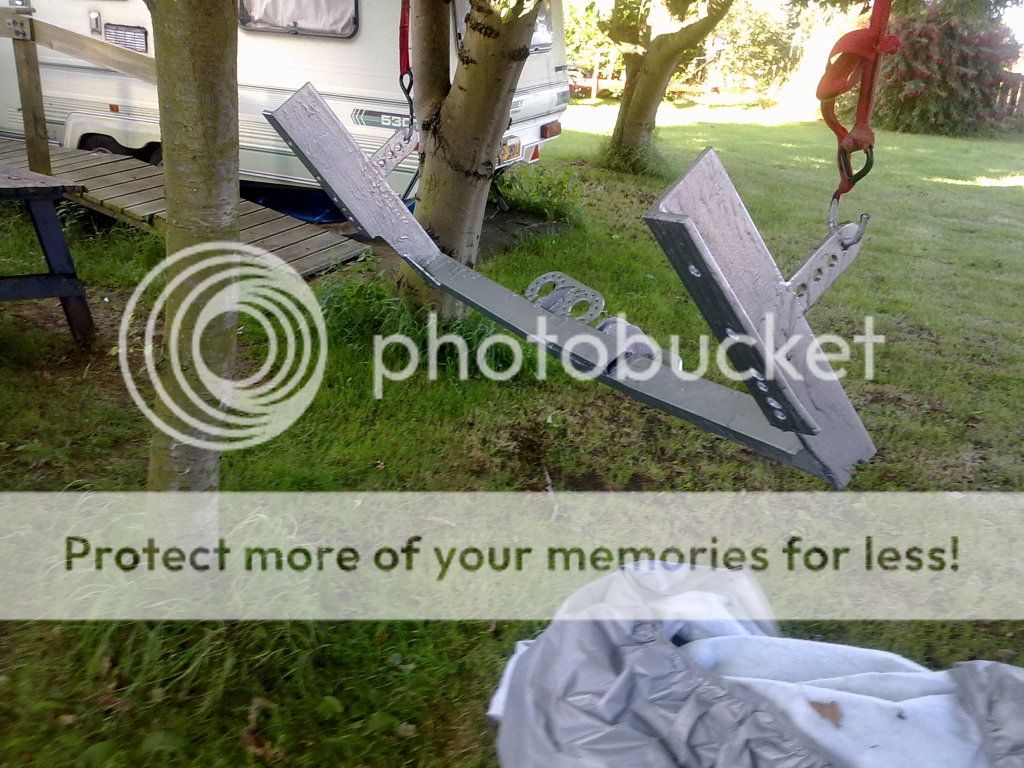
A little trimming and a mock up of the under side of the car using the tow
bar bracket which will be the back box hanger.
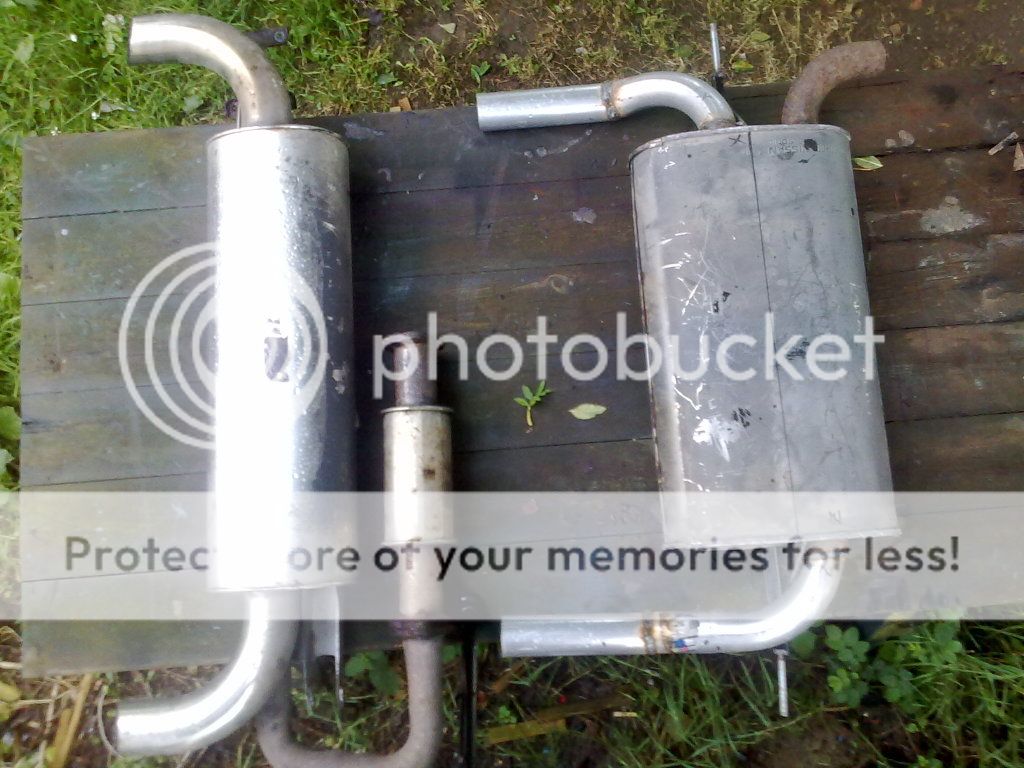
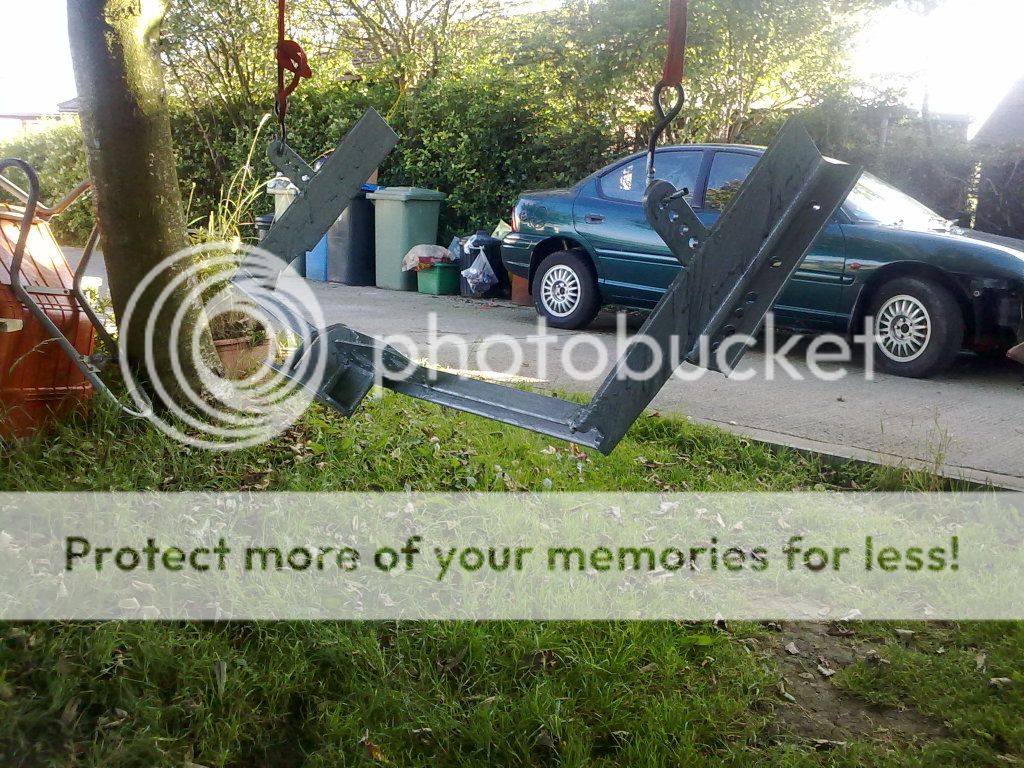
And a view of the whole thing before I realised I had screwed up, can you
tell where I went wrong?
Here is a hint, if you were laying on the floor looking up at the under side of
the car you should get the same view looking down on the bench!
One more hint with this picture!
Yes thats right I have the back box upside down and the wrong way round
(which ever way it is!).
After correcting it's position on the bench, I set about figuring out how to
do the hanger brackets. There will be a bolt added onto the ends so they
stick out over the tow bar bracket so that the exhaust rubber hanger can
be fitted easily from the outside. With them being bolts, a couple of
washers and locknuts to make doubly sure that the rubber hangers don't
come off!
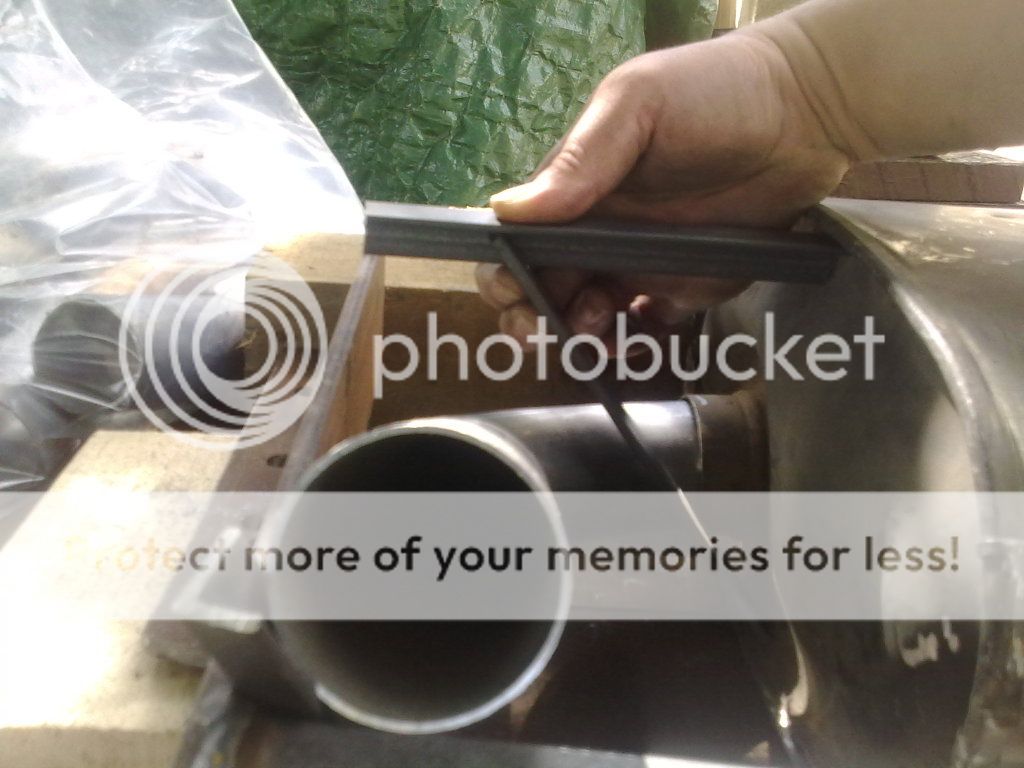
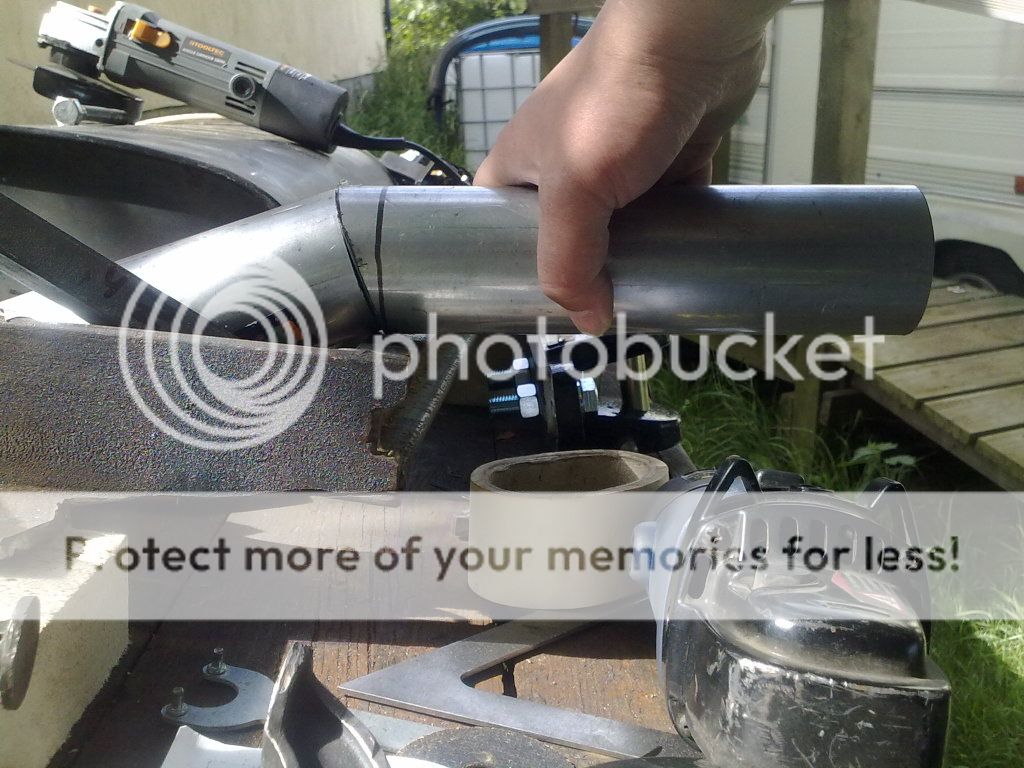
One thing you may have realised when looking at the above photos, is
something I found out when I went to put the pipes with the back box.
As the pipe is being bent the bit that is curved gets stretched and thinner
than the ends of the pipe which remains the original pipe size.
So instead of the pipe meeting the openings in the back box, the pipe
slides into the back box. This has one benefit on the outlet pipes, as the
bend isn't as tight as I would have wanted, by the pipe sliding in, it will give
the clearance needed between the tow bar bracket.
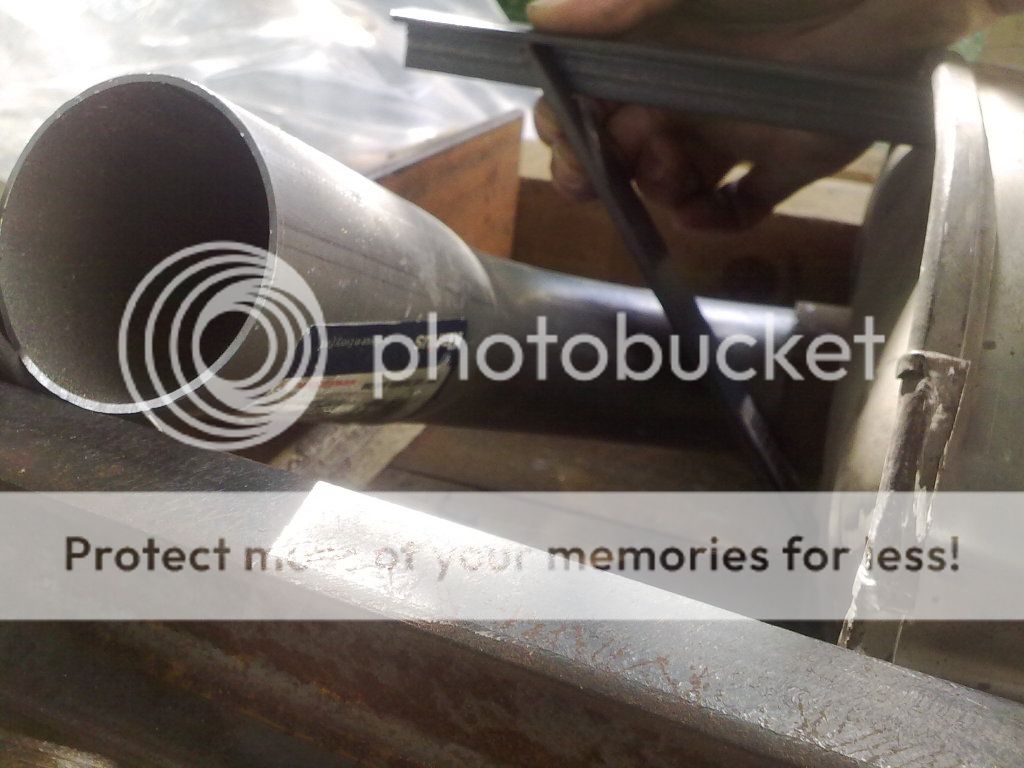
As the outlet pipes are bigger than the inlet, it will not restrict the flow of
exhaust gasses. I will try to reuse the old pipe bits for the inlet pipe.
I then trimmed the pipe bends so they were the same length before I made
the end of the tall pipes. Making sure there is plenty of pipe sticking out for
the moment, as it is easer to trim it down later than try to add it!
Virtually all bits done apart from that inlet pipe bit, and welding might be done
on Sunday by dad, weather permitting.
company when her mother died. And both of them were the same age.
Cassey has not been interested in her treats and has really been moping
around as she knows where he is buried!
Mother will start looking around for another dog to keep her company next
week, which will be the worst of the relative house will be sorted out.
As for me I had to do something to stop me dwelling on the old boy all day.
So to the exhaust pipe bends, one 2.25" (57mm) 90 degree bend and two
2 3/8" (60mm) 90 degree bend pipes.
A little trimming and a mock up of the under side of the car using the tow
bar bracket which will be the back box hanger.
And a view of the whole thing before I realised I had screwed up, can you
tell where I went wrong?
Here is a hint, if you were laying on the floor looking up at the under side of
the car you should get the same view looking down on the bench!
One more hint with this picture!
Yes thats right I have the back box upside down and the wrong way round
(which ever way it is!).
After correcting it's position on the bench, I set about figuring out how to
do the hanger brackets. There will be a bolt added onto the ends so they
stick out over the tow bar bracket so that the exhaust rubber hanger can
be fitted easily from the outside. With them being bolts, a couple of
washers and locknuts to make doubly sure that the rubber hangers don't
come off!
One thing you may have realised when looking at the above photos, is
something I found out when I went to put the pipes with the back box.
As the pipe is being bent the bit that is curved gets stretched and thinner
than the ends of the pipe which remains the original pipe size.
So instead of the pipe meeting the openings in the back box, the pipe
slides into the back box. This has one benefit on the outlet pipes, as the
bend isn't as tight as I would have wanted, by the pipe sliding in, it will give
the clearance needed between the tow bar bracket.
As the outlet pipes are bigger than the inlet, it will not restrict the flow of
exhaust gasses. I will try to reuse the old pipe bits for the inlet pipe.
I then trimmed the pipe bends so they were the same length before I made
the end of the tall pipes. Making sure there is plenty of pipe sticking out for
the moment, as it is easer to trim it down later than try to add it!
Virtually all bits done apart from that inlet pipe bit, and welding might be done
on Sunday by dad, weather permitting.
I'm Diabetic,& disabled BUT!! NOT DEAD YET!!
Re: V6 into a RHD Chrysler Neon mk1
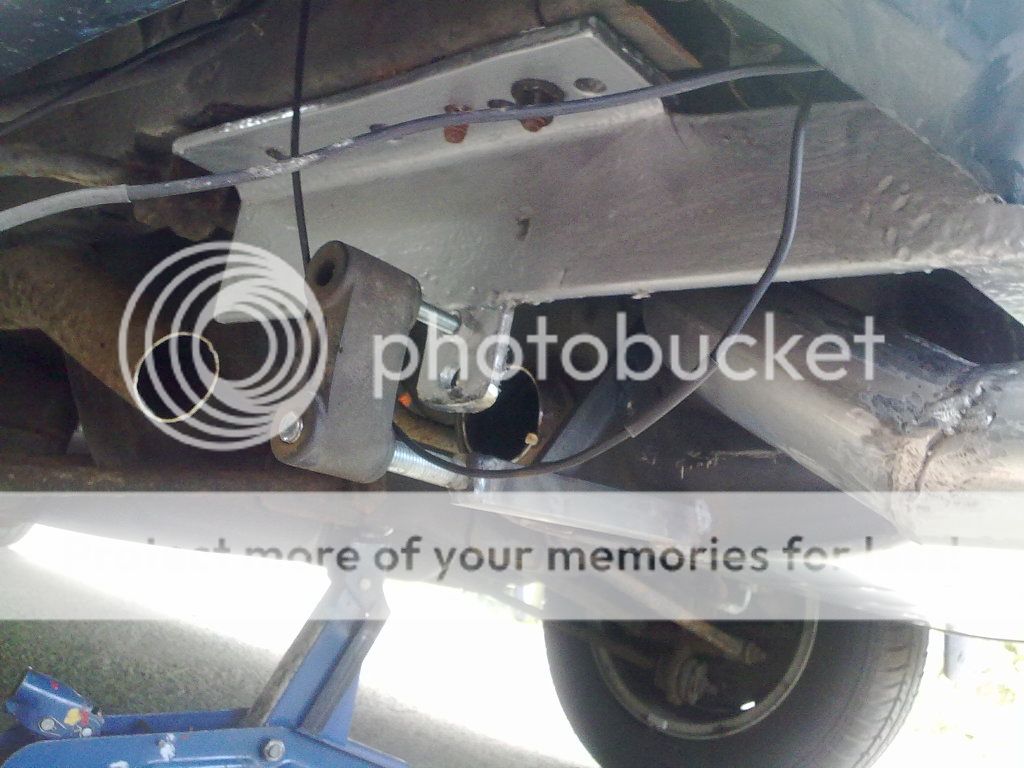
Dad managed to do most of the welding I needed doing, the only bit that will
need to be sorted is that the inlet pipe only has 3 dots of tack welding as
I will need to check that on the car before it is properly welded before
final fitting.
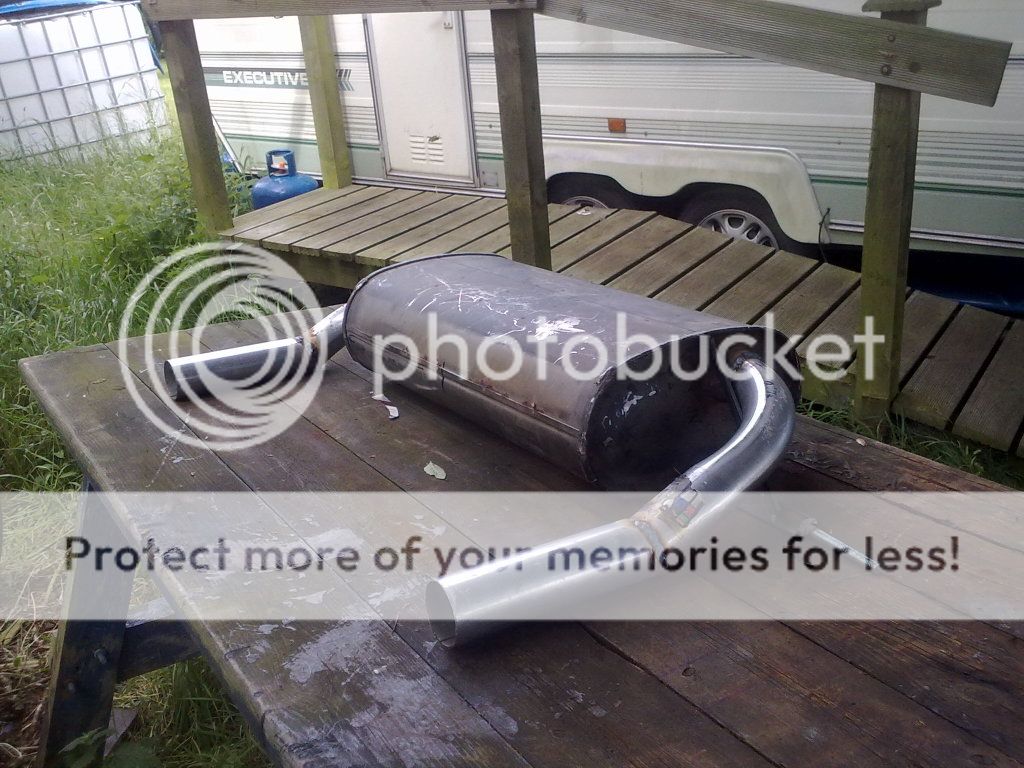
All the bits for the tow bar bracket were put together, the tabs with bolt
holes for hanging the back box were also added. as the metal is thick and
still very hot I left the tow bar bracket and exhaust back box outside too
cool down while I ran a few errands.
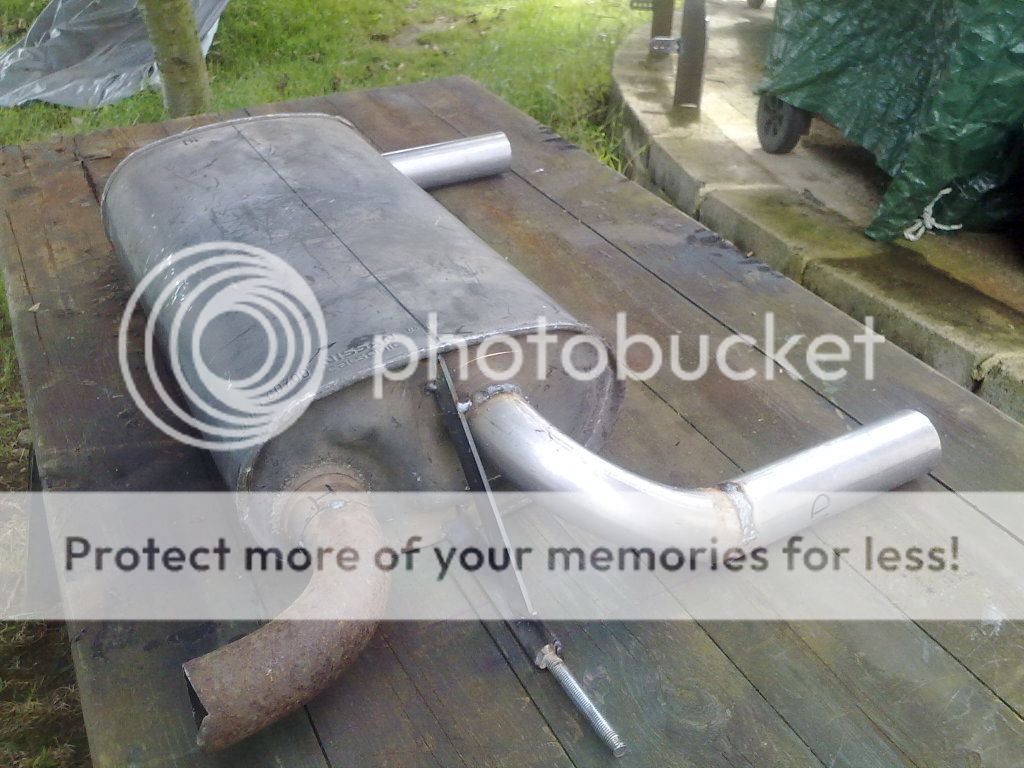
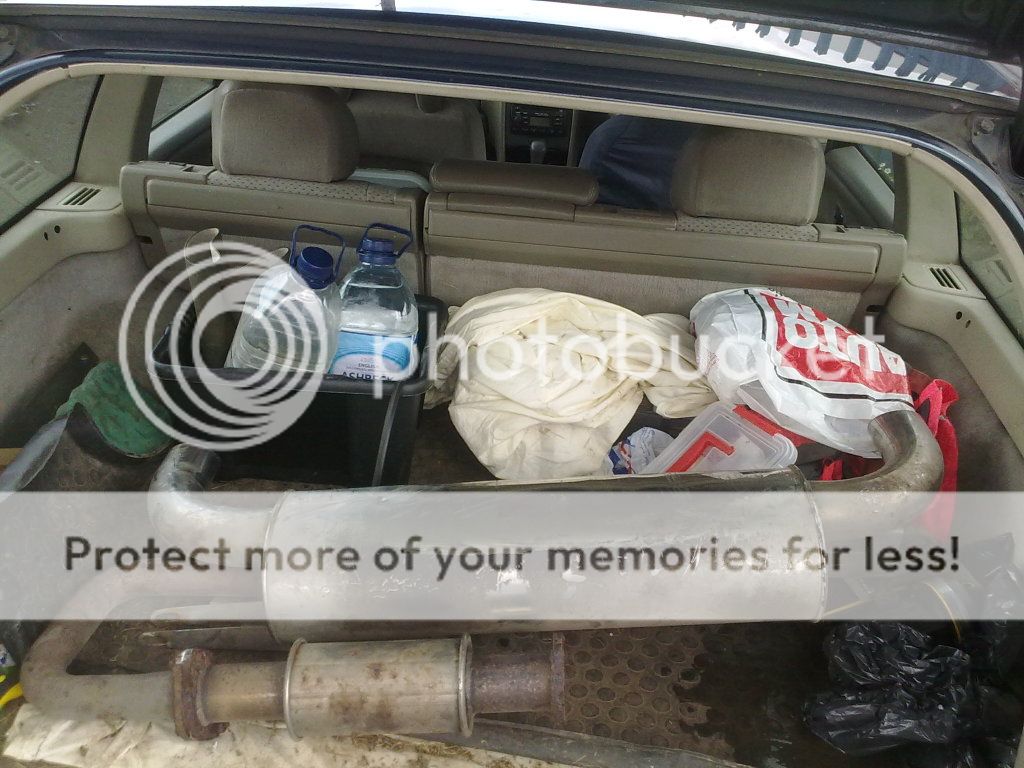
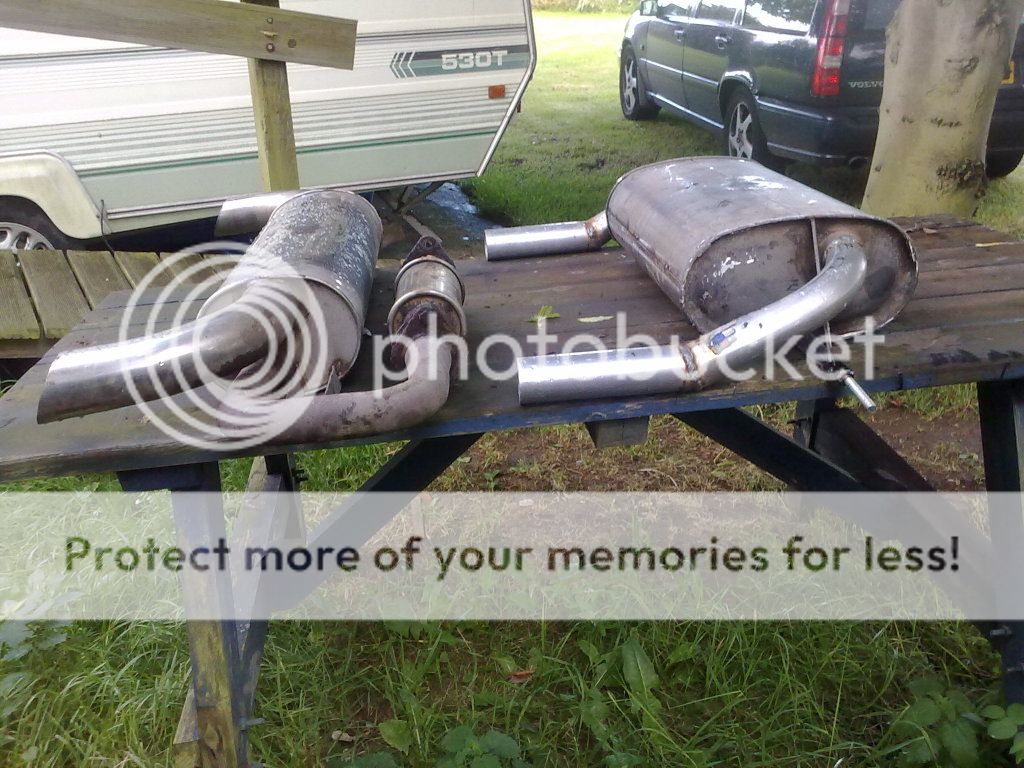
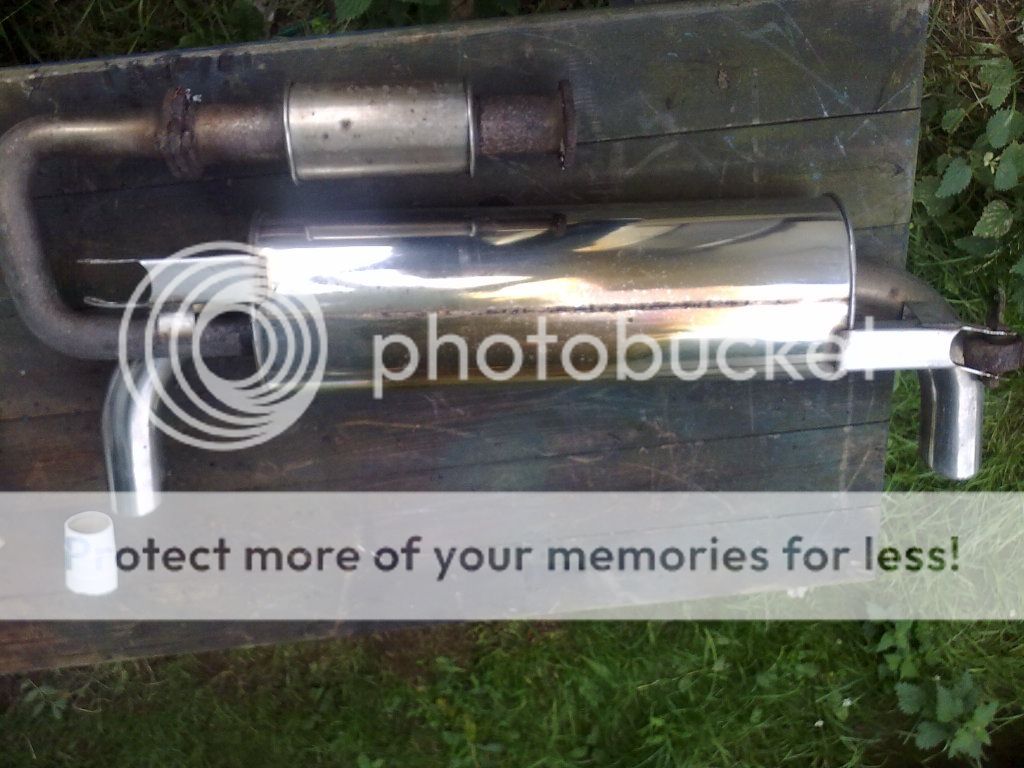
I then went to the scrapyard and picked up this exhaust system for a Toyota
MR2 MK2 for a friend. He said it was made by Mongoose or mongoose type?
I plead ignorance on this as it came off an MR2 mk2 and will go onto his
when he gets it!
By the time had picked it up then got to do some necessary food shopping,
the heavens had opened. So I have just paced both mine and his back boxes
on the bench ready to be cleaned up, and as a side by side comparison in
case someone was thinking of using one of these on their car!
Please remember mine is the right way up and the MR2 one is upside down!
If the weather permits I well tidy up the welds on the bracket and possibly
apply a lick of paint.
need to be sorted is that the inlet pipe only has 3 dots of tack welding as
I will need to check that on the car before it is properly welded before
final fitting.
All the bits for the tow bar bracket were put together, the tabs with bolt
holes for hanging the back box were also added. as the metal is thick and
still very hot I left the tow bar bracket and exhaust back box outside too
cool down while I ran a few errands.
I then went to the scrapyard and picked up this exhaust system for a Toyota
MR2 MK2 for a friend. He said it was made by Mongoose or mongoose type?
I plead ignorance on this as it came off an MR2 mk2 and will go onto his
when he gets it!
By the time had picked it up then got to do some necessary food shopping,
the heavens had opened. So I have just paced both mine and his back boxes
on the bench ready to be cleaned up, and as a side by side comparison in
case someone was thinking of using one of these on their car!
Please remember mine is the right way up and the MR2 one is upside down!
If the weather permits I well tidy up the welds on the bracket and possibly
apply a lick of paint.
I'm Diabetic,& disabled BUT!! NOT DEAD YET!!
Re: V6 into a RHD Chrysler Neon mk1
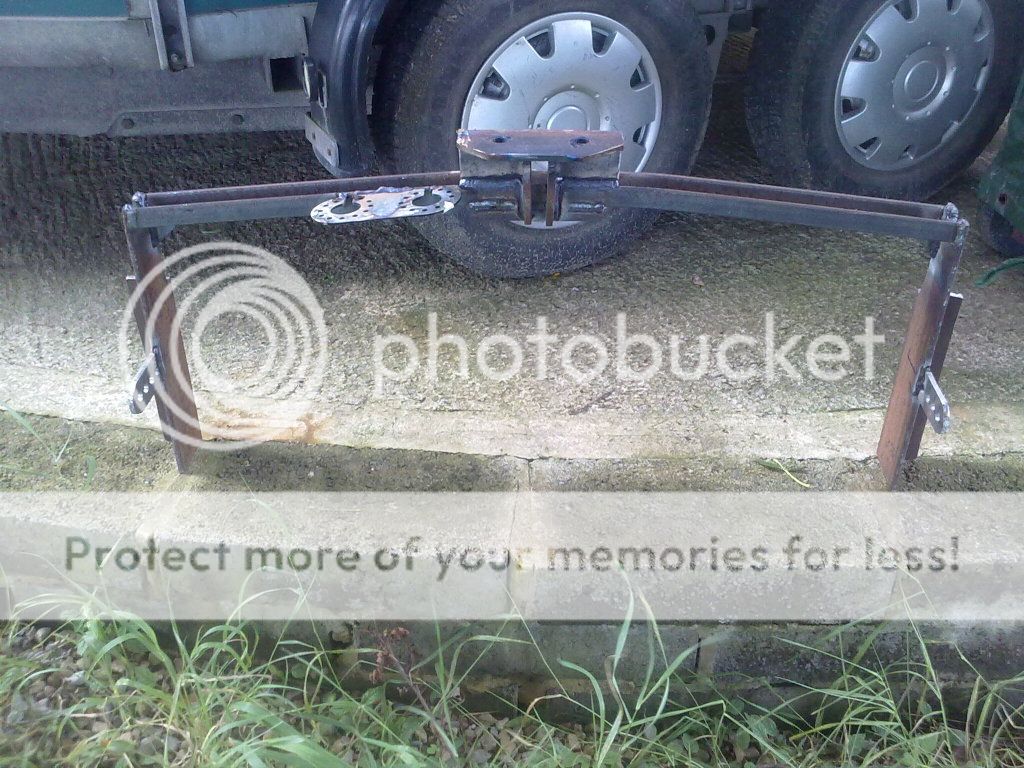
Well the grinder came out to play today!
I smoothed off the edges of the welds on the exhaust outlet pipes on
the back box. I will trim down the ends once I done a fitting for the
inlet pipe.
I then ground the sharp bits on the tow bar bracket, before switching to
the wire brush attachment to clean it up. A wipe down with white spirit,
then a a thin coat of silver hammerite paint. I will probably give it 3 - 4
coats of paint before fitting it to the car.
I'm Diabetic,& disabled BUT!! NOT DEAD YET!!
Re: V6 into a RHD Chrysler Neon mk1
After I sanded then wiped down the tow bar bracket with white spirits.
It got another quote of silver hammerite paint.
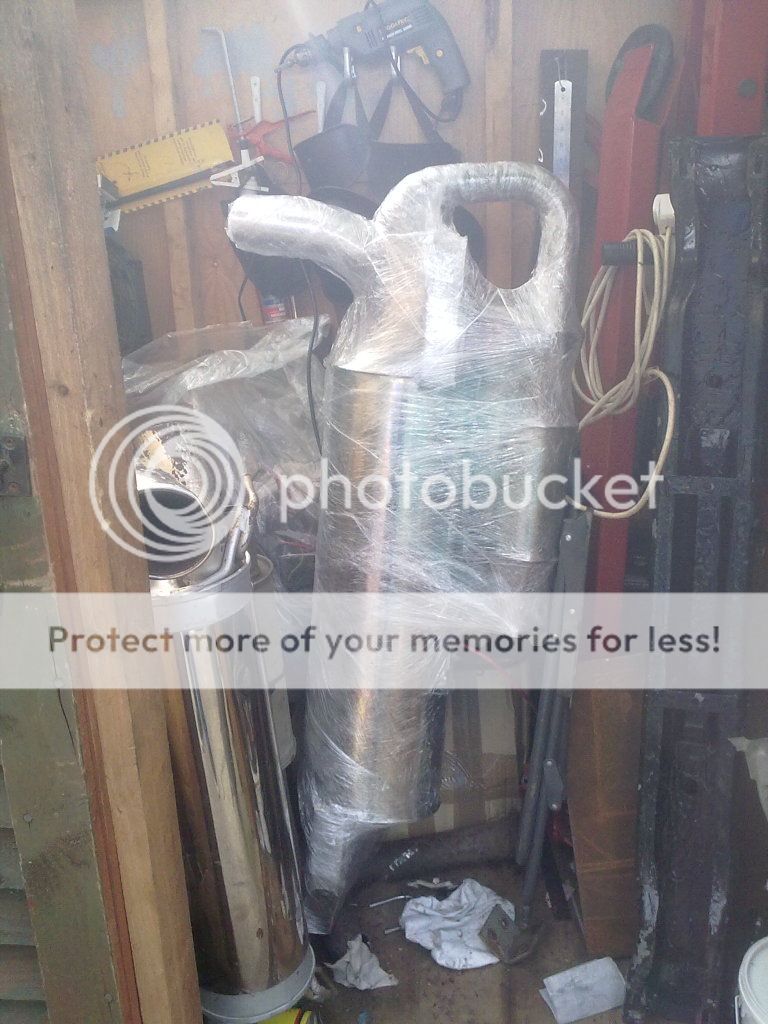
As the white spirits were out I thought i'd better get the MR2 exhaust
out and clean it up before I take it up to my friends mother.
Then out with the cling film/food wrap so that it doesn't get any paint
on while it is in my custody. In other words it's gift wrapped and ready
to go!!!
I then scrubbed the main areas of the nissan 350z back box with a pan
scower soaked with white spirits be for washing it down with hot soapy
water.
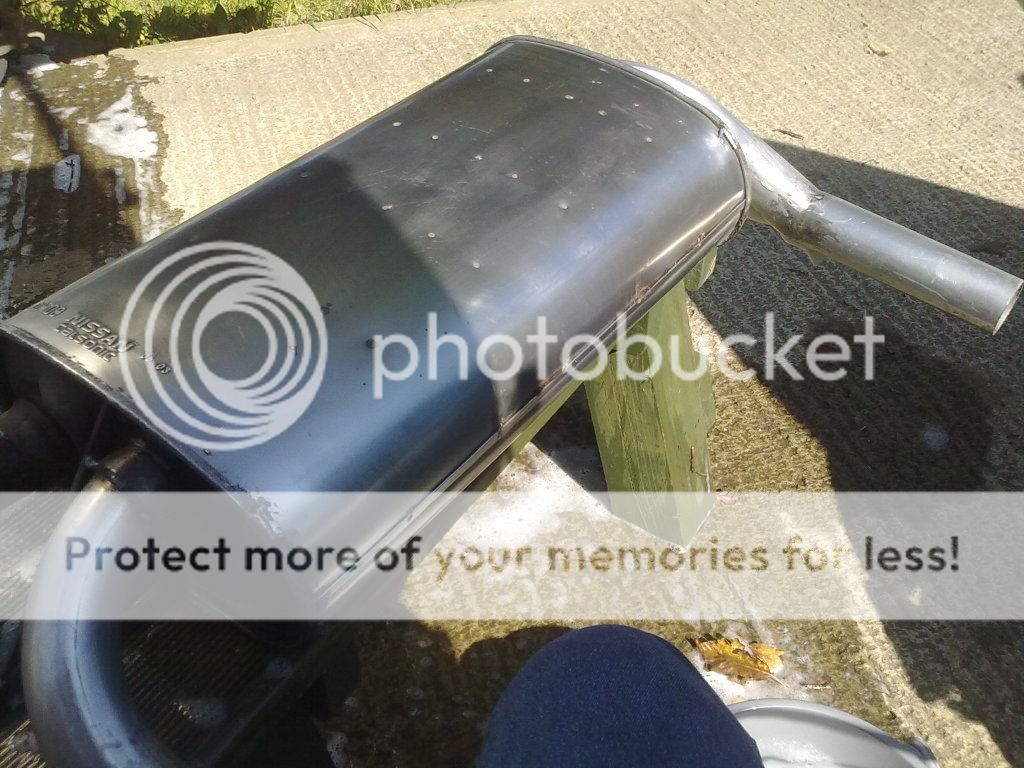
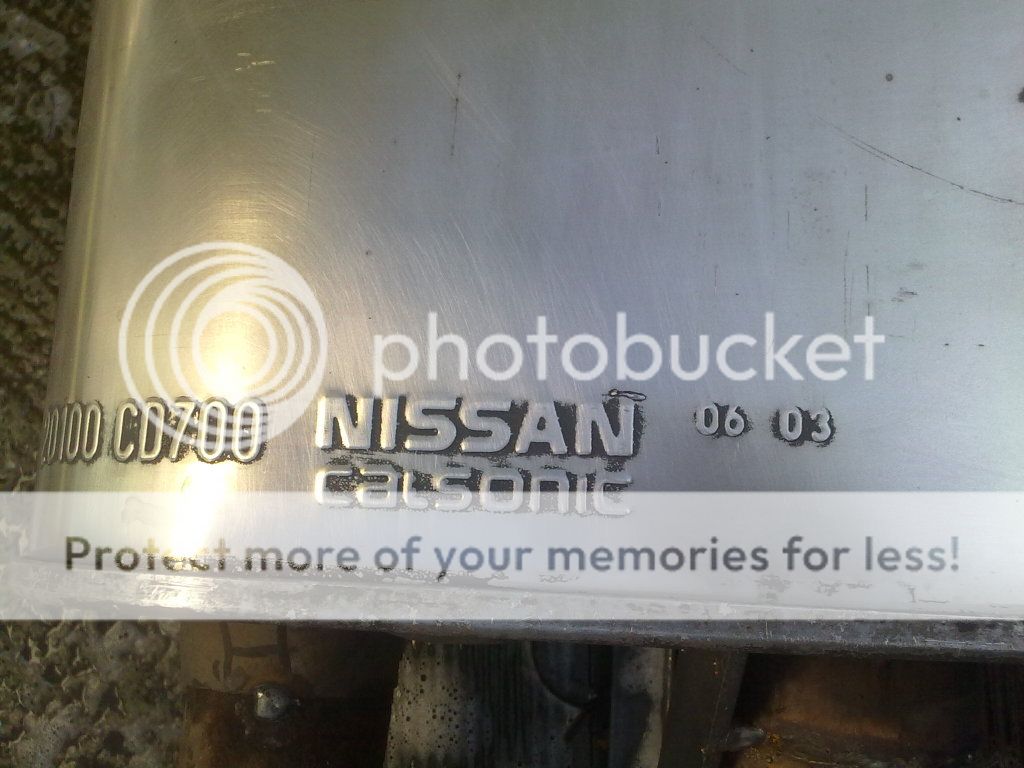
If you notice this back box was eithe made in June 03 or March 06.
Considering that, does this have the main part stainless steel? or is it
just looking good for it's age?
It got another quote of silver hammerite paint.
As the white spirits were out I thought i'd better get the MR2 exhaust
out and clean it up before I take it up to my friends mother.
Then out with the cling film/food wrap so that it doesn't get any paint
on while it is in my custody. In other words it's gift wrapped and ready
to go!!!
I then scrubbed the main areas of the nissan 350z back box with a pan
scower soaked with white spirits be for washing it down with hot soapy
water.
If you notice this back box was eithe made in June 03 or March 06.
Considering that, does this have the main part stainless steel? or is it
just looking good for it's age?
I'm Diabetic,& disabled BUT!! NOT DEAD YET!!
Re: V6 into a RHD Chrysler Neon mk1
Just finished giving the tow bar bracket a 3rd coat of paint with the
dregs of the last of the silver hammerite. There were more bits in the
bottom of the tin than you'd think!
I will need to sand it better to get it flat/smooth those lumps of paint
out before I give it another coat of paint! And I must remember to
buy another tin of when I am out next.
dregs of the last of the silver hammerite. There were more bits in the
bottom of the tin than you'd think!
I will need to sand it better to get it flat/smooth those lumps of paint
out before I give it another coat of paint! And I must remember to
buy another tin of when I am out next.
I'm Diabetic,& disabled BUT!! NOT DEAD YET!!
Re: V6 into a RHD Chrysler Neon mk1
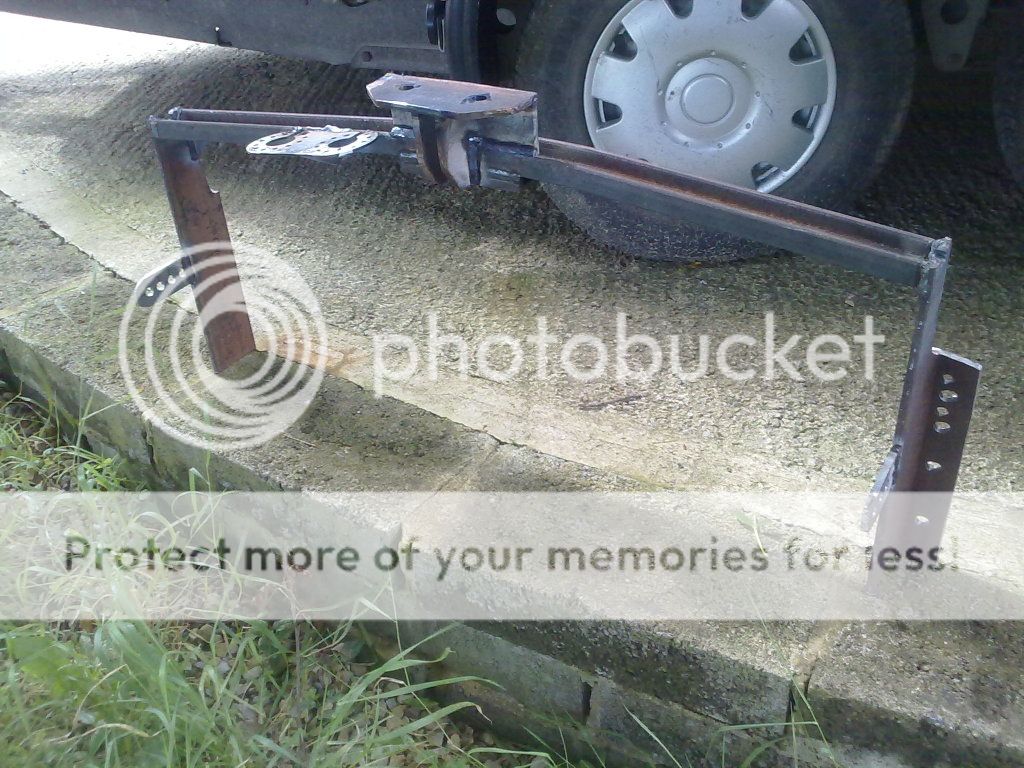
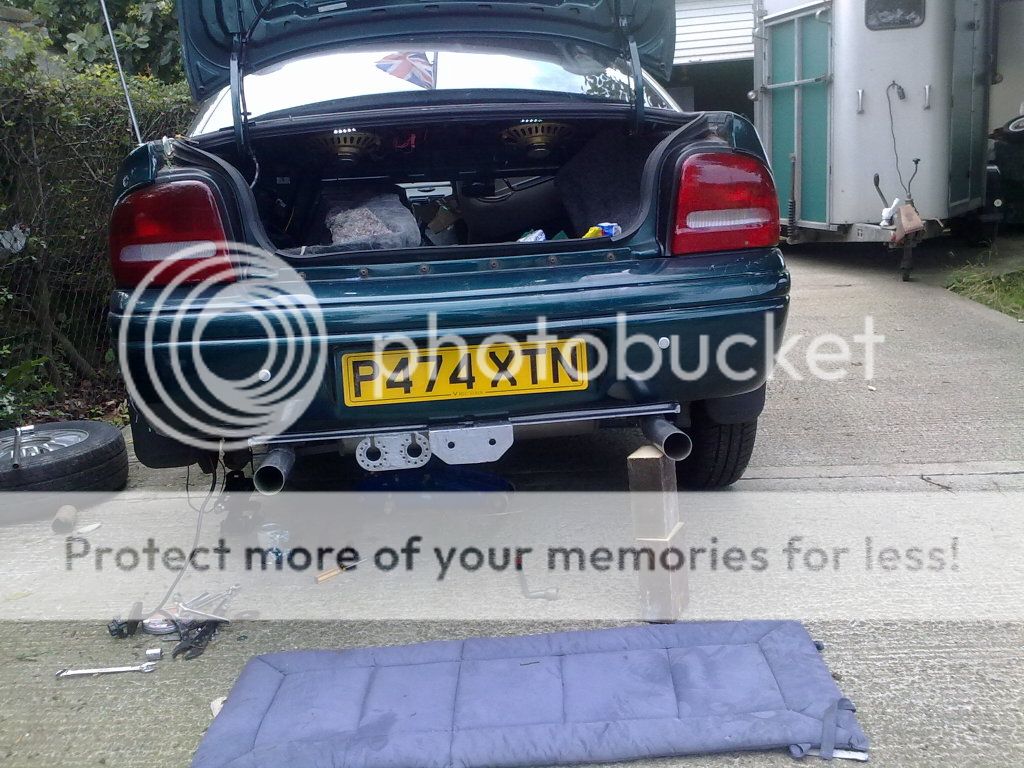
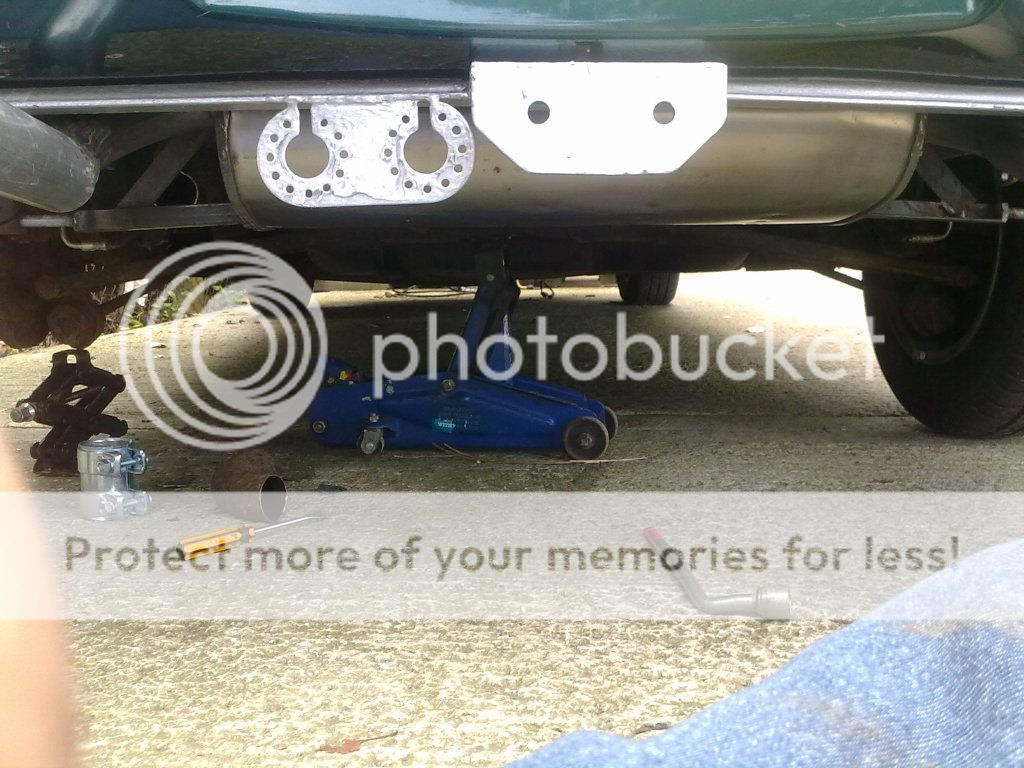
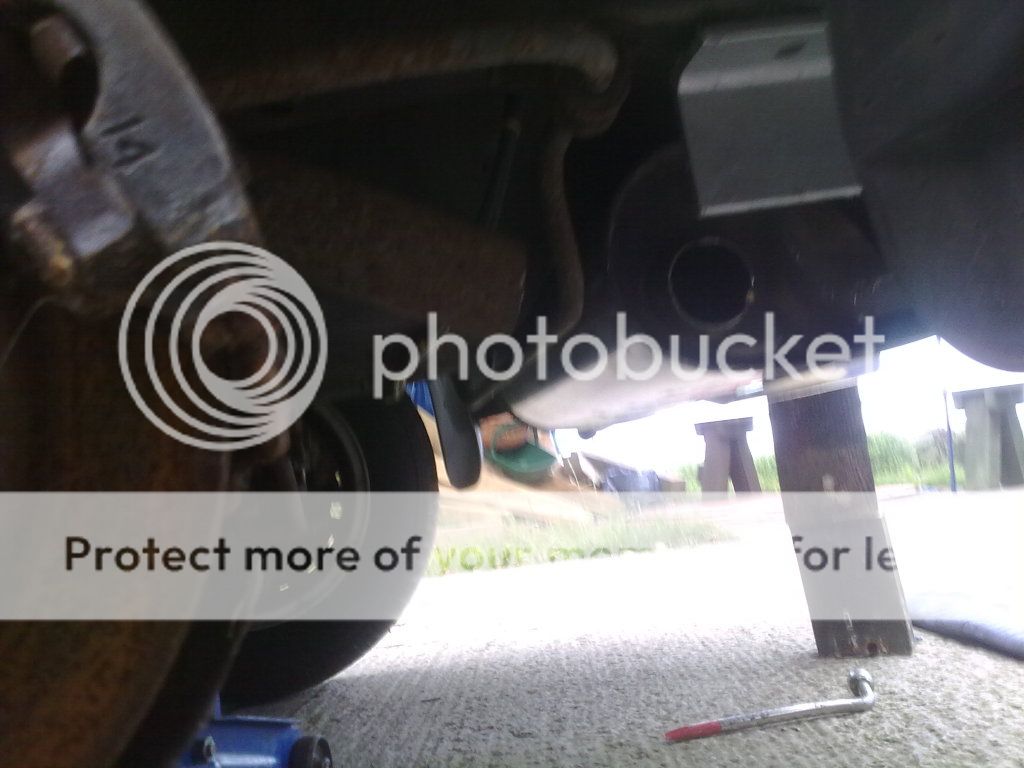
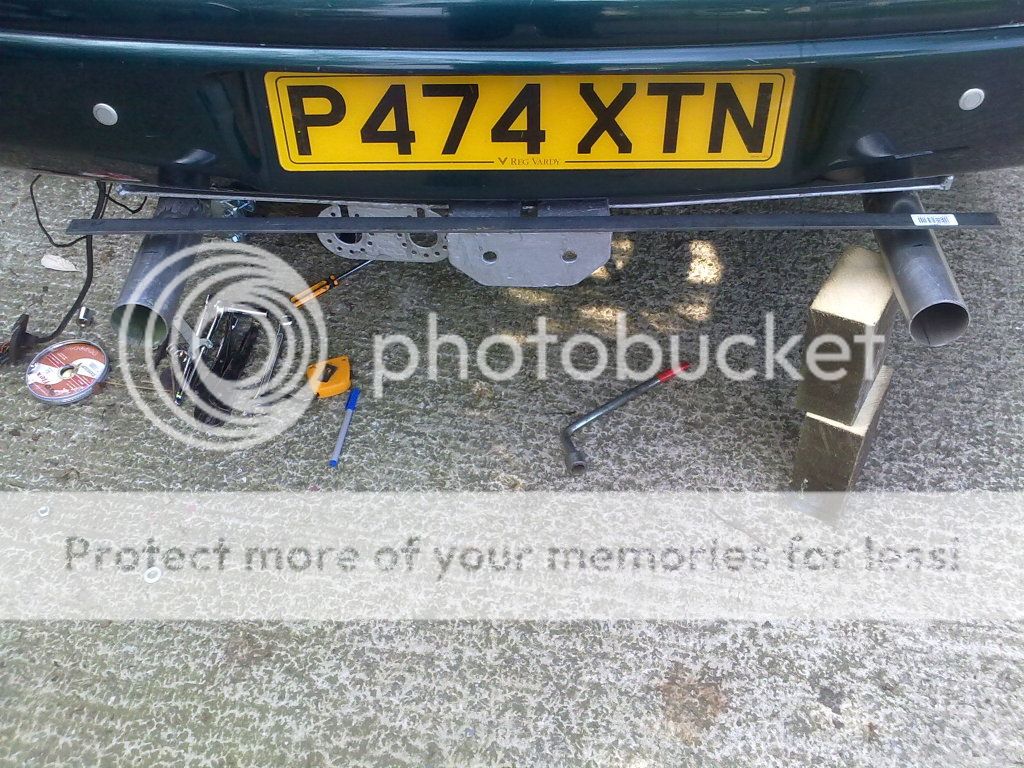
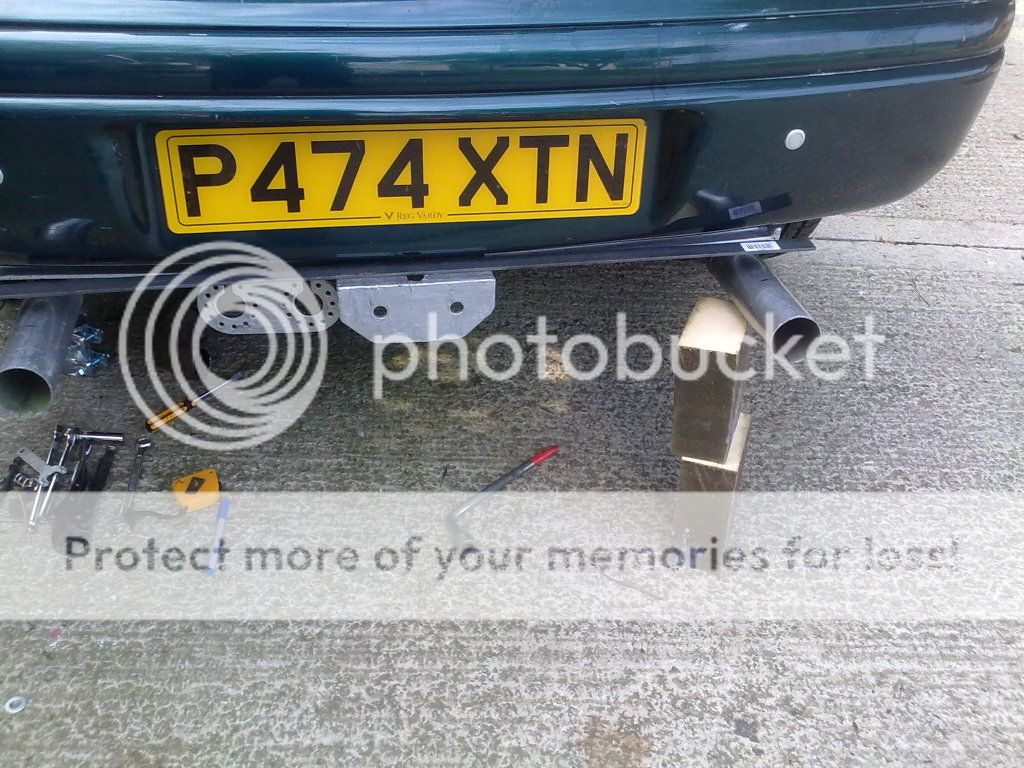
Well time for a fitting!
So on went the towbar bracket and then the back box was dually rolled
under and put into place with the trolley jack.
As you can see the main pipe needs to be trimmed to get that kink out
so a connector can join the box to the main pipe.
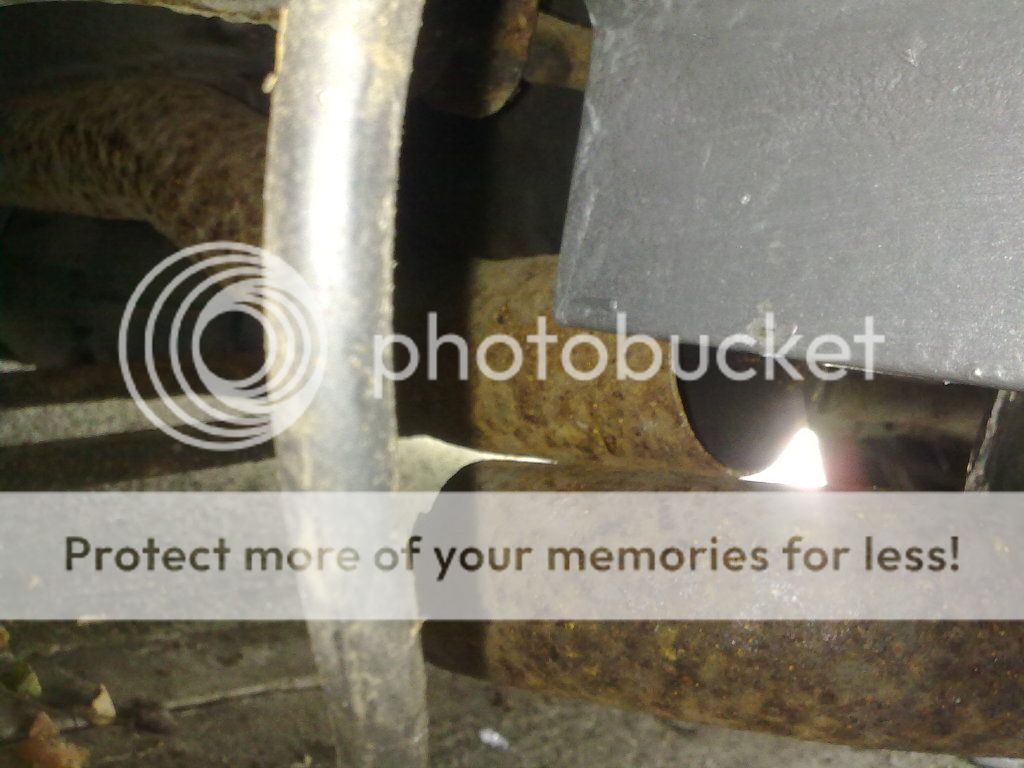
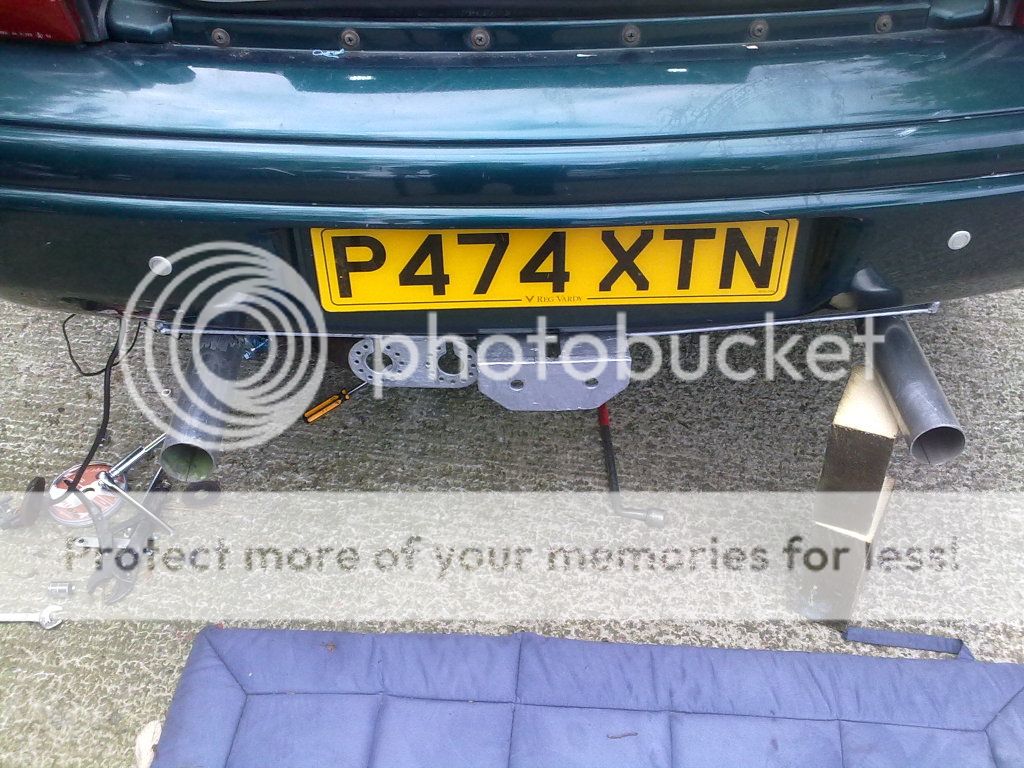
And a look from the back before it all comes back off for it's first triming.
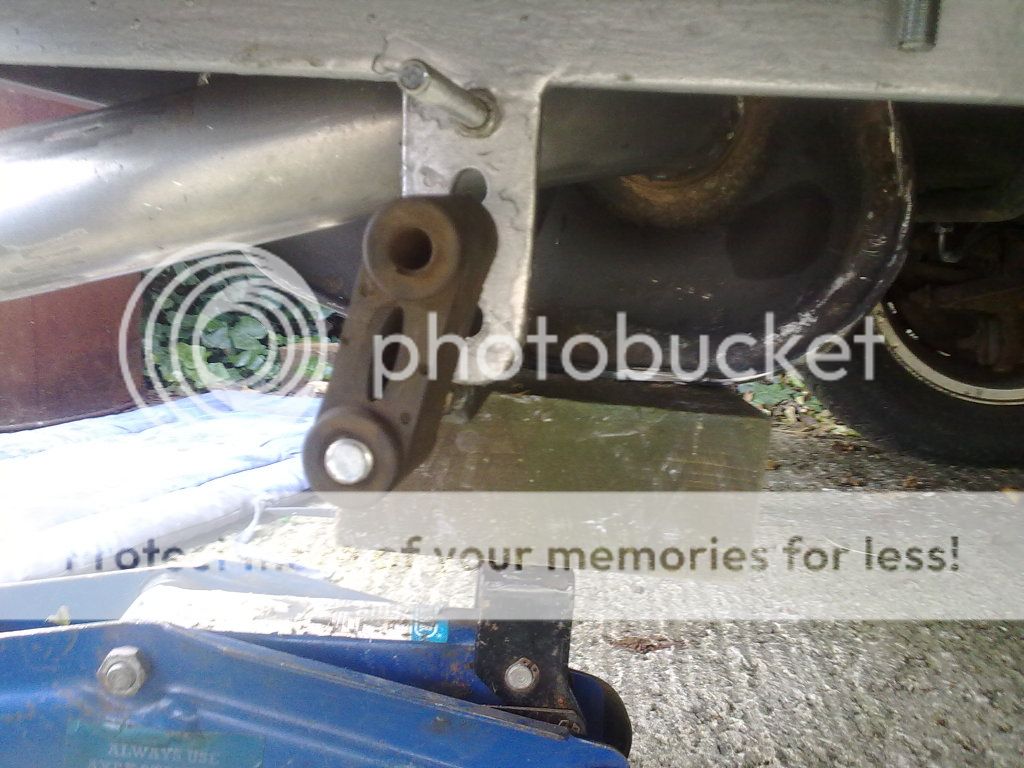
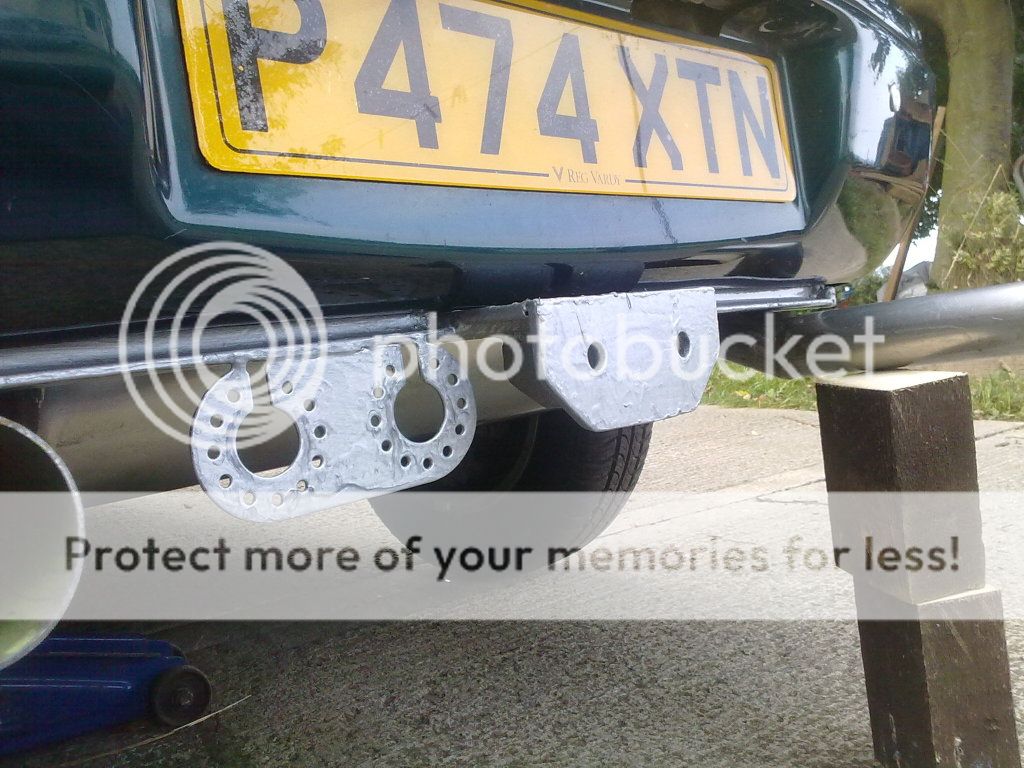
Two too many loops on the exhaust hanger bolt holes on the tow bar
bracket. By using the bolt holes changes the hight of the back box.
I will cut the lowest two off so that it can be gotten to the right
clearance and not hit the rods from the box!
I put the trolley jack under the box section under the spare wheel well,
making sure ir was in the right position so that the car could be moved.
It was easier to swing the back endout on the trolley jack then push
an pull the car forward and backwards till I had the space to tackle it
from the side.
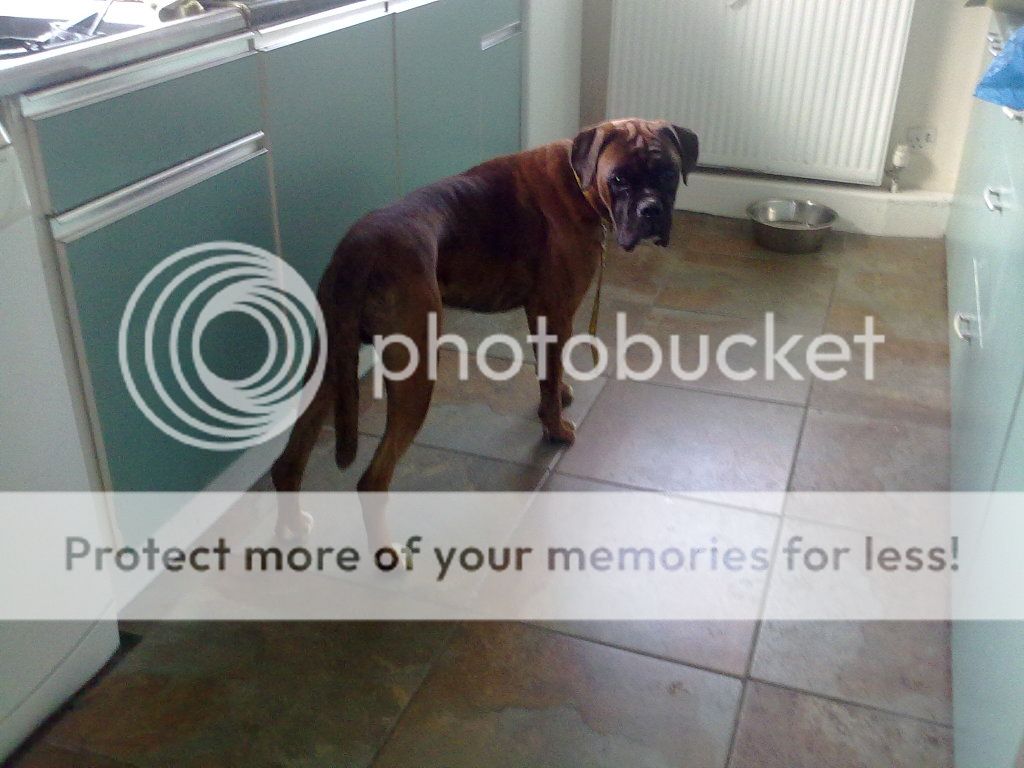
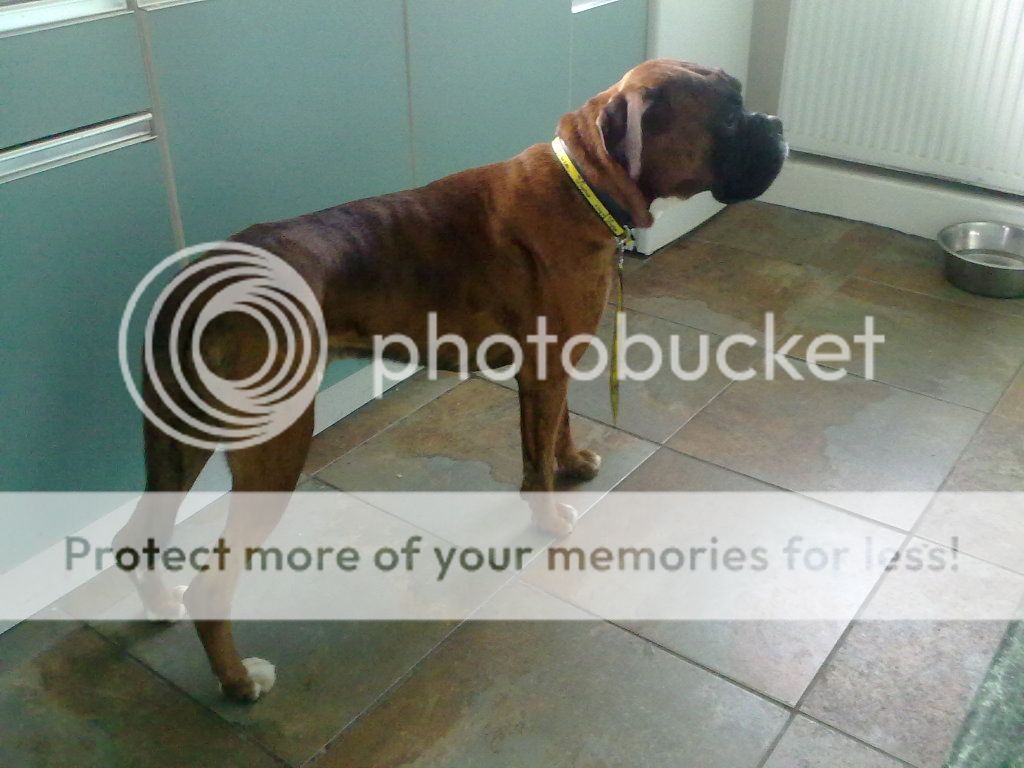
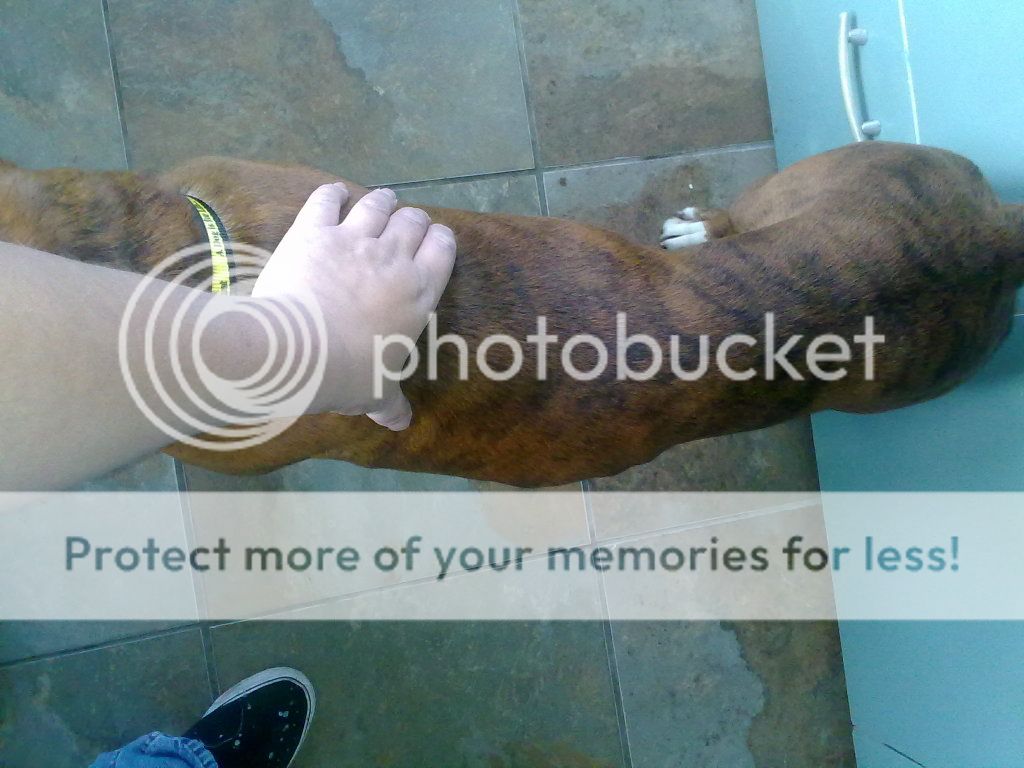
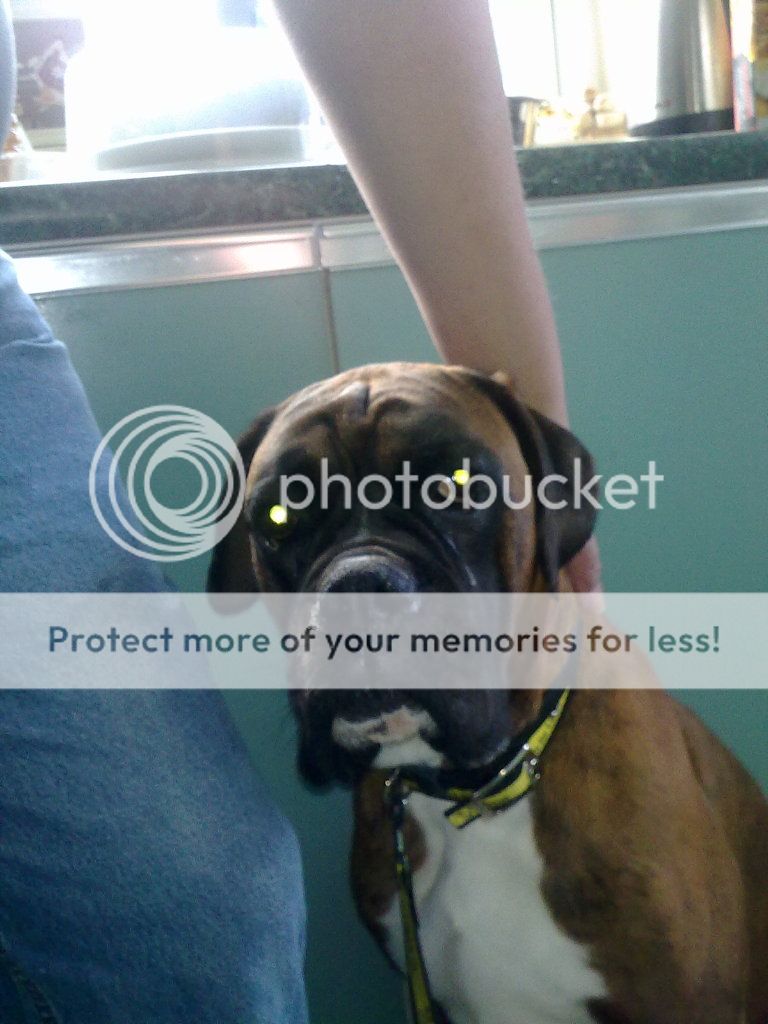
And the newest addition to the family was sticking his nose into
everything, and marking everything! Say hello to rocky.
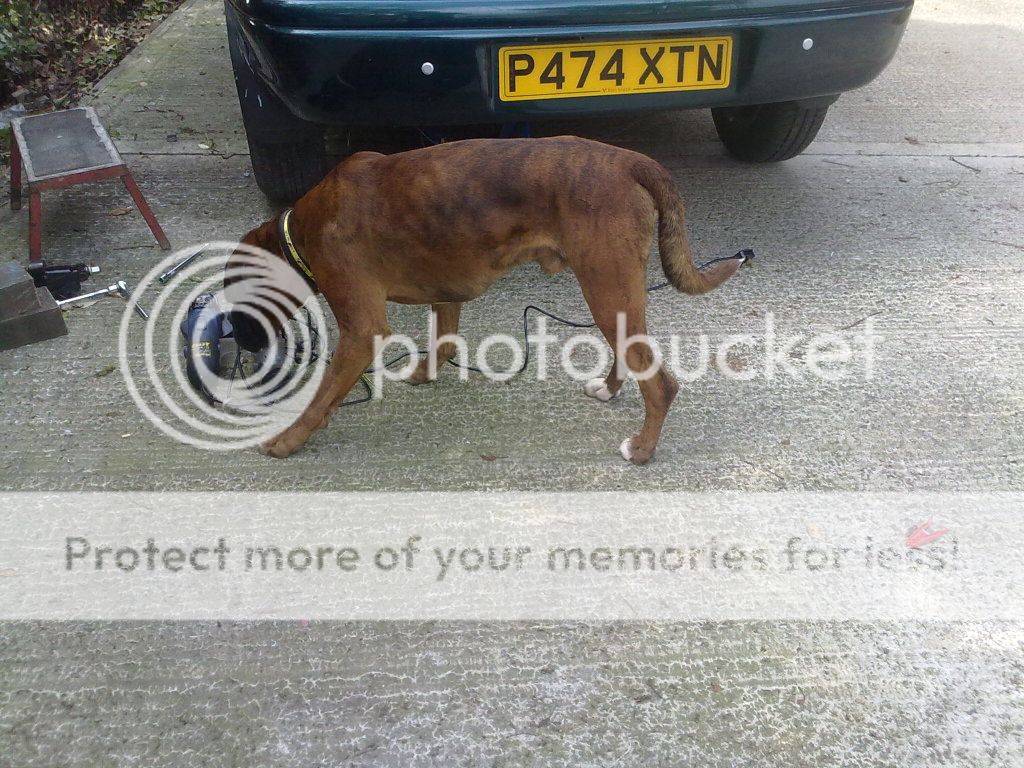
And more photos of the new dog, you can plainly see that Rocky hasn't
been feed up. Rocky is only 4 years old and is a rescue dog from the
Dogs Trust dog sanctuary. (There must be some money in it as all the
staff had the newest of cars and private plates, and expensive buildings)
Okay back to the car!
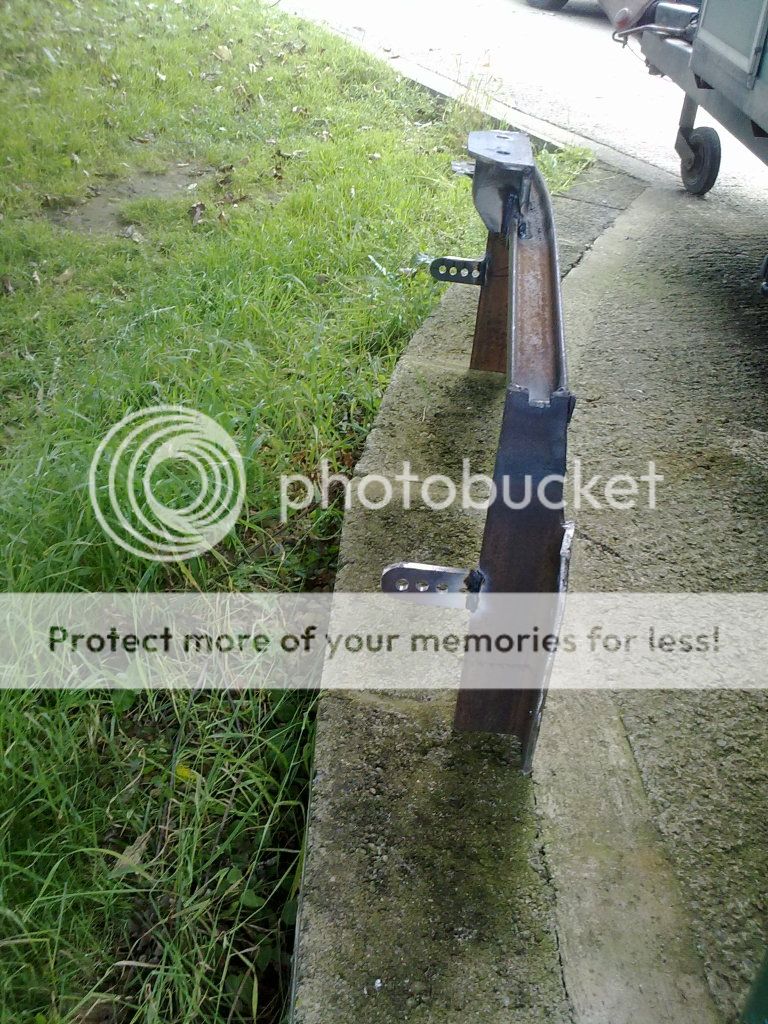
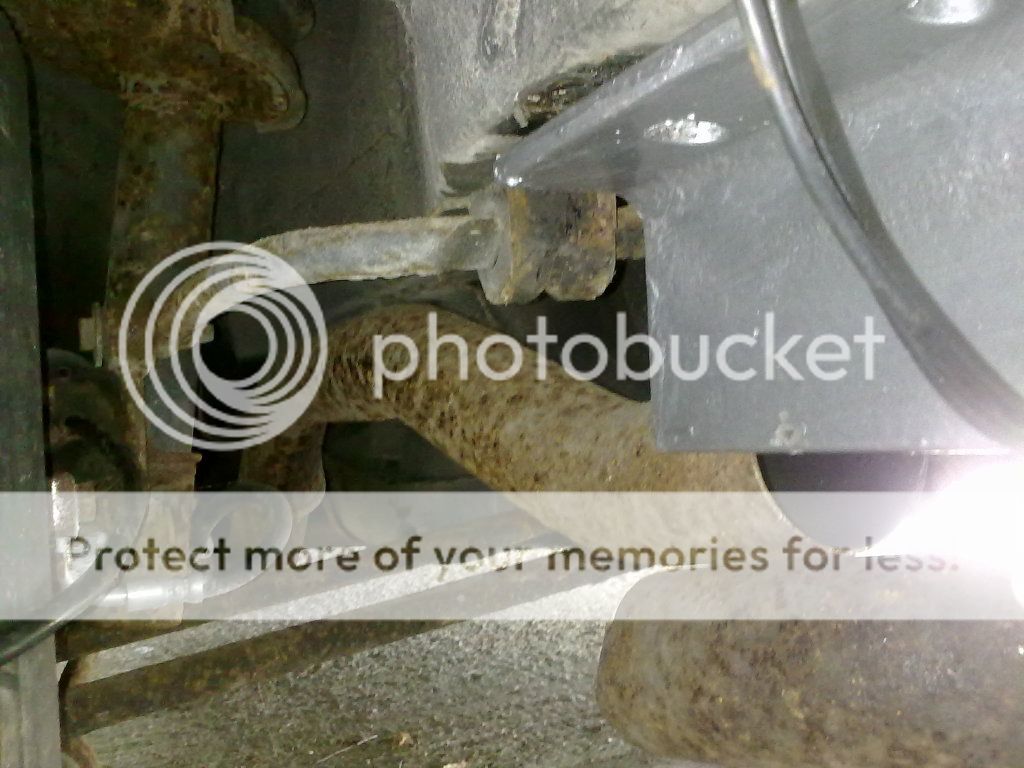
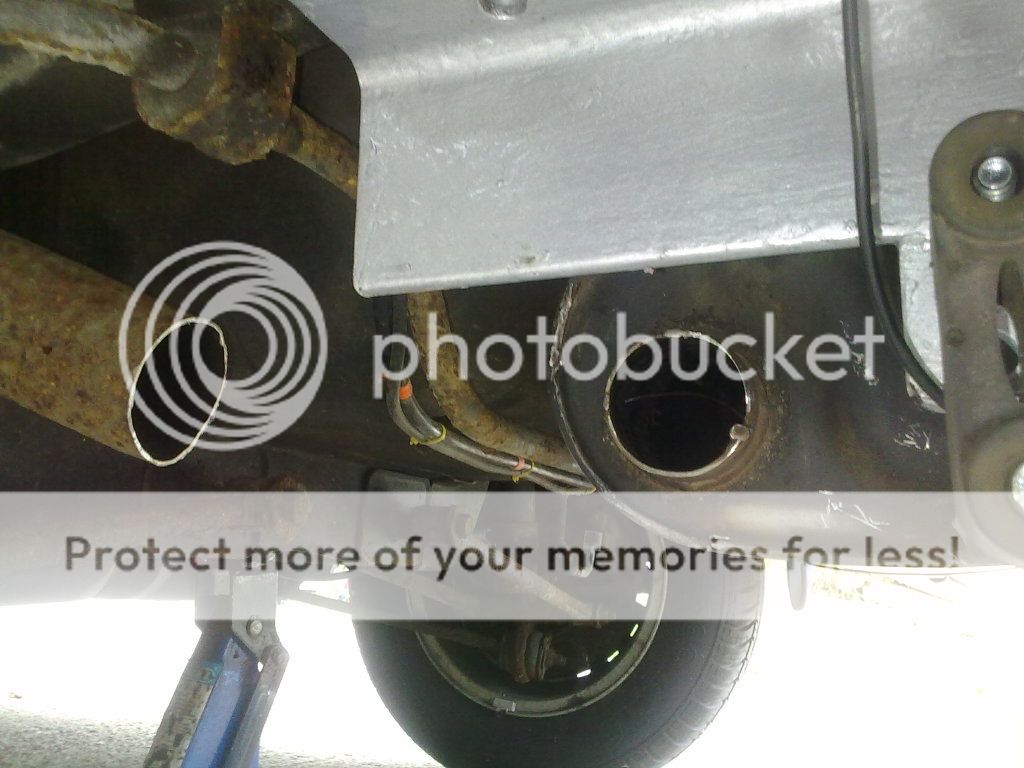
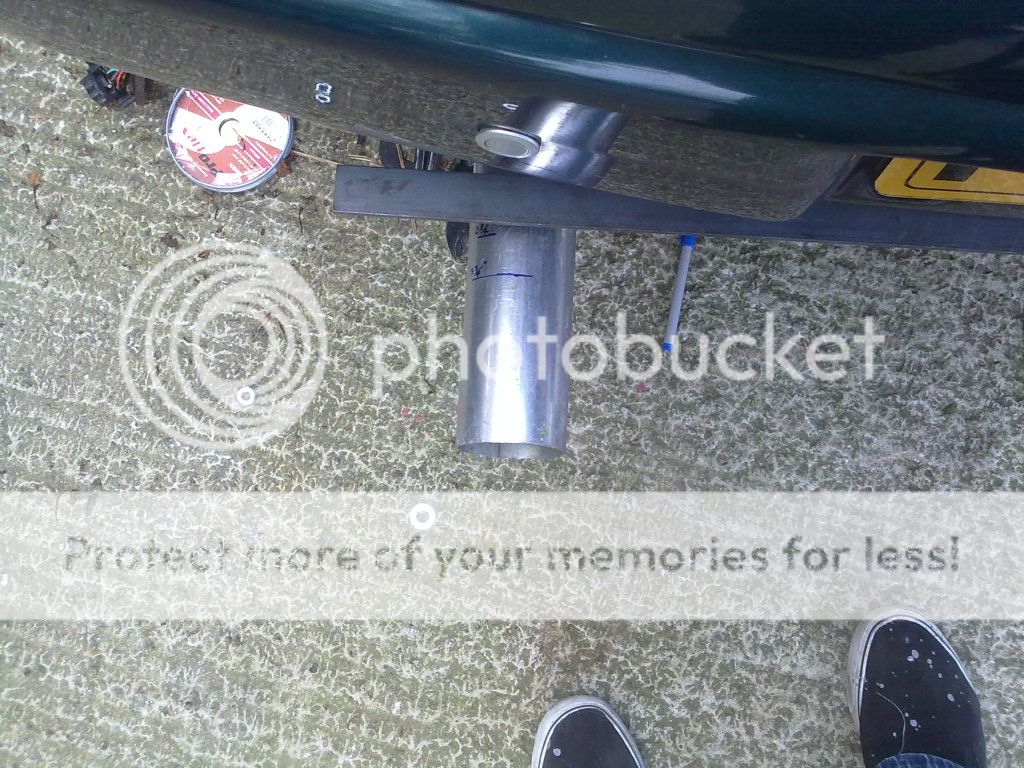
After the trimming of the loops and removing the inlet bend on the back
box as it could do with being closer to the box as it was too near the tow
bar bracket. The bracket was put back on, and the back box hung in for
the second fitting. The two wooden blocks are to stop the box tilting.
The hanger rubbers aren't on fully or properly but it makes it easier to
see how much might need trimming off the length of them.
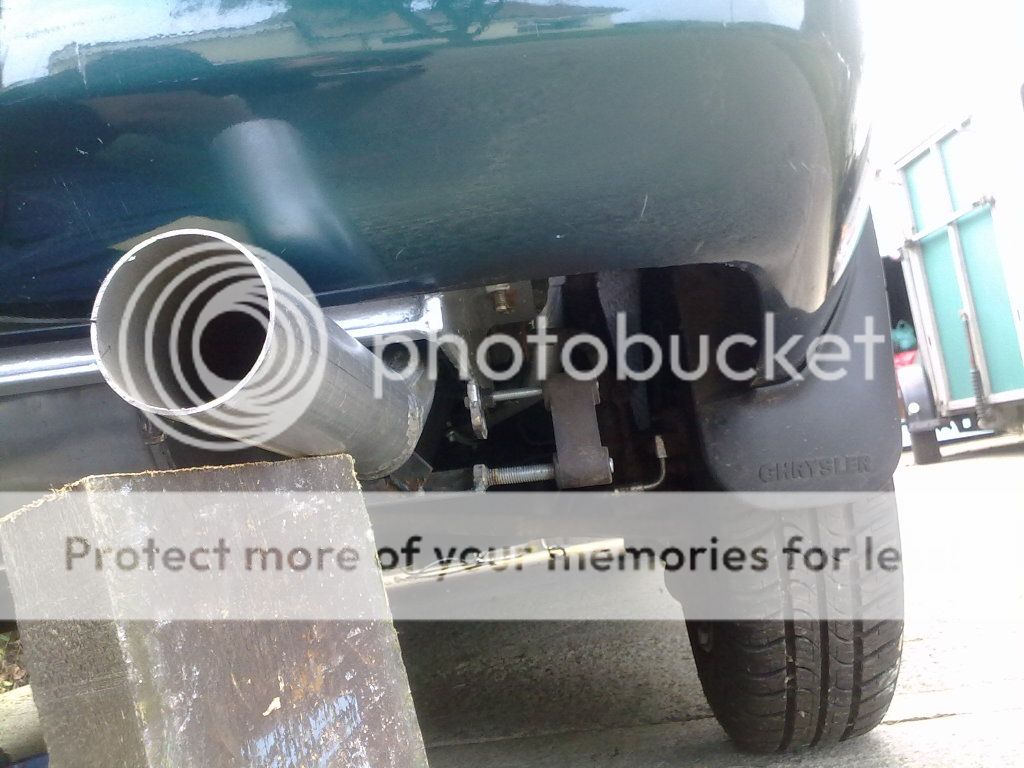
Just enough space between the bracket and the pipes.
How does that look? the box is high enough that it is just higher than
the box section under the spare wheel well.
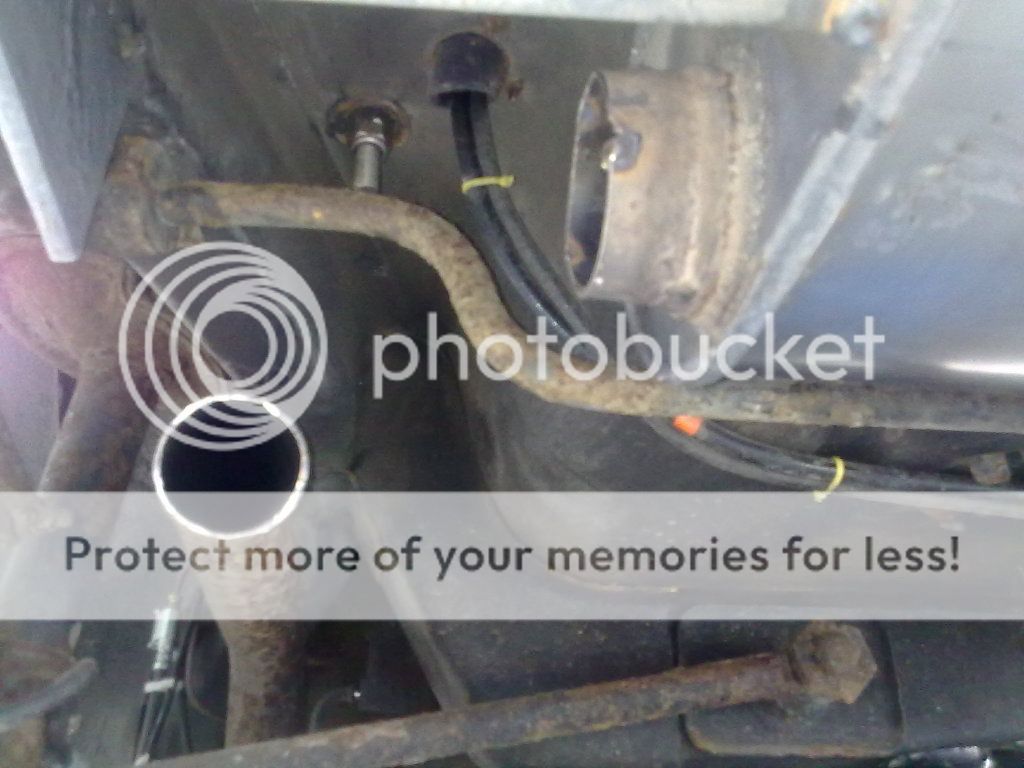
Okay back to the exhaust pipe, the bend and the connection. Pipework
Is not my idea of fun, but dad said he will do it! Which is good as it is
not straight or square.
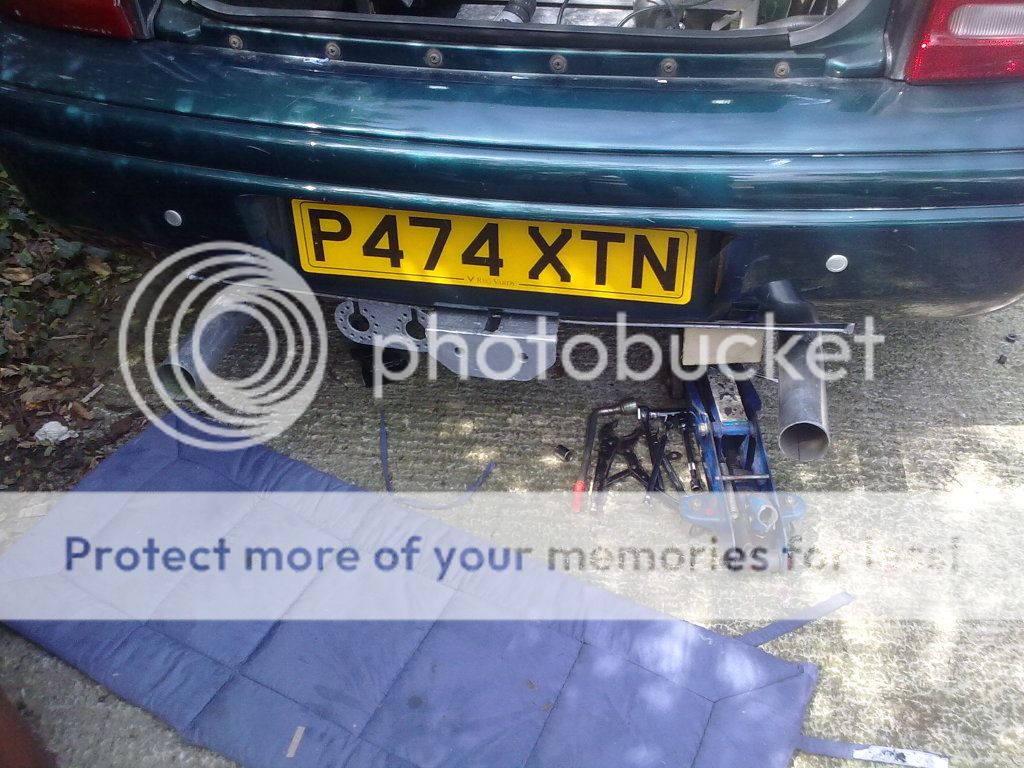
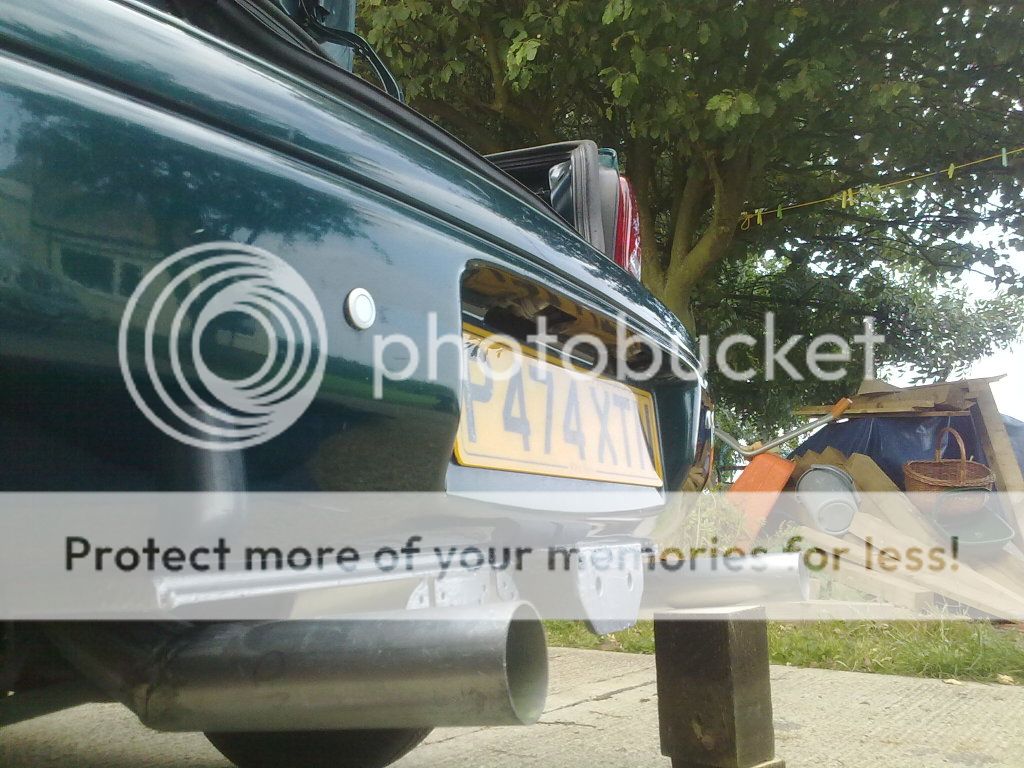
and the exhaust tail pipe length?

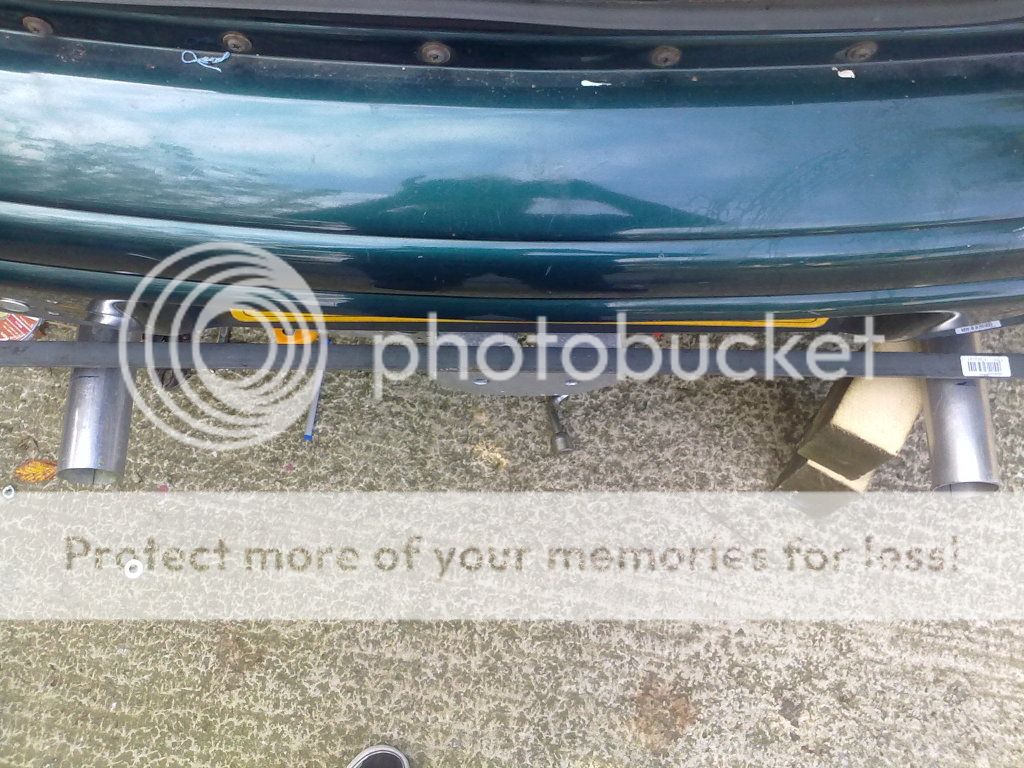
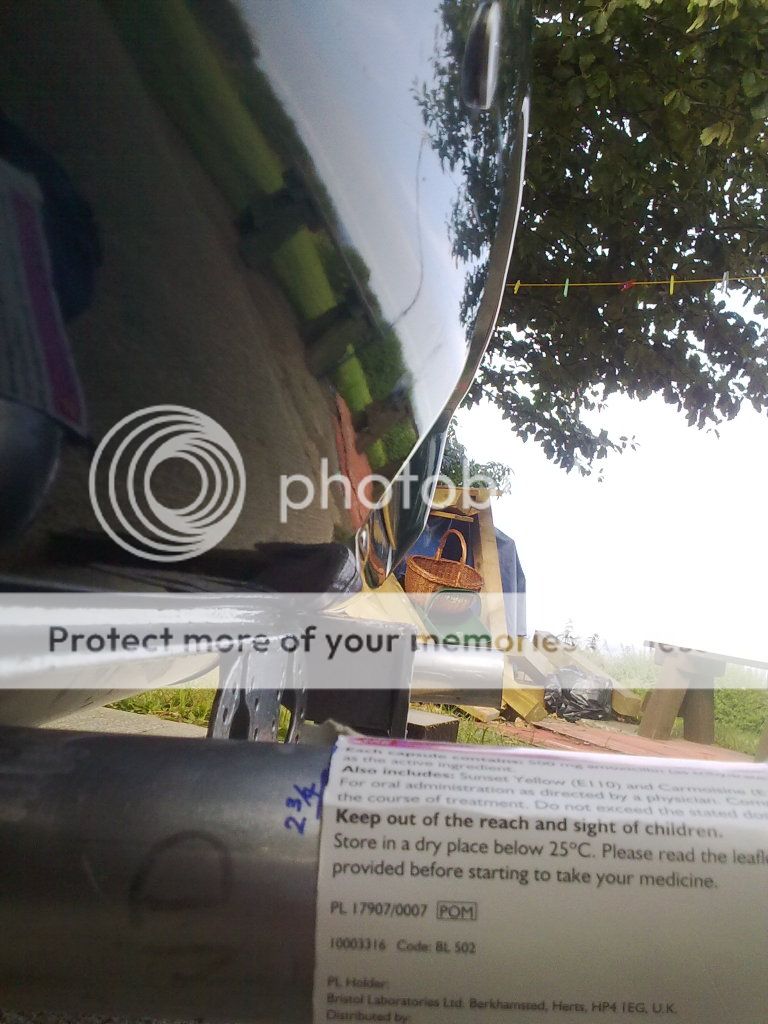
downward view with the bar at one inch forward from the ege of the face
plate of the towbar. But you can see both the 3.75 and 2.75 inch markings.
Sorry for posting this at 2:30 am but I was in no fit state to even sit up,
let alone sort the photos ot and type. Pain in back, legs locked shoulder
and neck. So I have been my own worst enemy!
Okay, here is a question for you.
Would the car's exhaust tail pipes be better square cut or slash cut?
And at what length from the edge of the tow bar bracket, 2.75 or 3.75
inches?
So on went the towbar bracket and then the back box was dually rolled
under and put into place with the trolley jack.
As you can see the main pipe needs to be trimmed to get that kink out
so a connector can join the box to the main pipe.
And a look from the back before it all comes back off for it's first triming.
Two too many loops on the exhaust hanger bolt holes on the tow bar
bracket. By using the bolt holes changes the hight of the back box.
I will cut the lowest two off so that it can be gotten to the right
clearance and not hit the rods from the box!
I put the trolley jack under the box section under the spare wheel well,
making sure ir was in the right position so that the car could be moved.
It was easier to swing the back endout on the trolley jack then push
an pull the car forward and backwards till I had the space to tackle it
from the side.
And the newest addition to the family was sticking his nose into
everything, and marking everything! Say hello to rocky.
And more photos of the new dog, you can plainly see that Rocky hasn't
been feed up. Rocky is only 4 years old and is a rescue dog from the
Dogs Trust dog sanctuary. (There must be some money in it as all the
staff had the newest of cars and private plates, and expensive buildings)
Okay back to the car!
After the trimming of the loops and removing the inlet bend on the back
box as it could do with being closer to the box as it was too near the tow
bar bracket. The bracket was put back on, and the back box hung in for
the second fitting. The two wooden blocks are to stop the box tilting.
The hanger rubbers aren't on fully or properly but it makes it easier to
see how much might need trimming off the length of them.
Just enough space between the bracket and the pipes.
How does that look? the box is high enough that it is just higher than
the box section under the spare wheel well.
Okay back to the exhaust pipe, the bend and the connection. Pipework
Is not my idea of fun, but dad said he will do it! Which is good as it is
not straight or square.
and the exhaust tail pipe length?
downward view with the bar at one inch forward from the ege of the face
plate of the towbar. But you can see both the 3.75 and 2.75 inch markings.
Sorry for posting this at 2:30 am but I was in no fit state to even sit up,
let alone sort the photos ot and type. Pain in back, legs locked shoulder
and neck. So I have been my own worst enemy!
Okay, here is a question for you.
Would the car's exhaust tail pipes be better square cut or slash cut?
And at what length from the edge of the tow bar bracket, 2.75 or 3.75
inches?
I'm Diabetic,& disabled BUT!! NOT DEAD YET!!