V6 into a RHD Chrysler Neon mk1
-
3xpendable
- Posts: 816
- Joined: Tue Apr 12, 2011 8:03 am
Re: V6 into a RHD Chrysler Neon mk1
Been meaning to comment on this for a while Mitsuru but good job! Not to my taste but the detail at which you're going into is fascinating and I log on here everyday to see you're progress which i'm very jealous at btw as I only get to work on my car one weekend a month or so 
2013 Dodge Durango R/T
2019 Ford Mustang Bullitt.
2022 Alfa Romeo Guilia
2019 Ford Mustang Bullitt.
2022 Alfa Romeo Guilia

Re: V6 into a RHD Chrysler Neon mk1
Thanks For Your watching and support.
The reason for the documentation/loads of notes and pictures, is so that if I make a mistake,
people can spot it if I didn't. And I have a reference point of where I went wrong.
Also if I have to take the full dose of painkillers or med's, there is a diary of sorts with where I am
upto and what's left to do!
If anything happened to this old girl, be it on the road after the swap is done or if vandals/thieves
damage the car, then I have all the info of where, what, and by whom things got done, so the
insurance company can blow it out there behind that it wasn't done properly.
Then I or whoever can start the process again!
(Heaven forbid once is enough for me)
And today's work once the rain stopped and started up again,
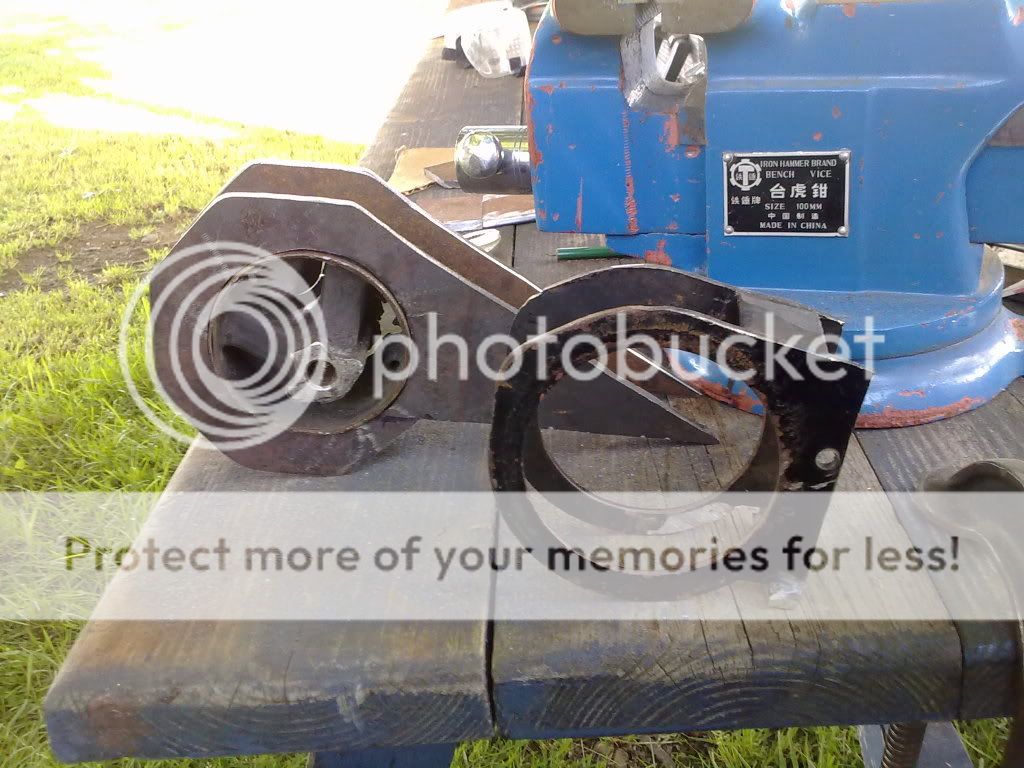
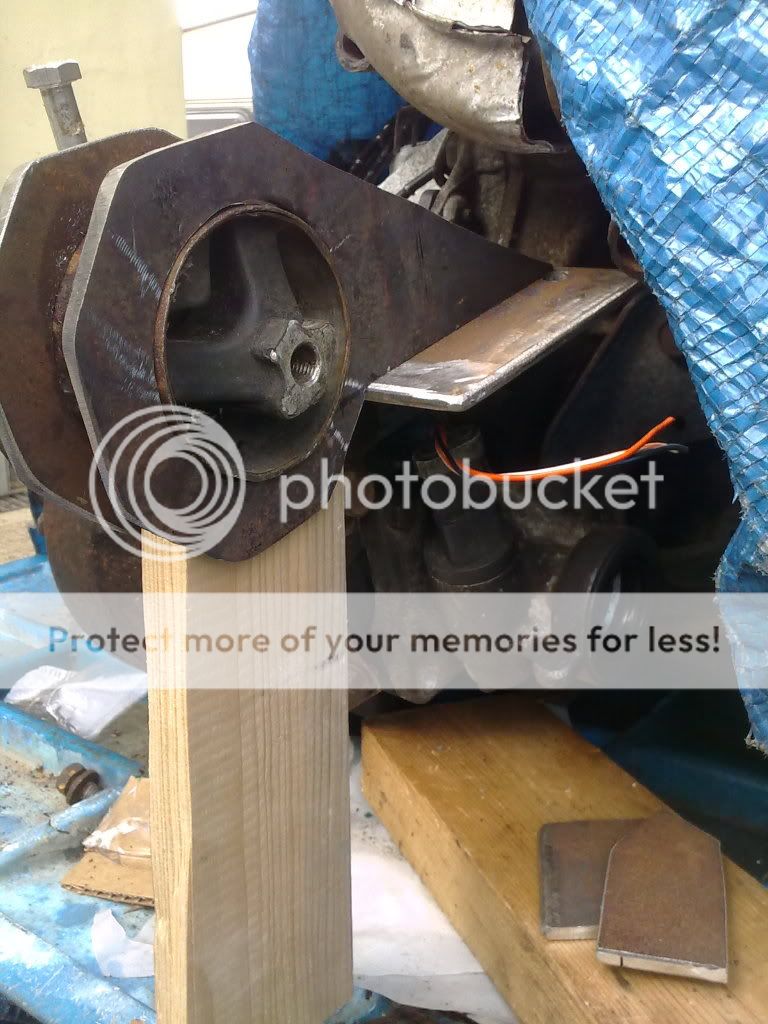
The Rear Engine/Transmission mount
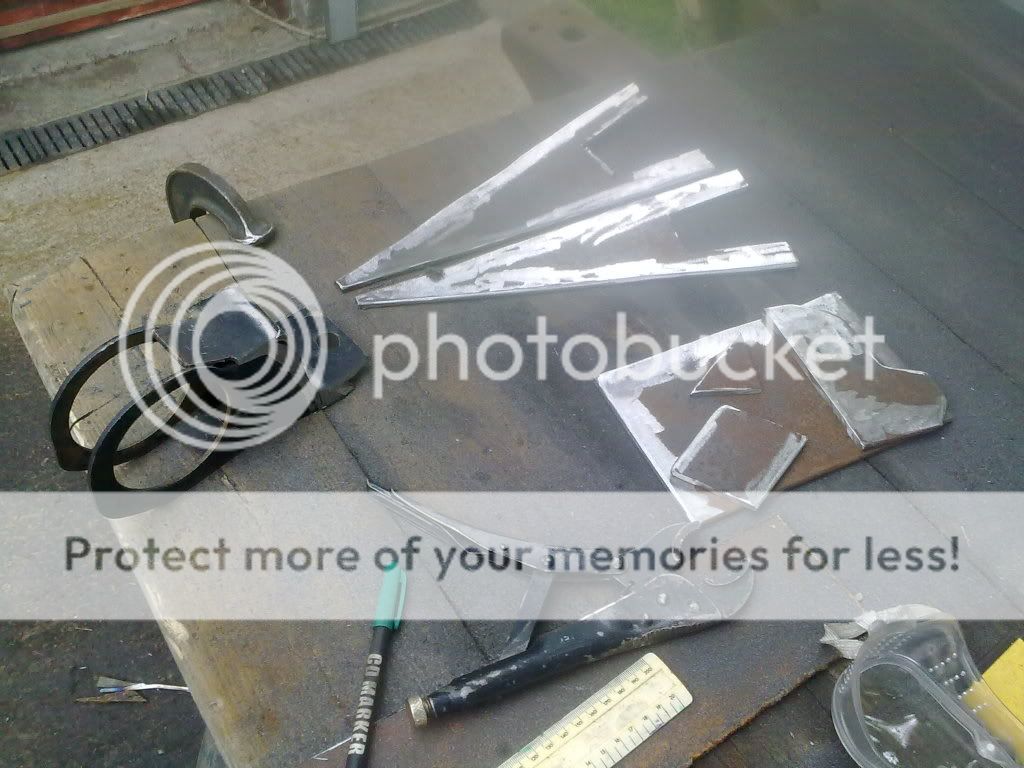
The triangles in the top of the picture are for the frame over the steering rack.
Below and to the right are the pieces for the bracket on the back of the transmission.
As I only want to make this once and can trim it down later, I have made the frame for going
on the rear subframe, and going over the steering rack as big as it is.
The Voyager Engine mount has been used in the following pictures to get an idea of scale,
and what there is to work with.
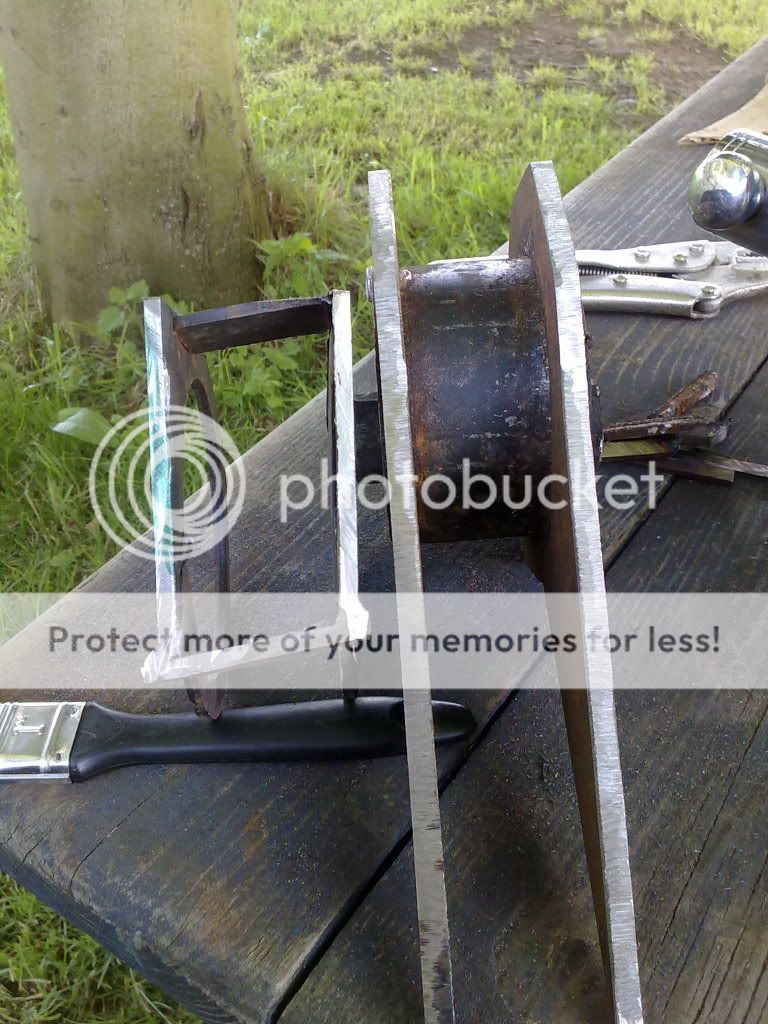
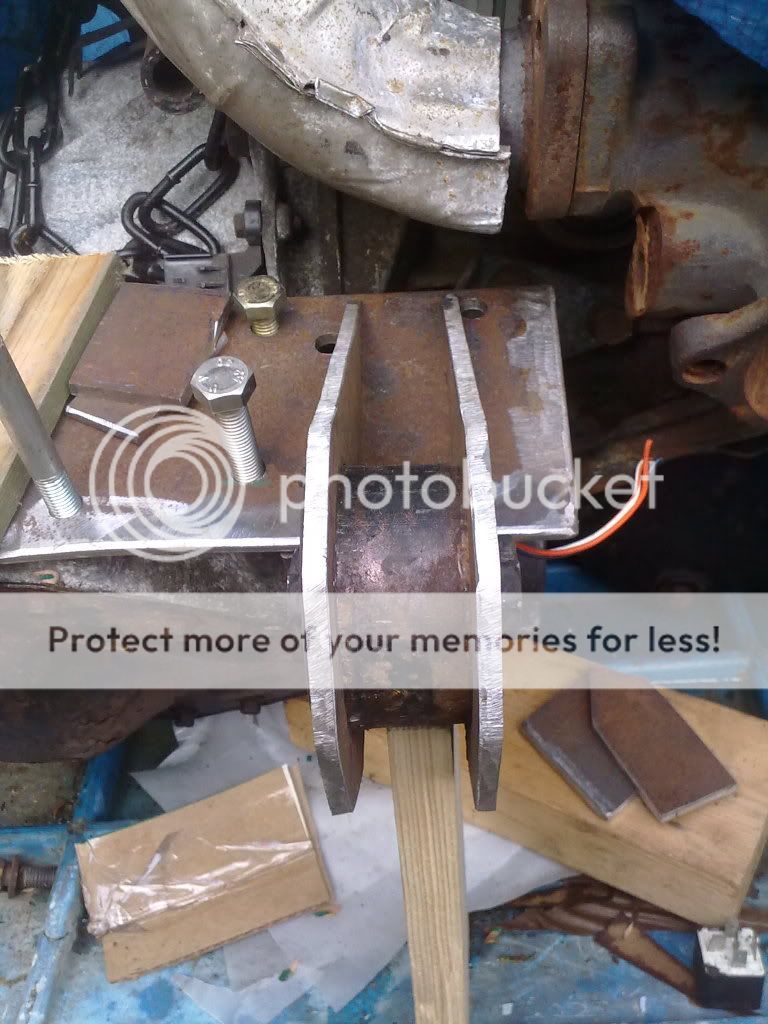
Whoops!!!!
I got the angle wrong!
I then trimmed it so it didn't tilt that way and had to make the hole over the steering rack a little
bigger with me trimming the foot of it. No Pictures of it after I trimmed it as rained again.
Please look at the top picture in this post.
You see the 2 large looped/holed black bit of metal?
Well it was going to be reused in part of the new bracket to hold
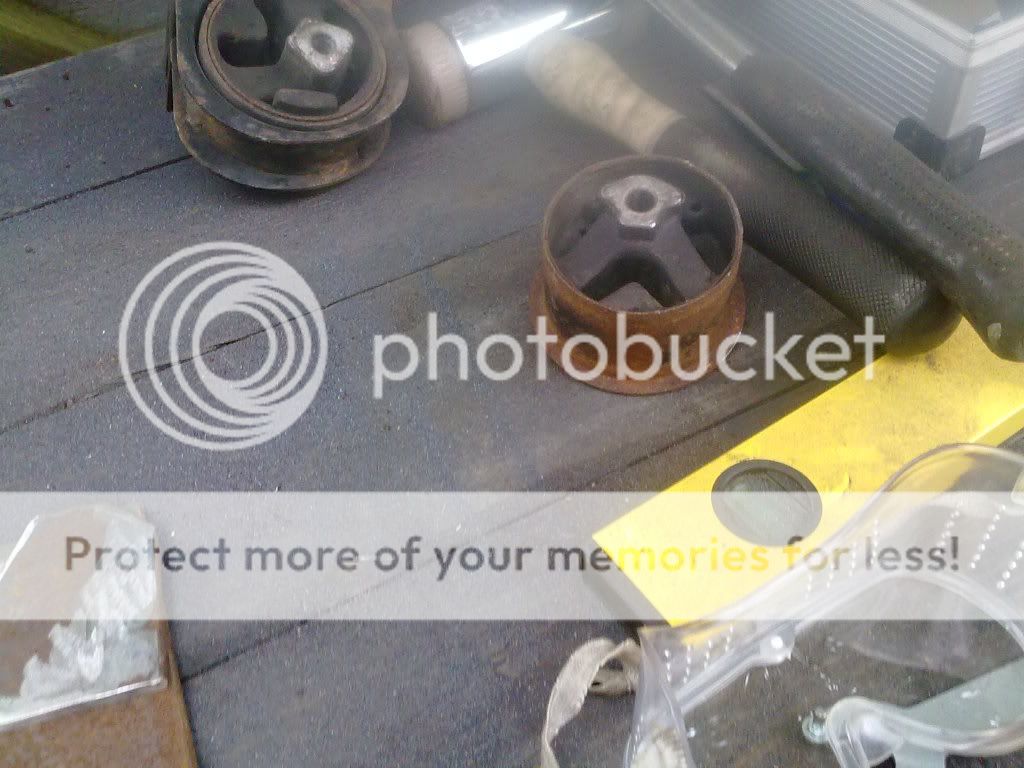
this mount insert which is just above the yellow spirit level in the above picture.
I think I will make my own bit to hold it as the metal is too thin for my liking.
Oh and for the record for all the parts of this bracket and frame I'm using 6mm plate.
I use the same 6mm for the new alternator brackets, the first lot were made with 4 or 5mm.
The reason for the documentation/loads of notes and pictures, is so that if I make a mistake,
people can spot it if I didn't. And I have a reference point of where I went wrong.
Also if I have to take the full dose of painkillers or med's, there is a diary of sorts with where I am
upto and what's left to do!
If anything happened to this old girl, be it on the road after the swap is done or if vandals/thieves
damage the car, then I have all the info of where, what, and by whom things got done, so the
insurance company can blow it out there behind that it wasn't done properly.
Then I or whoever can start the process again!
(Heaven forbid once is enough for me)
And today's work once the rain stopped and started up again,
The Rear Engine/Transmission mount
The triangles in the top of the picture are for the frame over the steering rack.
Below and to the right are the pieces for the bracket on the back of the transmission.
As I only want to make this once and can trim it down later, I have made the frame for going
on the rear subframe, and going over the steering rack as big as it is.
The Voyager Engine mount has been used in the following pictures to get an idea of scale,
and what there is to work with.
Whoops!!!!
I got the angle wrong!
I then trimmed it so it didn't tilt that way and had to make the hole over the steering rack a little
bigger with me trimming the foot of it. No Pictures of it after I trimmed it as rained again.
Please look at the top picture in this post.
You see the 2 large looped/holed black bit of metal?
Well it was going to be reused in part of the new bracket to hold
this mount insert which is just above the yellow spirit level in the above picture.
I think I will make my own bit to hold it as the metal is too thin for my liking.
Oh and for the record for all the parts of this bracket and frame I'm using 6mm plate.
I use the same 6mm for the new alternator brackets, the first lot were made with 4 or 5mm.
I'm Diabetic,& disabled BUT!! NOT DEAD YET!!
Re: V6 into a RHD Chrysler Neon mk1
What work I have done this week has caught up with me, and it's been a glorious day to do work on the car!!
But my body says NO!
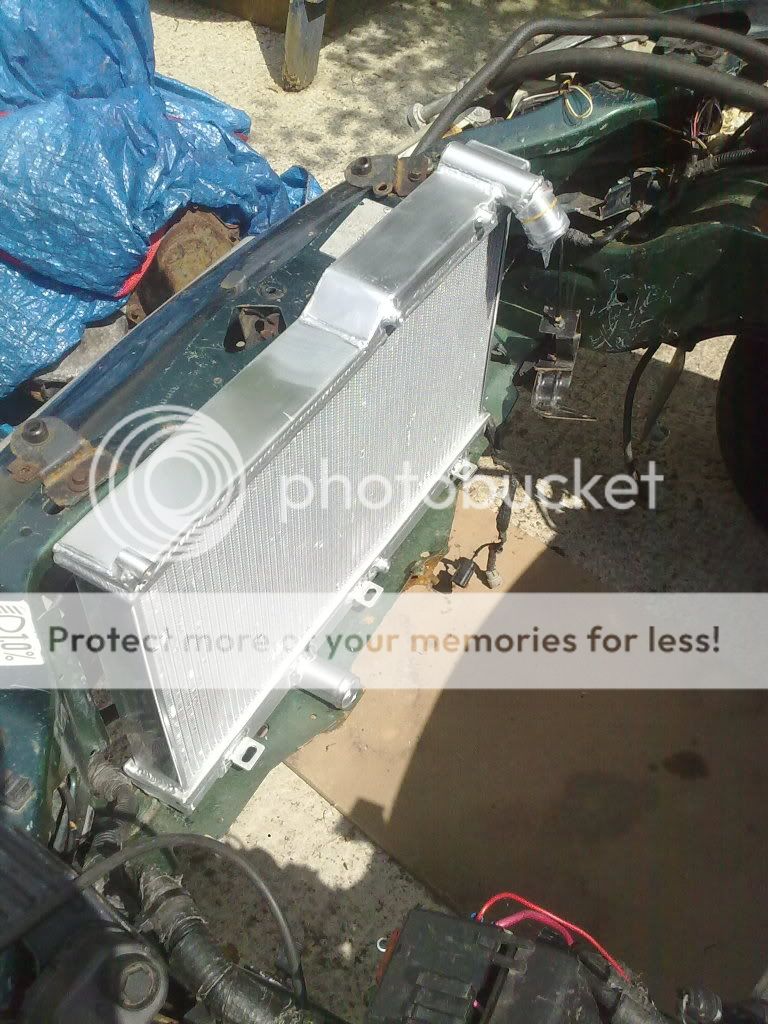
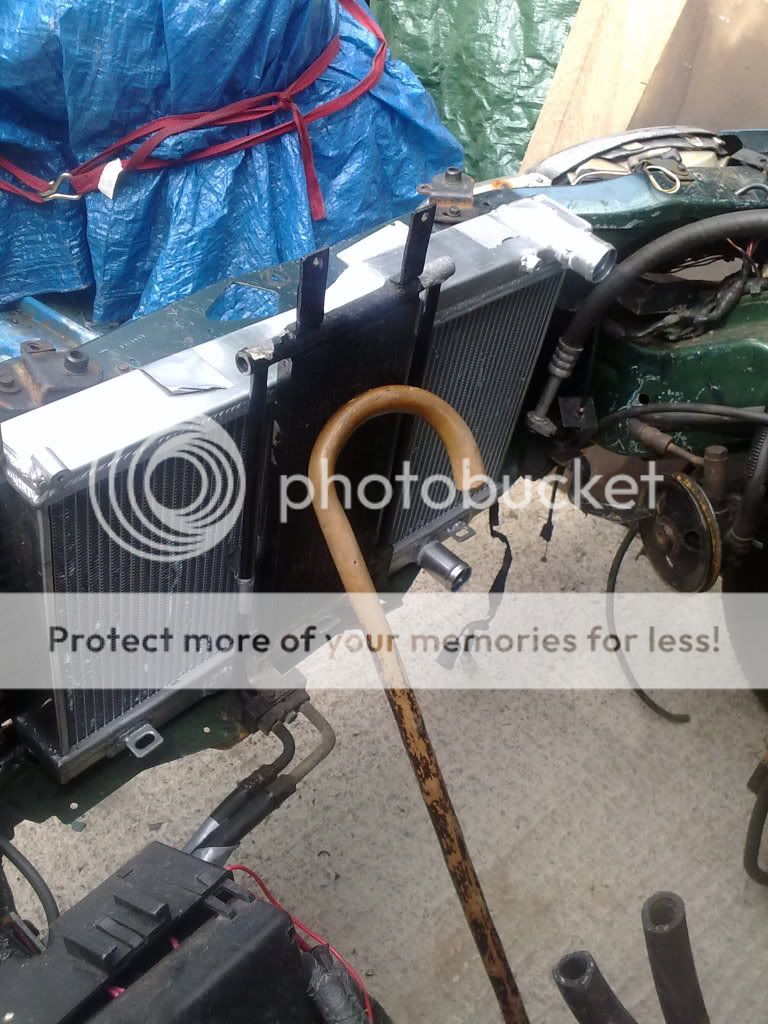
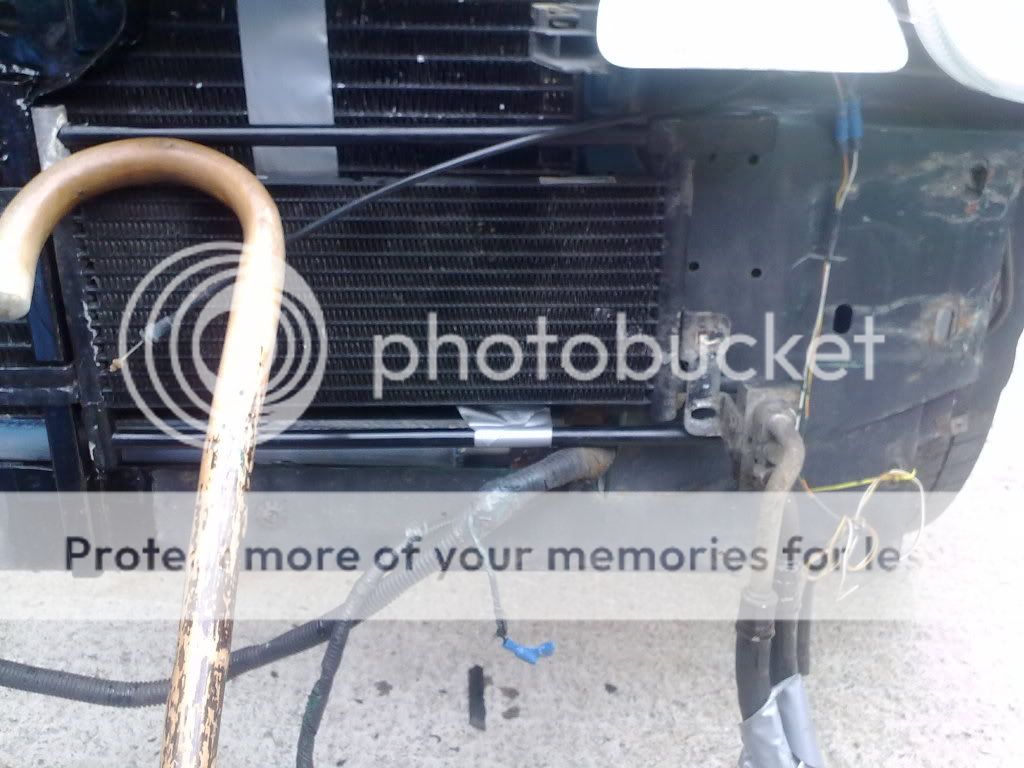
I gave a call to Hartlepool Radiator Co, the radiator was ready and pressure tested.
Total cost including tax £75.
So I went and collected that.
Before modification
After
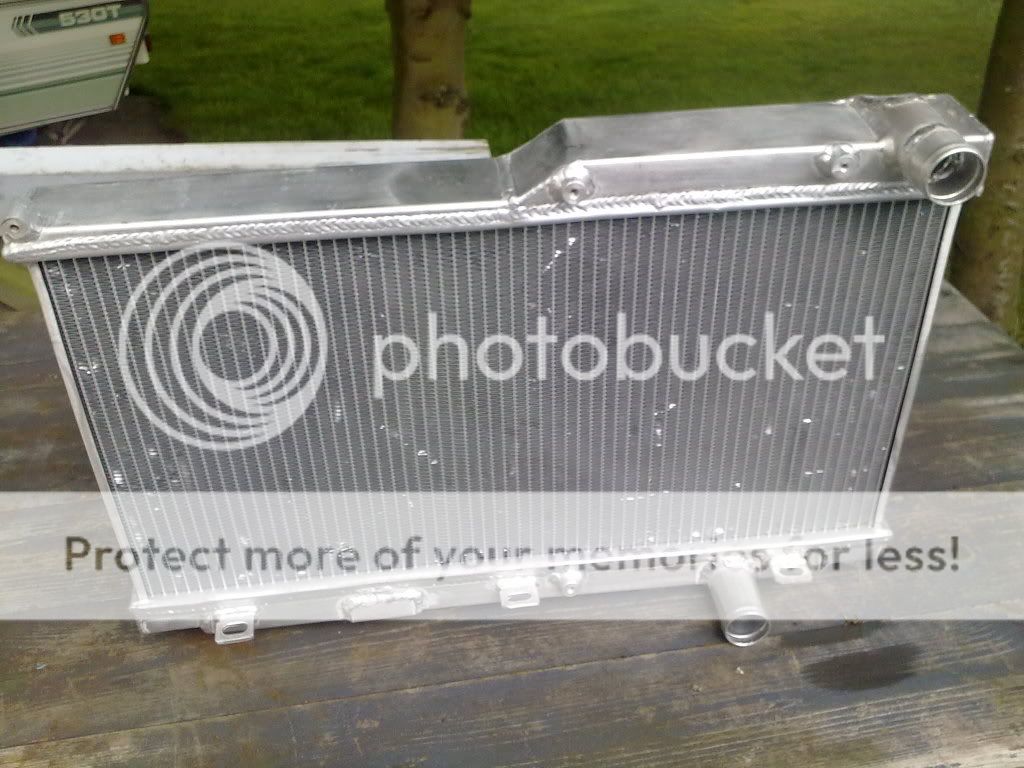
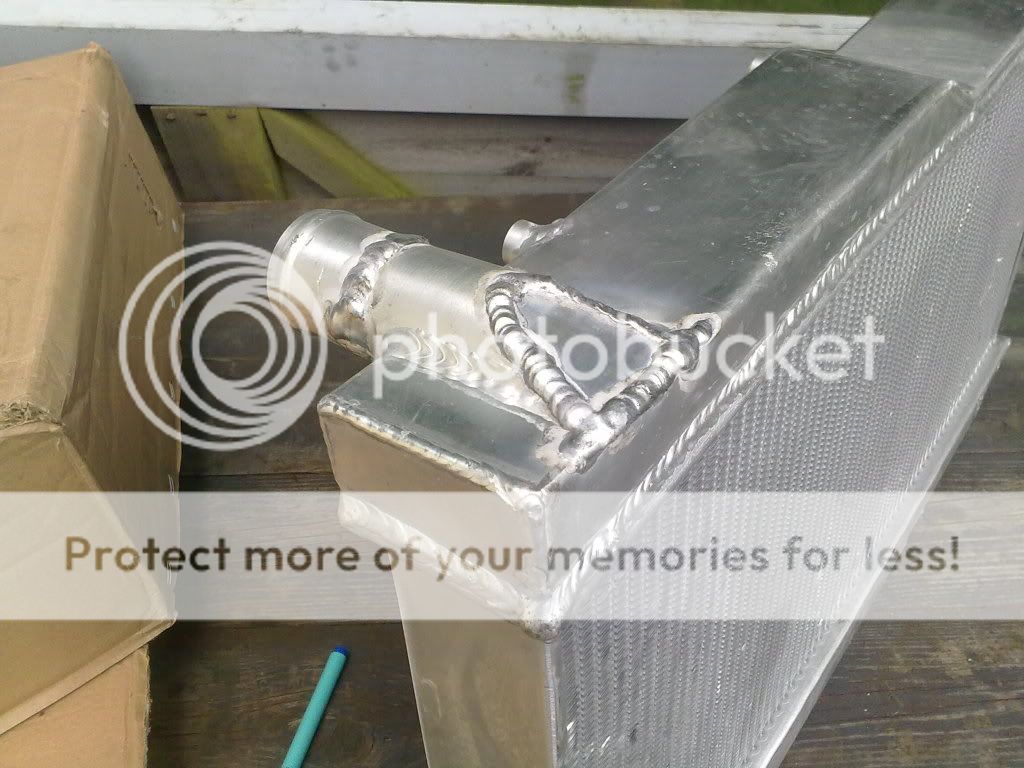
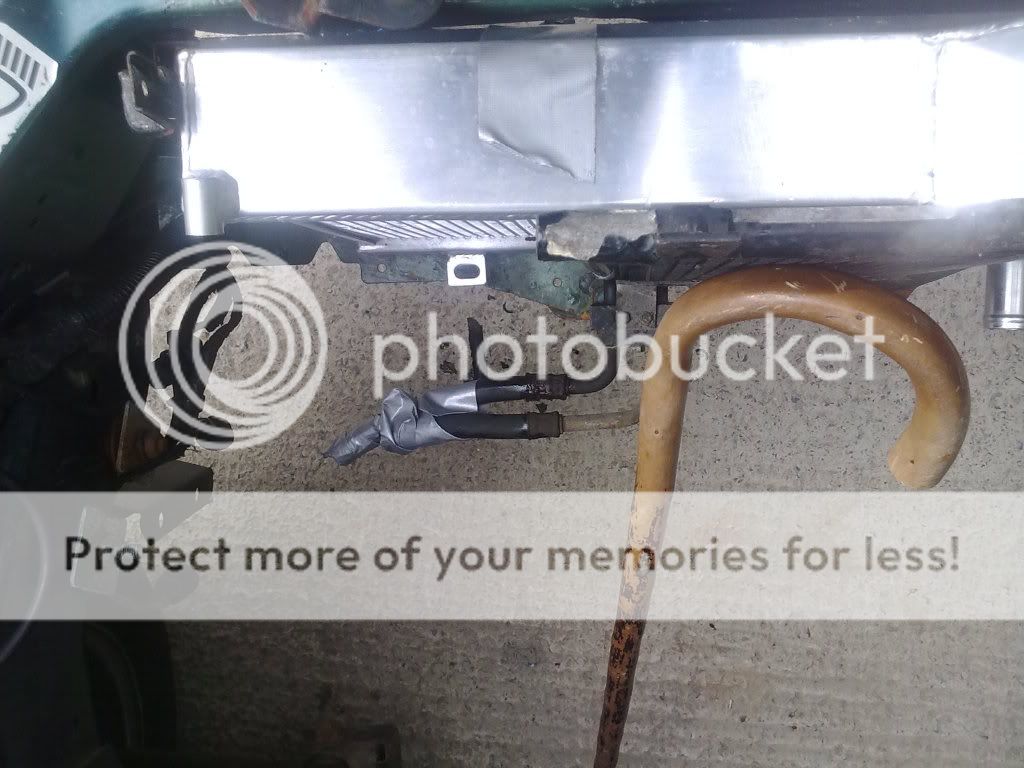
The cropping of the pipe and putting a vit of angle on it should mean it clears the bonnet.
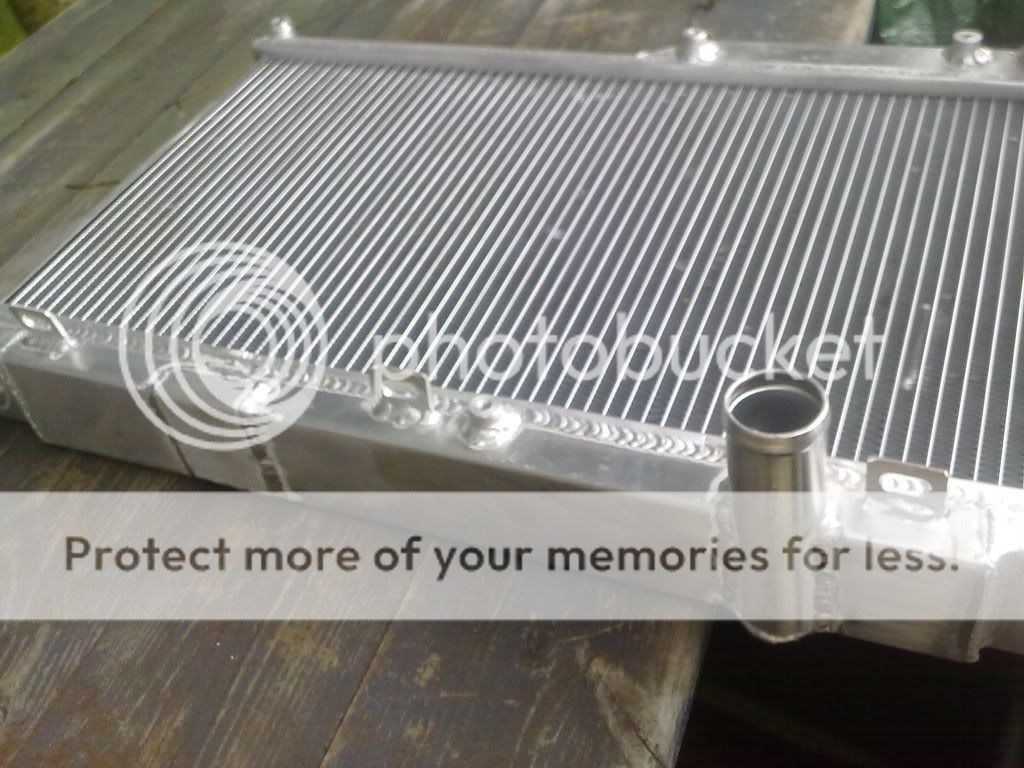
As you can see the bottom pipe has been moved across to the correct side.
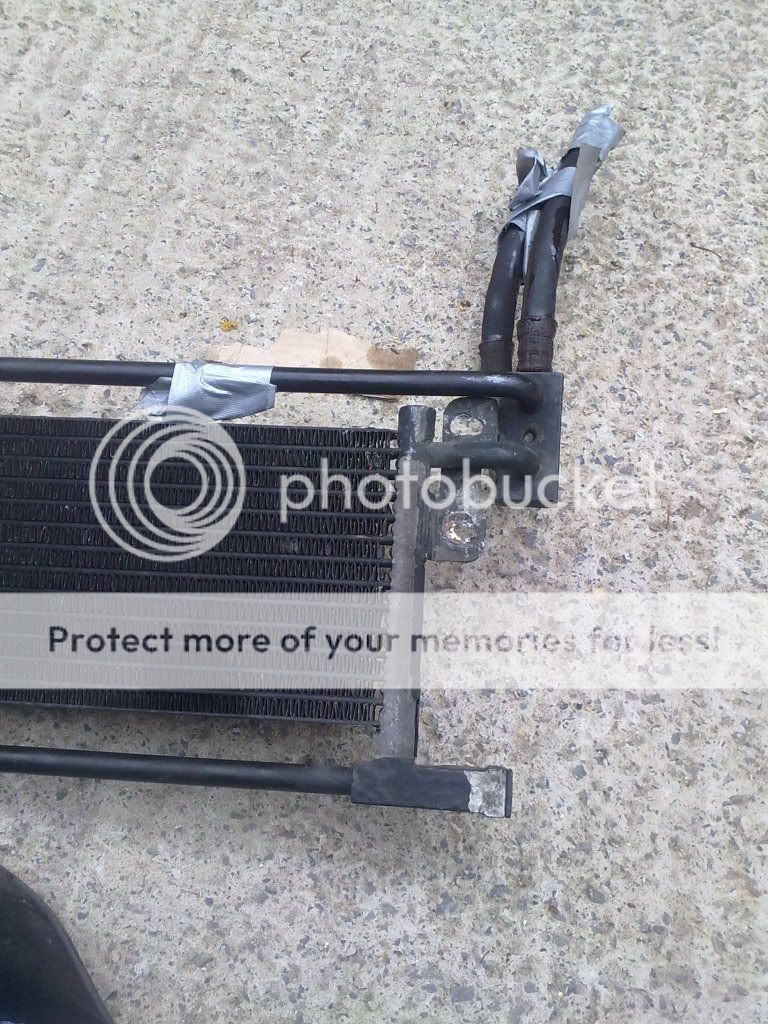
A reminder of where the pipes for the transmission are on it.
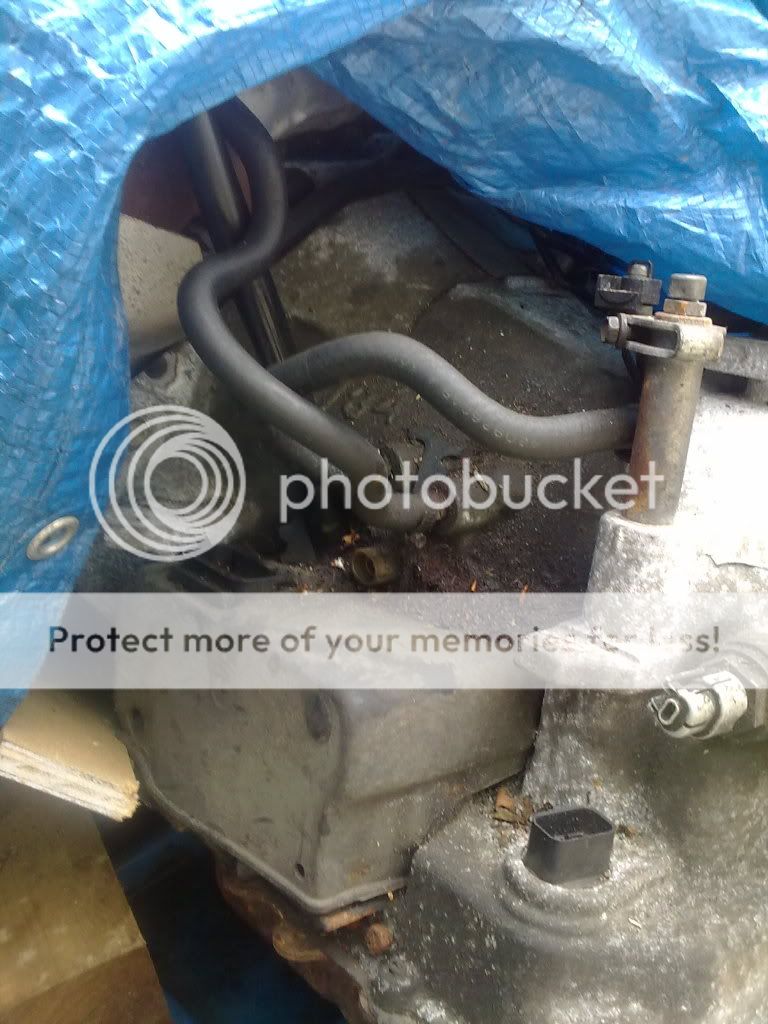
Also where the pipes on the oil cooler are/like.
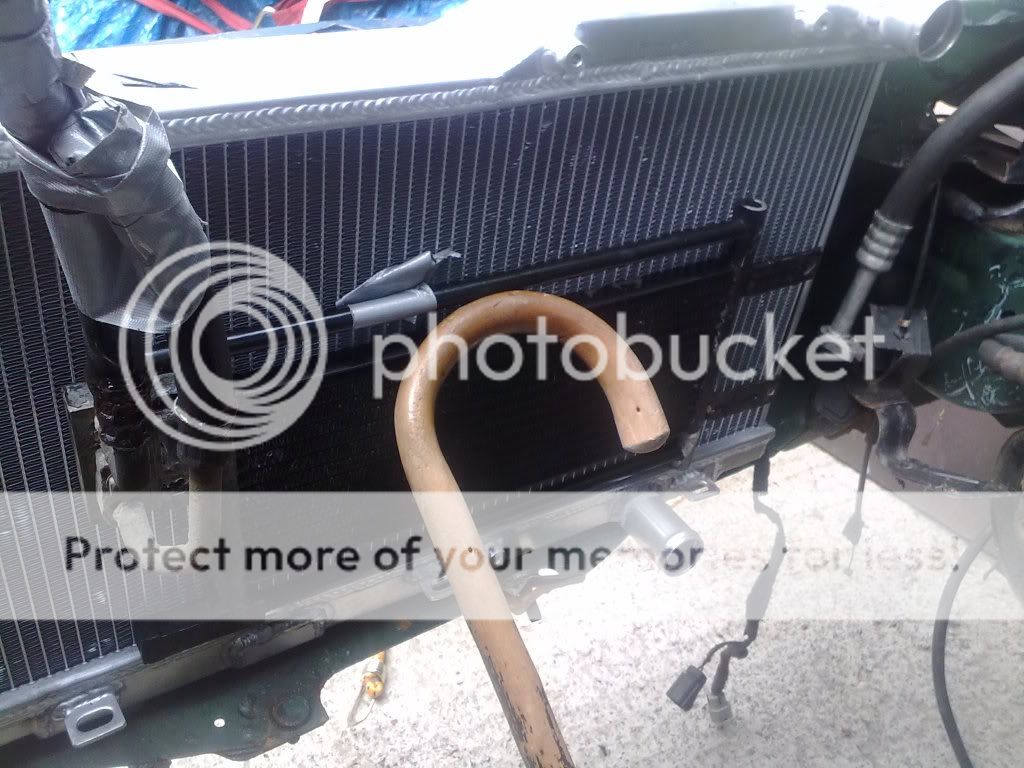
I put a bit of duct tape on the A/C condensor to hold it in place on the radiator.
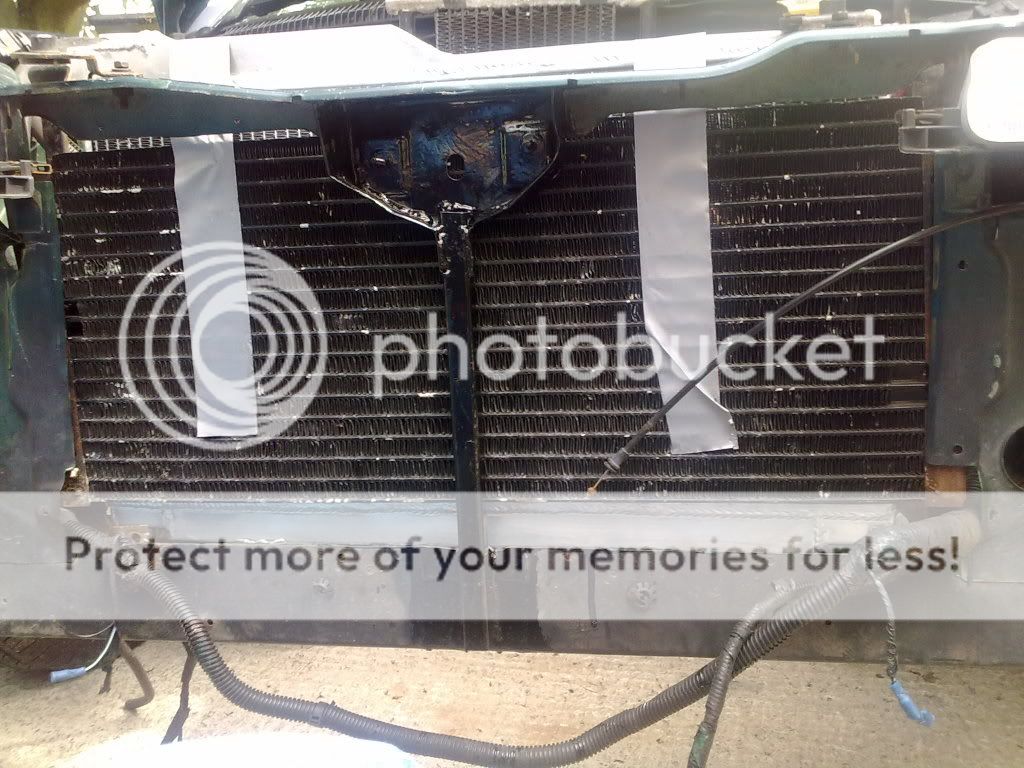
There will just be enough space for the wiring to get through.
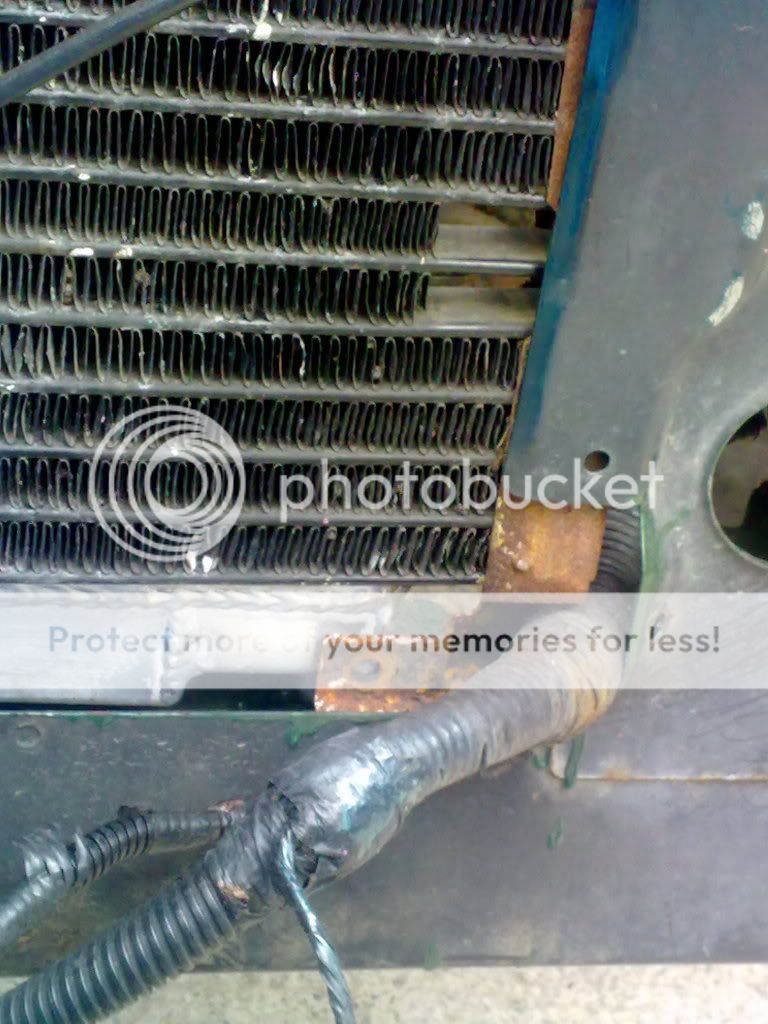
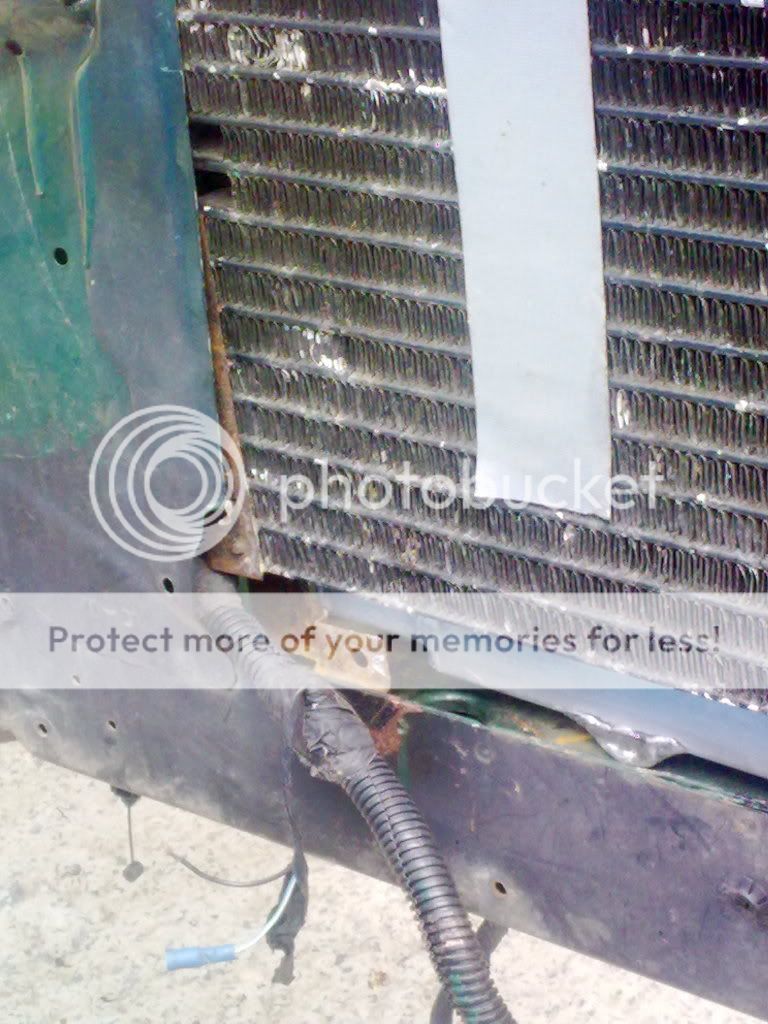
More than enough for the A/C pipework
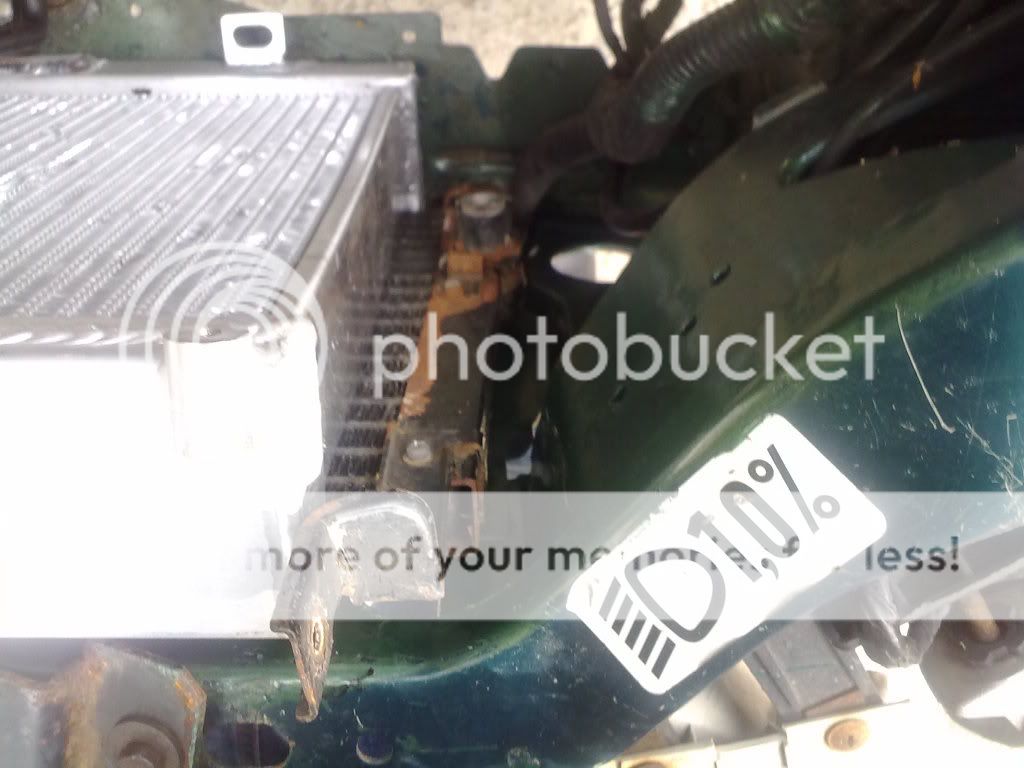
Now if I have the Oil cooler Radiator where I was originally planning on having it,
I wouldn't be able to close the bonnet!
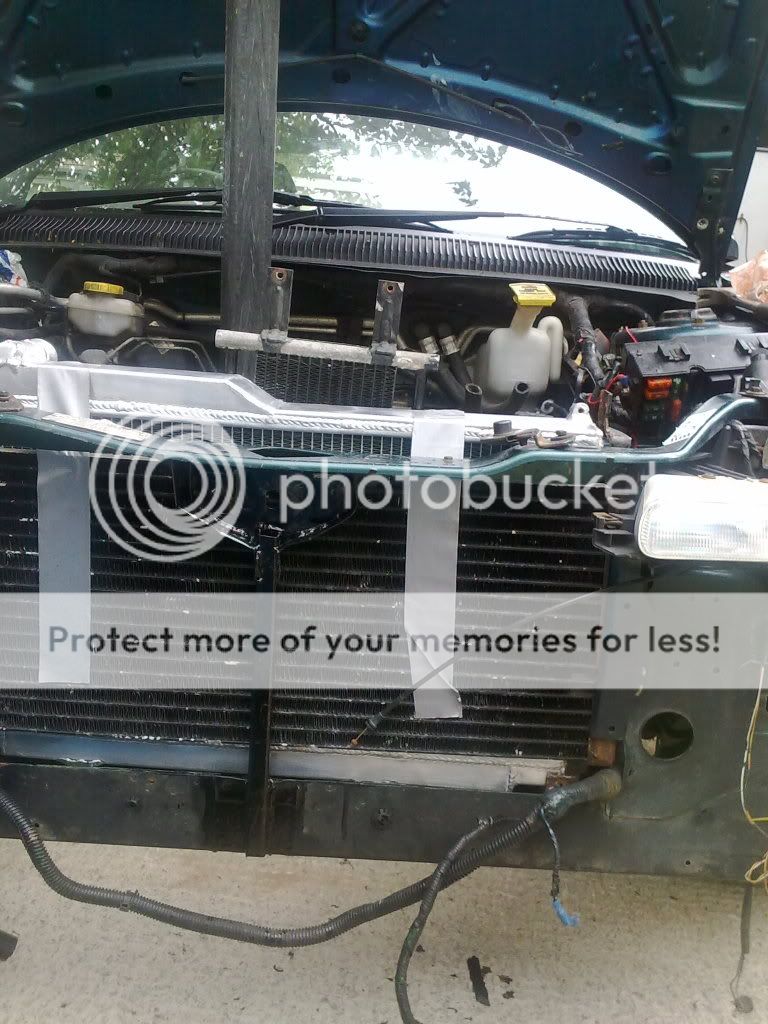
And the pipe layout would be wrong.
Another option is length ways (not in this position)
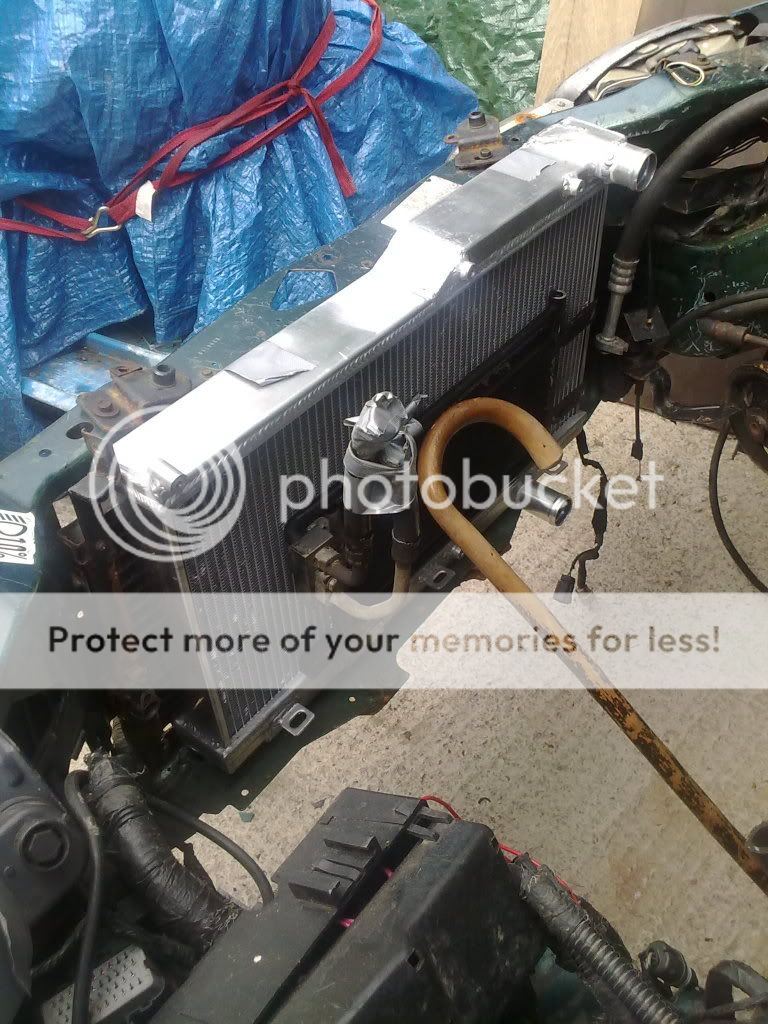
Yet another option is for it infront with the pipes through a hole cut into the slam panel
Yes the radiator has the pipes pointing out over but it would be flipped over so the pipes went the other way.
If I went for the last option, fans would be a problem, if I had them behind there might not be enough clearance for the air to circulate.
The thinnest fans I can find are 2.5 inches deep.
Also I think that I might fix the A/C condensor to the slam panel rather than the Radiator.
But my body says NO!
I gave a call to Hartlepool Radiator Co, the radiator was ready and pressure tested.
Total cost including tax £75.
So I went and collected that.
Before modification
After
The cropping of the pipe and putting a vit of angle on it should mean it clears the bonnet.
As you can see the bottom pipe has been moved across to the correct side.
A reminder of where the pipes for the transmission are on it.
Also where the pipes on the oil cooler are/like.
I put a bit of duct tape on the A/C condensor to hold it in place on the radiator.
There will just be enough space for the wiring to get through.
More than enough for the A/C pipework
Now if I have the Oil cooler Radiator where I was originally planning on having it,
I wouldn't be able to close the bonnet!
And the pipe layout would be wrong.
Another option is length ways (not in this position)
Yet another option is for it infront with the pipes through a hole cut into the slam panel
Yes the radiator has the pipes pointing out over but it would be flipped over so the pipes went the other way.
If I went for the last option, fans would be a problem, if I had them behind there might not be enough clearance for the air to circulate.
The thinnest fans I can find are 2.5 inches deep.
Also I think that I might fix the A/C condensor to the slam panel rather than the Radiator.
I'm Diabetic,& disabled BUT!! NOT DEAD YET!!
Re: V6 into a RHD Chrysler Neon mk1
I want to get the engine in to get a better idea on what to do.
But anybody got any ideas or comments on the radiator and fan situation after seeing the radiators in?
But anybody got any ideas or comments on the radiator and fan situation after seeing the radiators in?
I'm Diabetic,& disabled BUT!! NOT DEAD YET!!
Re: V6 into a RHD Chrysler Neon mk1
I started the bracket part which holds the insert.
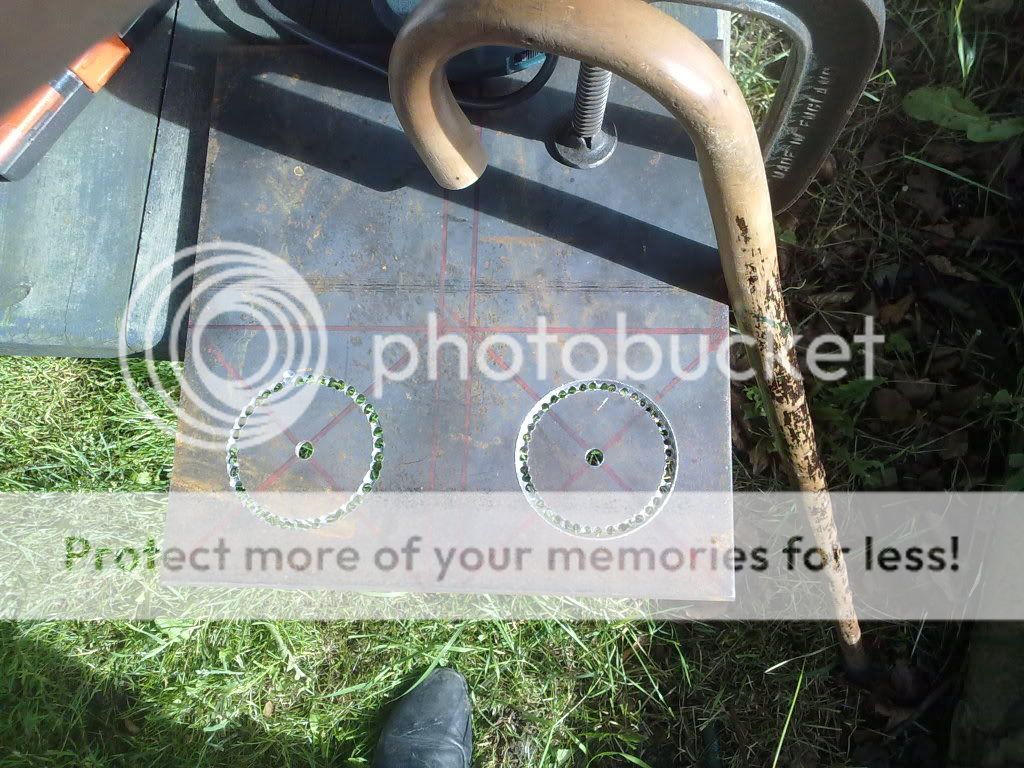
I used a metal 70mm hole cutter to score the circles as it wasn't
ment for that thickness of metal, then I proceded to drill in the
circle, before using the jigsaw to finish cutting out the hole.
The jigsaw went nuts and has thrown a pin, so it's back in the box,
for me to repair later.
I used a dremmil which came with mini grinding disks to complete
the hole cutting.
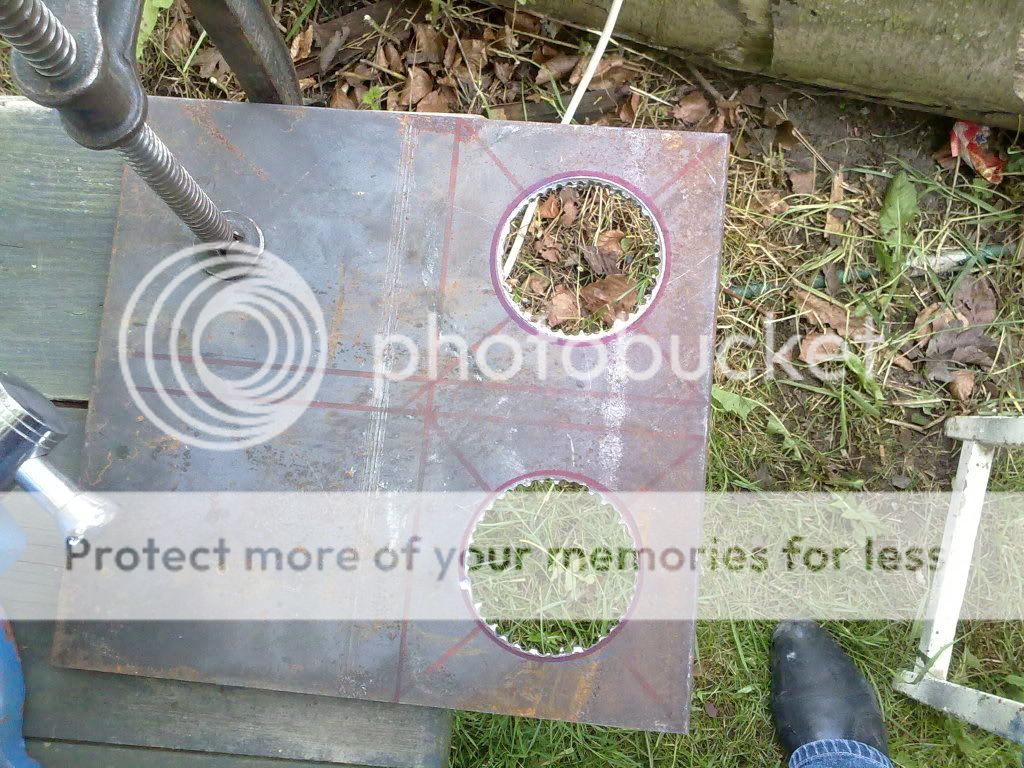
Then using the old bracket I marked the plate with the correct sizes,
before using a bit which can only be described an INDUSTRIAL sized
dremmil bit in the electric drill, to smooth outh the holes and take it
close to the pen line.
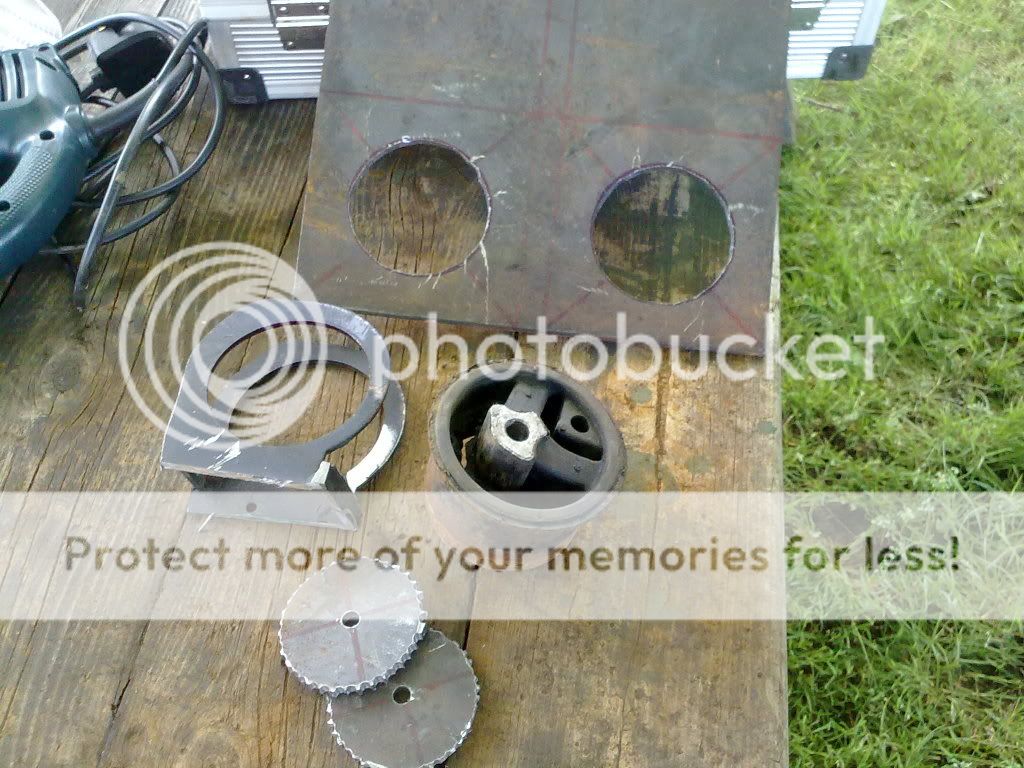
Also as a by product I have 2 large washers! lol
I used a metal 70mm hole cutter to score the circles as it wasn't
ment for that thickness of metal, then I proceded to drill in the
circle, before using the jigsaw to finish cutting out the hole.
The jigsaw went nuts and has thrown a pin, so it's back in the box,
for me to repair later.
I used a dremmil which came with mini grinding disks to complete
the hole cutting.
Then using the old bracket I marked the plate with the correct sizes,
before using a bit which can only be described an INDUSTRIAL sized
dremmil bit in the electric drill, to smooth outh the holes and take it
close to the pen line.
Also as a by product I have 2 large washers! lol
I'm Diabetic,& disabled BUT!! NOT DEAD YET!!
Re: V6 into a RHD Chrysler Neon mk1
As dad was in one of his tidying moods!!!
The car was moved onto the pit, but not pointing the
way I said it would need to be for me to work on it.
When he is back at work on monday morning she will
be moved so I can work on her.
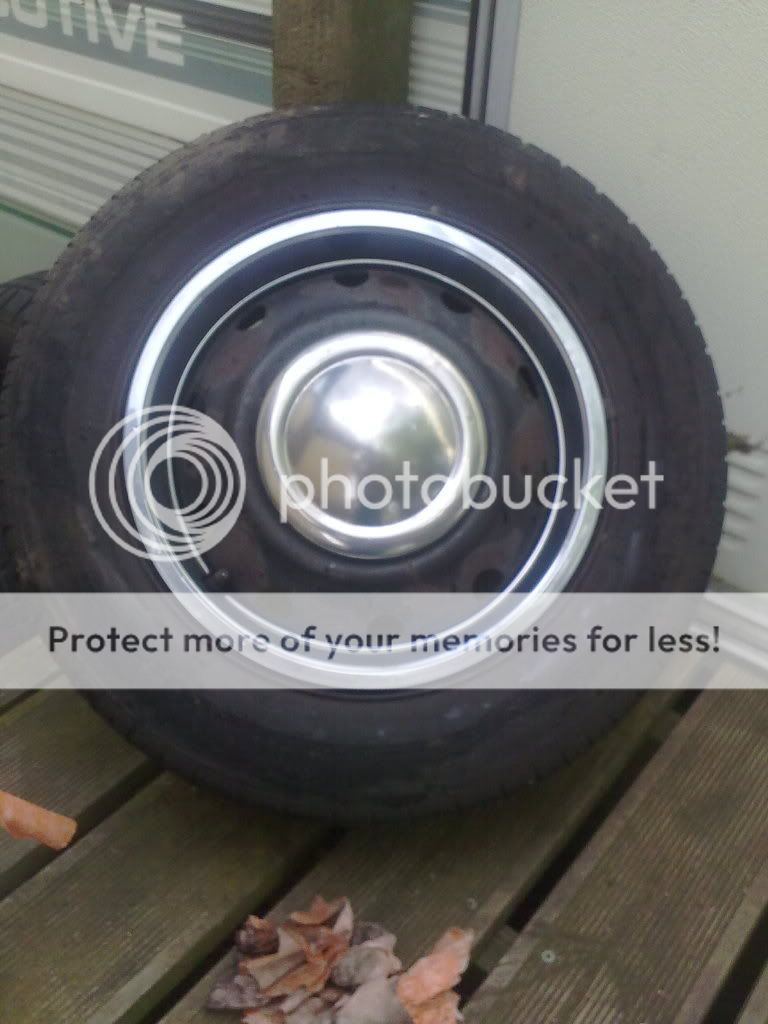
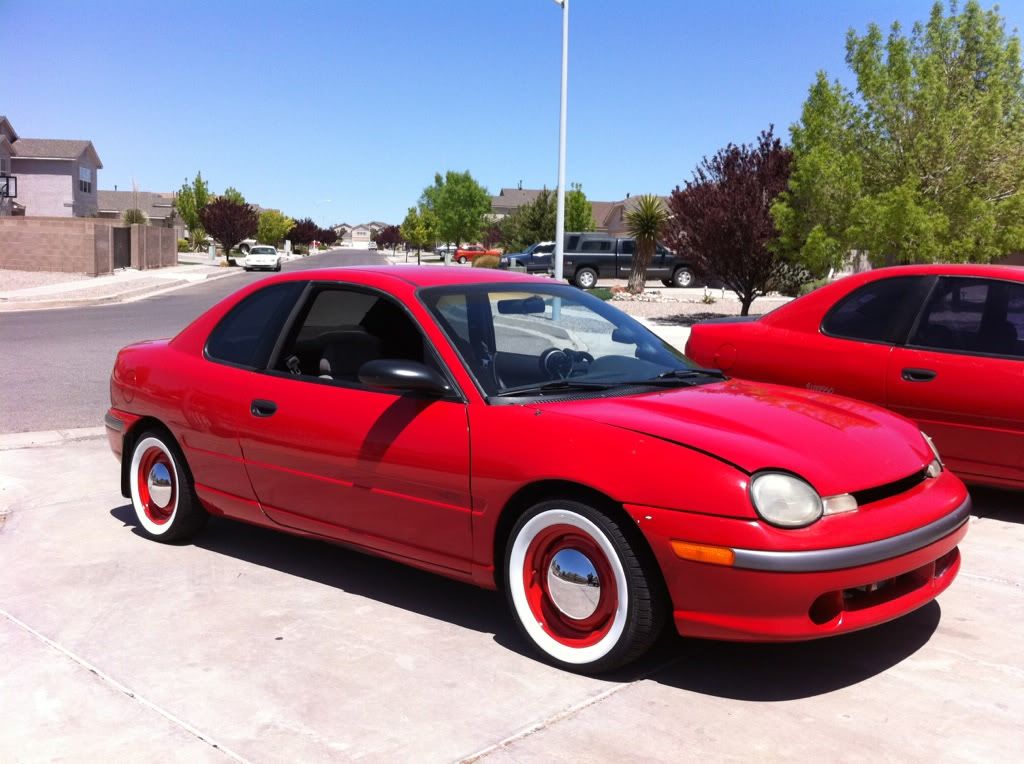
The only thing I did was to try the chrome ring and
mini hubcap on a steel wheel with the car.
Before with the alloy wheel.
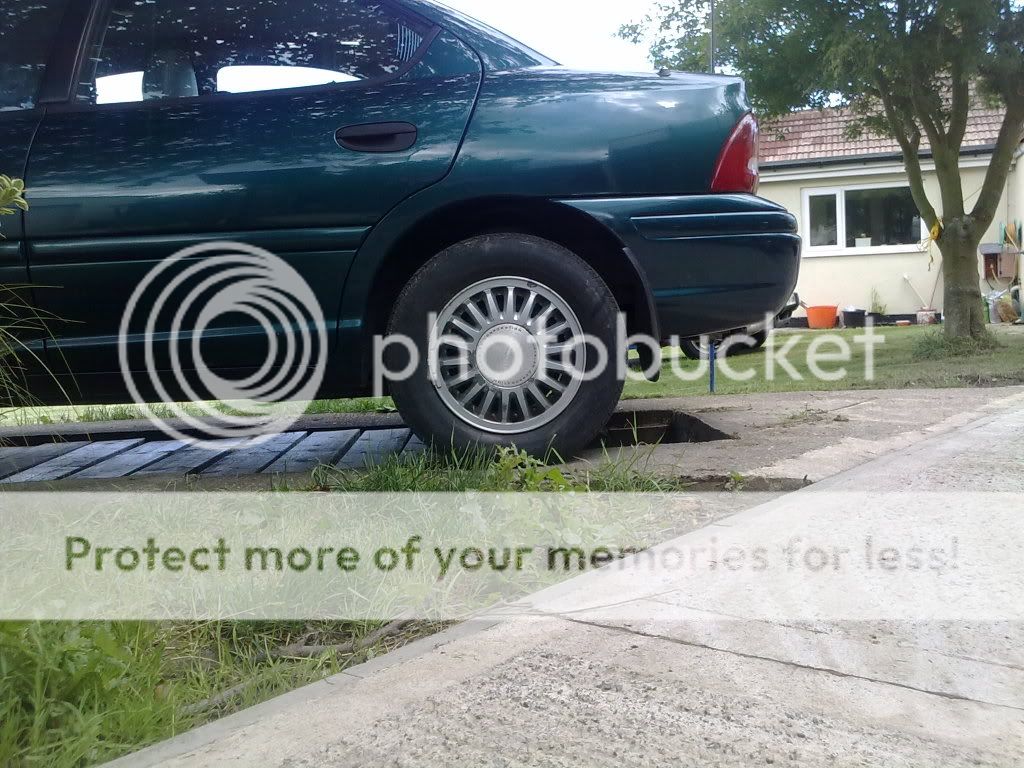
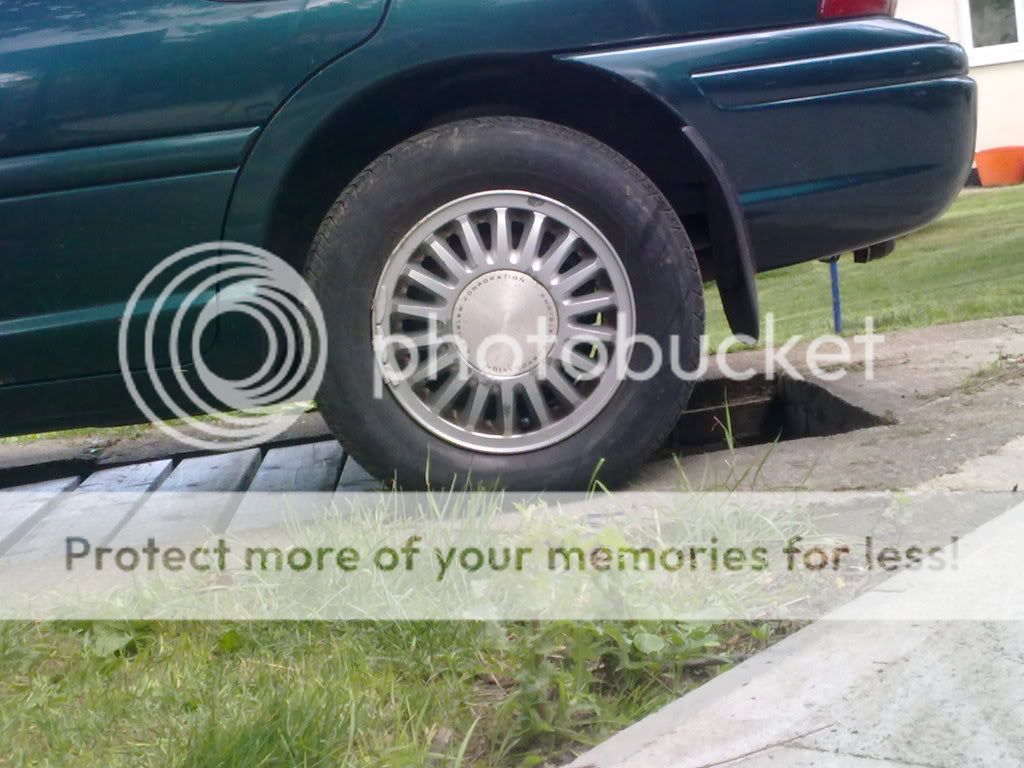
The Steel wheel

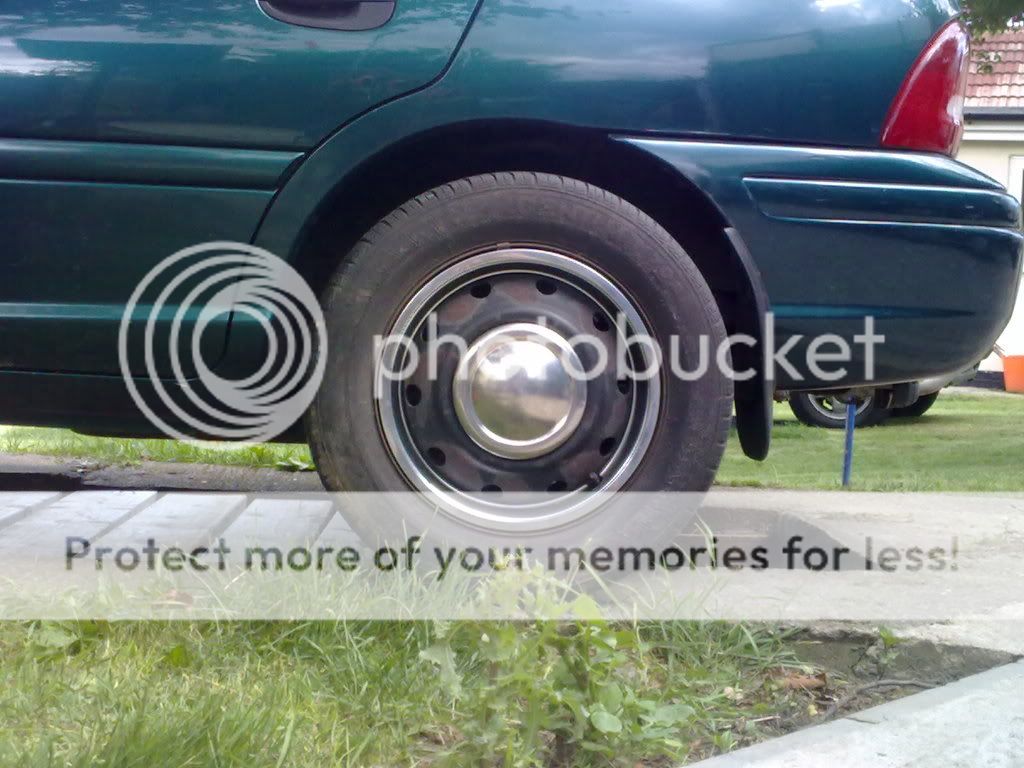
Can you spot the trick for these pictures?
Hint it involved 2 twigs and a bit of ducktape!
The car was moved onto the pit, but not pointing the
way I said it would need to be for me to work on it.
When he is back at work on monday morning she will
be moved so I can work on her.
The only thing I did was to try the chrome ring and
mini hubcap on a steel wheel with the car.
Before with the alloy wheel.
The Steel wheel
Can you spot the trick for these pictures?
Hint it involved 2 twigs and a bit of ducktape!
I'm Diabetic,& disabled BUT!! NOT DEAD YET!!
Re: V6 into a RHD Chrysler Neon mk1
Someone just posted this on my thread on a different forum,
And it is the look I was trying to achieve!
It wasn't his car so I have asked him to contact the owner,
to find out what wheels and hubcap.
And it is the look I was trying to achieve!
It wasn't his car so I have asked him to contact the owner,
to find out what wheels and hubcap.
I'm Diabetic,& disabled BUT!! NOT DEAD YET!!
-
SirTainleyBarking

- Posts: 413
- Joined: Mon Feb 14, 2011 12:41 am
- Location: Solihull, where Landrovers come from
Re: V6 into a RHD Chrysler Neon mk1
IIRC they are off the peg custom jobs available in the states. Bit like the ripspeed jobs you get in Halfrauds
But cool
But cool
Landrovers and Welding go together like Bread and Butter. And in the wet they are about as structurally sound
Biting. It's like kissing except there's a winner
Biting. It's like kissing except there's a winner
Re: V6 into a RHD Chrysler Neon mk1
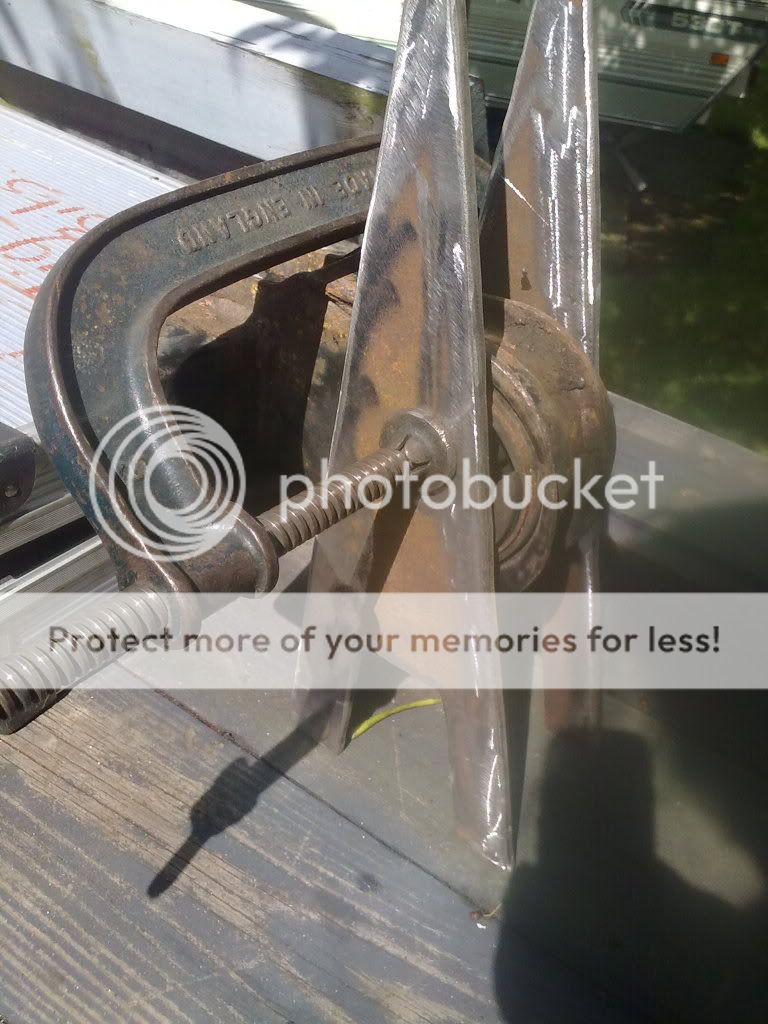
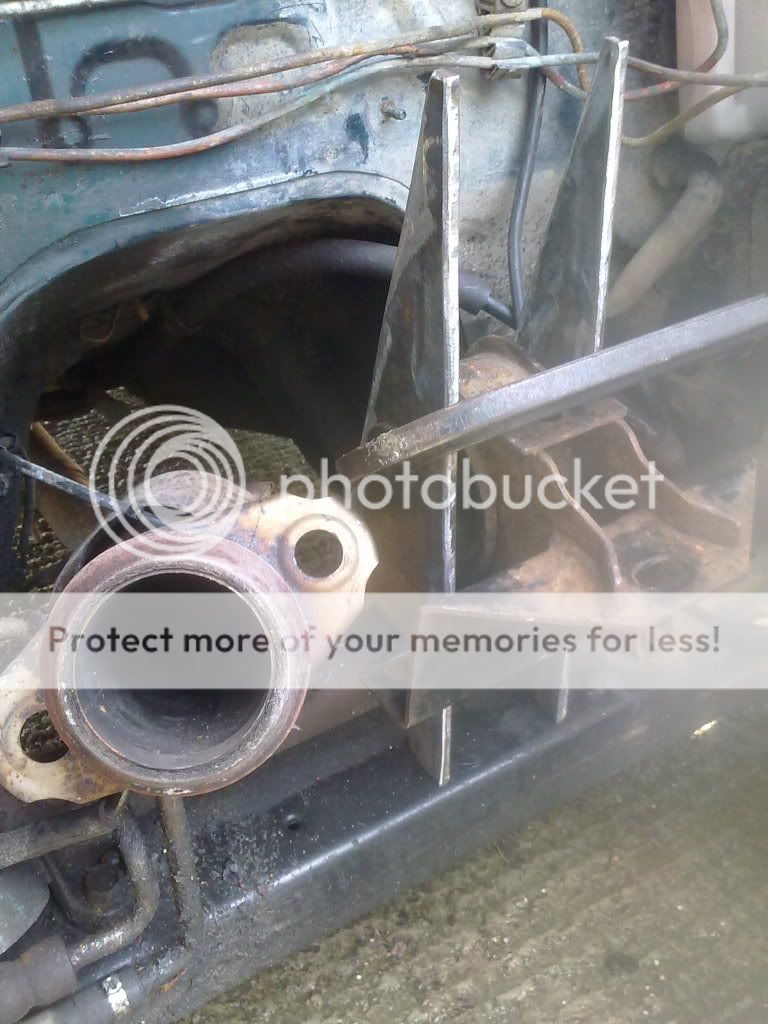
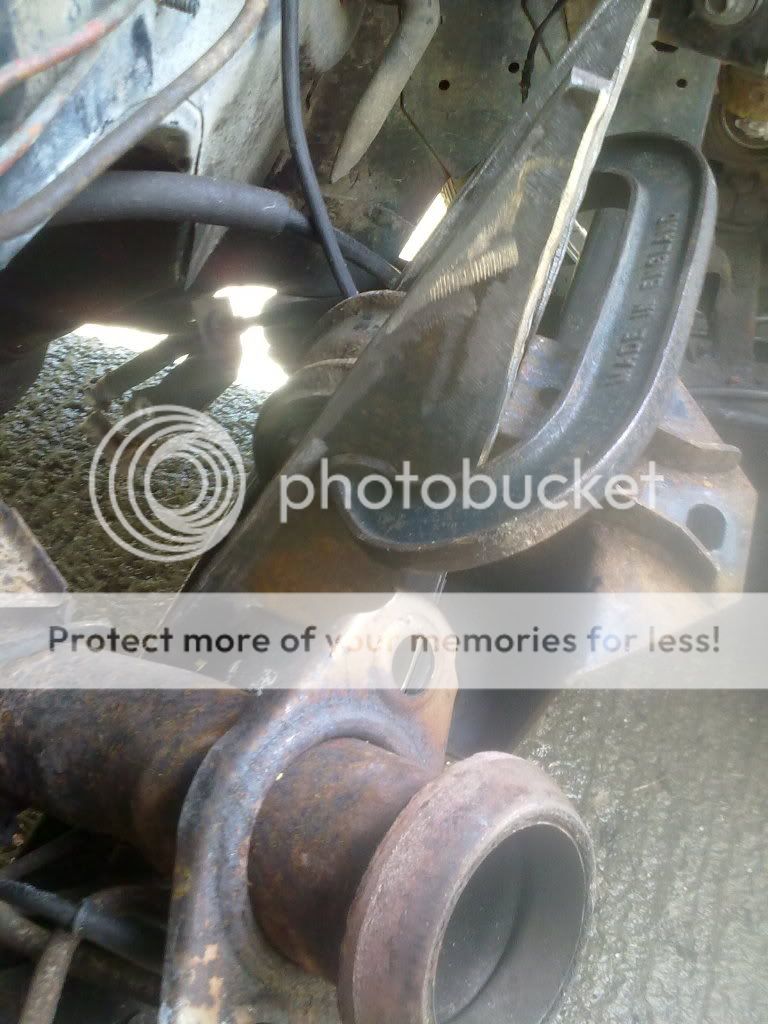
A little tweaking on the mounts hole for the insert.
You can see in both the above and below picture the old one was just
way too thin a metal and strength compared to mine.
It is placed where it will be welded and there will be other peices to
strengthen it further.
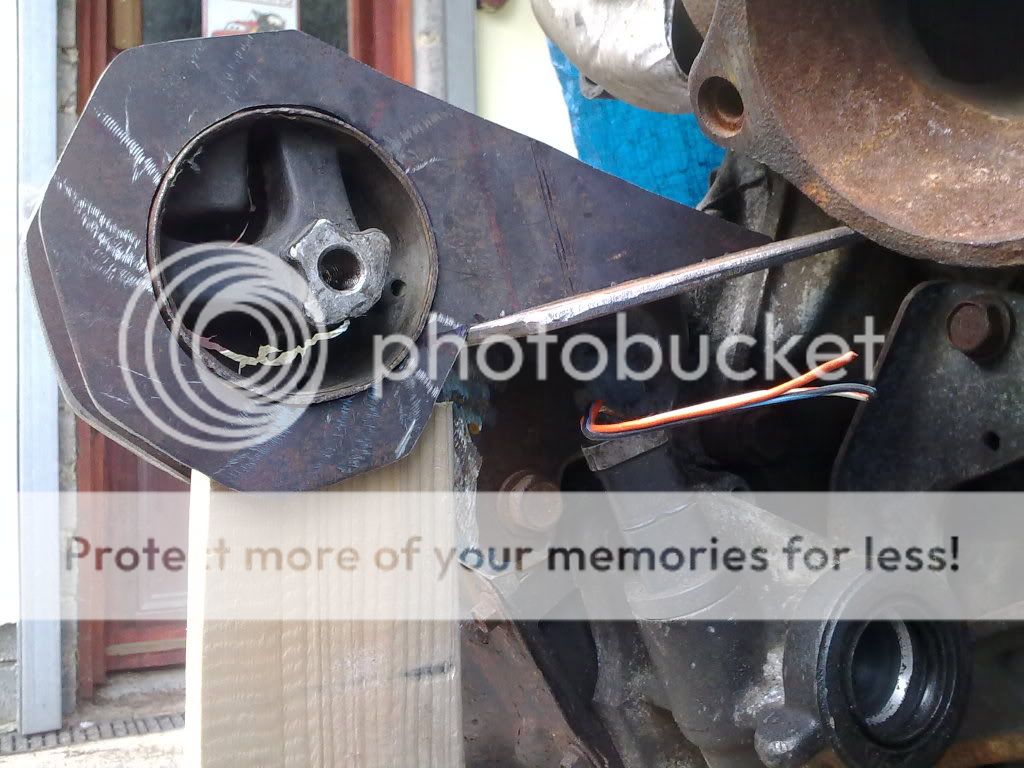
Although that industrial dremmial did it's job well!!
I will not be wanting to use it again for a LOOONGGGG while!!
I will be picking flexs of metal out of my hands with tweezers for
weeks!!
You can see in both the above and below picture the old one was just
way too thin a metal and strength compared to mine.
It is placed where it will be welded and there will be other peices to
strengthen it further.
Although that industrial dremmial did it's job well!!
I will not be wanting to use it again for a LOOONGGGG while!!
I will be picking flexs of metal out of my hands with tweezers for
weeks!!
I'm Diabetic,& disabled BUT!! NOT DEAD YET!!
Re: V6 into a RHD Chrysler Neon mk1
got most of the little fiddly bits cut today.
All the bits that are to be welded into brace the larger bits.
Dad has said he will do the welding tomorrow weather permitting.
All the bits that are to be welded into brace the larger bits.
Dad has said he will do the welding tomorrow weather permitting.
I'm Diabetic,& disabled BUT!! NOT DEAD YET!!