Page 7 of 43
Re: kevin s's blog
Posted: Sat Jan 04, 2014 9:56 pm
by TerryG
That looks like a LOT of K-Rust.
On the plus side you found a really useful box poking out of the floor pan while you were under there

Re: kevin s's blog
Posted: Sat Jan 04, 2014 11:16 pm
by kstrutt1
It's a product called aquasteel, apparantly it is used on oil rigs etc, seems to work really well and leaves a surface the paint sticks to really well, only problem is it takes a while to dry in this weather.
I bought 1 litre but only seem to have used a tiny amount of it so far, I am sure It will all get used eventually on one of the cars.
Re: kevin s's blog
Posted: Sun Jan 05, 2014 12:00 am
by JPB

Oil rigs eh? The sis-in-law beast is one of very few people in this world who makes her living and keeps up her extravagant lifestyle by repairing the areas of those that are under the water and trust me when I say that they use a product from the Shell Ensis range to protect her freshly stuck together bits of steel. She hadn't used that stuff but has heard about its maker claiming that it's used in the offshore industry. I won't repeat the language she used when I showed her that they're still at it!
I don't doubt that it'll be at least as effective as any similar product on steel that doesn't have to be welded together underwater and then spend its entire life there but the oil rig connection is, apparently, the stuff of pure myth.

Re: kevin s's blog
Posted: Sun Jan 05, 2014 8:32 pm
by kstrutt1
I did wonder there didn't seem to be many actual examples quoted, to be fair it doesent claim it can be used below water as you describe, it certainly seems to work better than the stuff from halfords though.
They seem to be selling 25 litre drums to somebody so I guess some commercial outfit must be using it.
Kevin
Re: kevin s's blog
Posted: Sun Jan 05, 2014 11:31 pm
by JPB
kstrutt1 wrote:it certainly seems to work better than the stuff from halfords though.
And that is ultimately what matters!

Halfords do sell some of the better known brands but they can't compete on price. I used a Kurust product on clean steel when I stripped all of the original paint from the sills of the most recent Dolomite, it left a very similar, blue finish to your product and was, the last time I heard from the car's current keeper, still doing its job as no surface rust has reappeared through the black top coats on an o/e spec red epoxy primer.
Keep up the good work with your fleet, that Minor was probably only borderline savable when you started and I've seen less rusty ones killed for spares. Now it's going to be as strong as its makers intended and should see many years of further use. Everyone loves a Minor.

Even Marmite can be obtained in massive drums if you ask the right people.

Re: kevin s's blog
Posted: Mon Jan 06, 2014 9:27 am
by tractorman
I got some "expensive" stuff from Frosts some years ago when I sorted my trailer (I think it was about ten years ago). I won't say the trailer chassis is perfect, but the only place that has rusted is where I couldn't get in to brush it on. It was similar to Kurust, but a lot thicker, almost like PVA glue!
I did an experiment with Kurust on the big tractor's mudguards: painted it on without any rust removal and left it with no other protection. In our salty atmosphere, it lasted for about two or three years and there are still traces six years (I think) later! The tractor has only been undercover for the six weeks or so (when I eventually got the shed roof on) but, as there isn't a door, the mudguards are still exposed to the elements. Unfortunately, circumstances keep putting it down the list for repair/restoration and even servicing!
Re: kevin s's blog
Posted: Sat Jan 11, 2014 10:49 pm
by kstrutt1
This stuff sounds very much like thestuff you describe, it is very much like a slightly thinner PVA.
Re: kevin s's blog
Posted: Sat Jan 18, 2014 8:39 pm
by kstrutt1
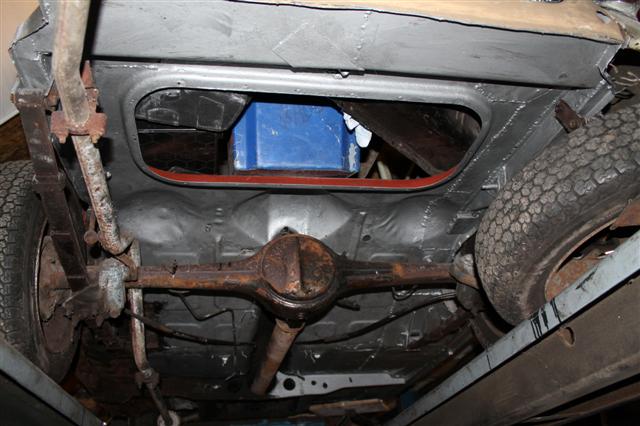
over the last week I have fitted the centre X member and painted the underside of the minor , which makes it a much nicer place to work.
- IMG_1371 (Small).JPG (70.33 KiB) Viewed 2357 times
.
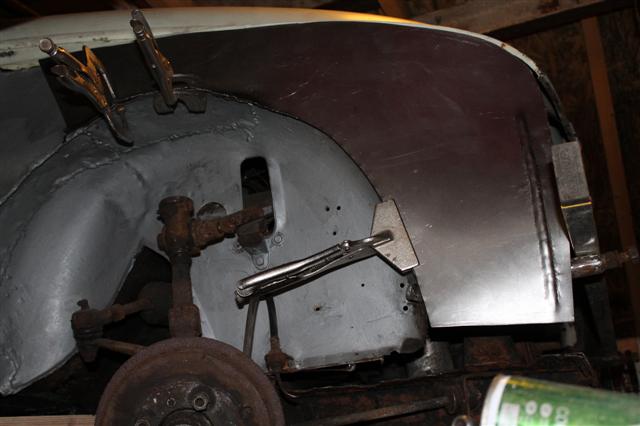
Also cut the remains of the inner wing off and started making a new one.
- IMG_1367 (Small).JPG (52.74 KiB) Viewed 2357 times
Also cut the very rusty and extensively patched front end of the chassis rail out and trial fitted the steel tube I plan to use to replace it with. THe tube fits neaty inside the existing rail, but being thicker will alleviate the rust traps in the double skinning of the original one.

- PICT0264 (Small).JPG (87.27 KiB) Viewed 2357 times

- PICT0260 (Small).JPG (80.76 KiB) Viewed 2357 times
Re: kevin s's blog
Posted: Sat Jan 18, 2014 8:58 pm
by kstrutt1
Today has been taken up with some problems on the Land rover, the issues were noise and play in the waterpump, an air leak on the inlet and further attempts to improve the heater.
firsty I changed the waterpump, all went well until one of the bottom bolts sheared off.

- PICT0253 (Small).JPG (78.57 KiB) Viewed 2355 times
Fortunately the rest came undone and the pump came off without too much of a struggle, a few taps on the end of the remains with my favourite X mas present and some mole grips got the remains of the bolt out. I then took a new bolt out of an old engine I had lying around.

- PICT0254 (Small).JPG (74.23 KiB) Viewed 2355 times
The new pump then went back on easily enough I had to use instant gasket as the one in the box had been damaged in shipping though.
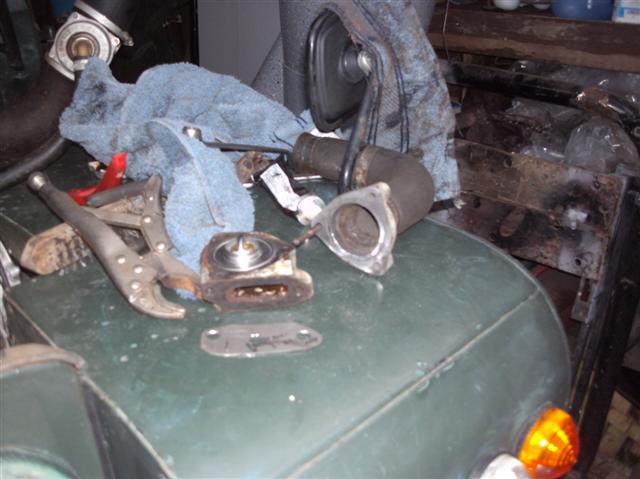
Next up was the improvements, I wanted to fit a 88c thermostat but you can't get these in the original shrouded design, so I changed the cooling sytem to something like the defender which uses a conventional thermostat. I blanked off most of the bypass except for a 3/8 hole using a steel plate and then modified the thermostat housing by presssing a piece of tube inside, the thermostat also had to have a small bleed hole drilled in it. It also has LPG which is permamant bypass flow in the same way the defnder has a permanant flow heater
- PICT0258 (Small).JPG (78.92 KiB) Viewed 2355 times
.
FInally the air leak turned out to be between the manifold and carb adaptor, I removed it, made a new gasket and re-fitted.
Re: kevin s's blog
Posted: Sun Jan 26, 2014 7:46 pm
by kstrutt1
Got a few hours on the cars yesterday, fitted some new flooring to the rear of the landie, it was an offcut that was being thrown away, while I was underneath poking holes through I also found one of the exhaust hangers had failed so I had to replace that as well.

- BILD0057.JPG (102.93 KiB) Viewed 2329 times
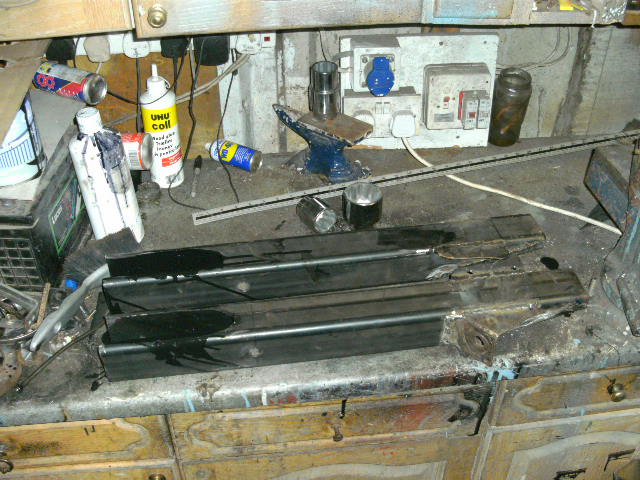
This did not leave much time for the minor, I have finished fabricating the chassis rails though, the only thing left to do is weld the lh tie bar bracket on but I dont want to cut the lh side around to remove it until I have used it to line up the rh side. I have also painted the inside by tipping half a tin in and swilling it around, you can see where I tipped it out in the photos.
- BILD1400.JPG (122.52 KiB) Viewed 2329 times

- BILD1403.JPG (116.71 KiB) Viewed 2329 times
I aslo made a template for the tie panels, once these are made I can put the rh side together.
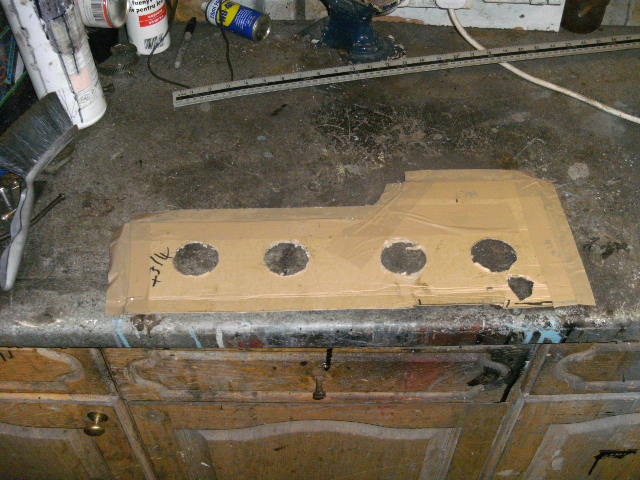
- BILD1399.JPG (108.61 KiB) Viewed 2329 times
I have also been on ebay again, we now have a set of the earlier rear lights which we prefer and for the TR I manged to get a bumper corner to replace the one I smashed squeezing it in the garage.
