Time for another massive and confusing update!
Remeber that water temperature gauge I bought at Amberly? Here it is, all nice and shiny with it's new friend! I mentioned to a mate that the new engine had an attachment for an oil pressure gauge - "Hang on one moment" - and gave me this!


And they shall go here


Gearbox out!
It's covered in shite; god knows how it got this dirty! I also need a new rubber bobbin 'cos one's split... thought it was odd that the gearbox could cant over 90 degrees....


Some random photos of the car. Sorting out my "engine issue" on Monday. Blasted thing; I'm getting cheesed off with the whole "It's not working thing". Plus mum insists that I sell it (which would of course be at a rather epic lose right now) and "buy another, better one; and treat this one as 'expirience'"... Not totally sure she gets cars - but then again she had five 2 door MkI Escorts in one year...


Lovely new gearbox mountings are on from Moss too - £9 including postage - local motor place wanted £20!

My washer pump is made, like all modern things that aren't meant to last very long, out of plastic. I could deal with it only being held on with one screw. I was kindof ok with it only being held in by hope when the other side topped itself. But I couldn't really agree with it's mood when it decided to snap off it's connector!
So I bought a second hand one. This; like the engine (from the same place) didn't fit; so I took it back to swap with one that did. On close inspection the new new one is crap. No nice way of saying it; the metal's just fallen through into the bushes and it's fuxked.


So... anyone got one they don't want?

Also; I've spruced up my gearbox mounting plate

Aaaaaanyway; it runs; I can get all gears; everything that worked before this happened works now (bar the radio; but that's because it's not fitted

).
So: Bonnet on

Then fill up the radiator and reconnect the headlamps (rather hard as the bloc had rusted pretty much solid

).

Then the gearbox tunnel (easy) piece of carpet (piece of cake) then the radio holding bit (which holds up the dashboard (which has sagged because I drove it thirty feet

)) which was REALLY HARD (OOOOHHHH MAAATTTRRROOONNNN!!!!!).

But seriously what a bastard of a job. And it ripped the carpet. And only one of the four bolts is actually in at the bottom
So I moved onto the grill and underriders - which; inexplicably; is held on with two 7/16ths bolts and two 10mm bolts...

And fitted the numberplate - which is totally straight; and as level as my ride height


Also; whilst looking (with great anger) at the gearbox a frame thingy I shorted a wire with a spanner; in order to check if my "FASTEN BELT" light works - joy of joys it does!

And fitted all the vinyl spongy bits and a seat; then went for a spin

And stopped at the local garage (which was, oddly, open and being run by a rather attractive blonde) to investigate the odd noise I kept getting when I let off the throttle

At this point it also went from running ok above 800rpm to not idling at all; no matter what choke or throttle it was giving it just stutters and doesn't do anything below 1,500rpm; then suddenly picks up and shoots off; so you release the throttle in an attempt to bring it back down again and you're below 1,500rpm and it won't pick up again and tends to stall. Good thing I stole the Toyota's battery or I would have been very stuffed!
Willy's washer pump fitted up, big thanks for that!


Just kind of casually fitted the Spit's ancient battery to the Toyota; hopefully this will work as it's used everyday?

So the correct speaker wires are plugged in now... and the random one next to it is removed
Everything looks original behind; so I shalln't touch it


And then I sorted out the carpet at the back; some previous owner had glued (badly) some new, non-moulded carpet behind the original, molded carpet (and presumably lost the bit of carpet that goes on the shelf too); so I carefully ripped that out; then put the (free and lovely) bit of carpet over the shelf; carfully tucking in my floor carpet; then I fitted the back panel (with the properly wired speakers) and screwed it all down


And the spare wire for the third speaker; so now my radio is stereo instead of mono but with the wires for stereo

(Note also my working radio!
)


So the brakes on the passenger side were clunking; having checked the whole thing over (all fine and pretty new) I decided that it might be the ancient and crumbly flexi hose... which, as ever, took far longer than it should have
Having finally undone it at the bottom; I decided this was definitely a good idea - loads of crumbly rubber came out
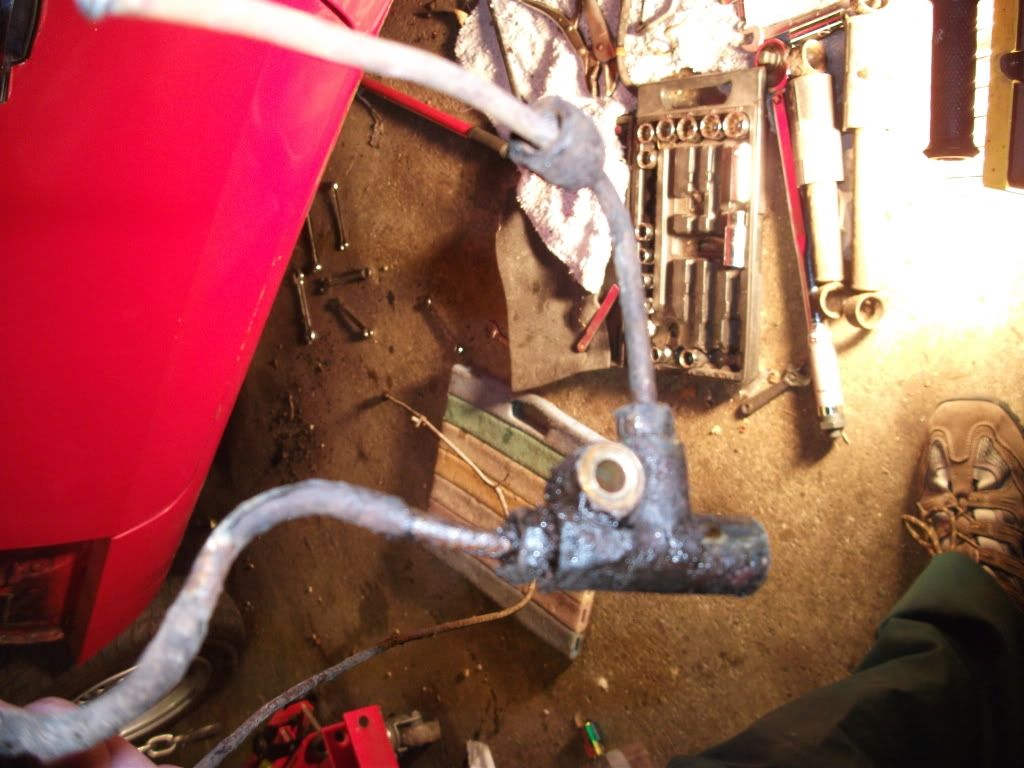
And the copper hose from the flexi to the slave cylinder has been worn against; so I'll replace that too. And, even better (lol

) the
steel pipe from the three way joint to the flexi is not only really rusty but, worse than that; the whole pipe twisted one whole turn, instead of just the connection!


So the car currently looks like this:

So, since I finally worked out where it was; I topped up the diff with EP90 - took about 500ml (might explain it's noise!) and painted the top up thing white to make it more obvious

Bit more work done tonight; need to buy some more lights - the one I've got needs to go back to it's owner now he's back from holiday!
Anyway; mild lack of floor here; no flash and underlighting (thanks to light mentioned above) shows it rather well...

Hmm...

So I cunningly hid it with some carpet...

Checked the seats weren't leaking too much....

And fitted a passenger seat

Coming for a ride Josh?
Then I got some soapy water and some 1200 wet&dry, and set about my paintwork on the rear wings - far, far easier than I expected, a real difference took about five minutes and it feels so, so much better!


Now I'll just need to borrow a mop and some G3 shizzle
I'll start off with a
cool photo of the Spit smoking, just after it's been turned off:

Anyway, on with the current battle, the original dated as November 1977 rubber flexi hose (which sheds loads of rubber every time I bleed the brakes from that cylinder) I thought would be a quick, easy and sensible job to do. I was wrong. But never mind...
I started by removing the (scored against something) copper hose, and bending a nice shiny new one to the same shape (but kunifer this time
). This went well, and the new one's really shiny (
), and screws on nicely to the new flexi hose:
Spot the difference?


However, at the top of the flexi hose it's connected to a bracket... to which the (original and steel!) metal pipe has rusted itself to both the flexi hose and the bracket... metal hose off (and that needs replacing as it twisted as I undid it... and is also stuck in that little three way union (
)), and the flexi hose was stuck on

Cut off the remanents of the rusted on flexi hose flush with the bracket, as suggested by some Triumphers... yet it STILL WON'T BUDGE!!!!


So that's been cut flush on both sides (yey for junior hack saws!), and then drilled through a bit... till I realised you can't get straight into the hole (beaver?) with the shock on. And the shocks were an MoT offense, so I took opportunity to whip them off and replace them with new ones
About my super-cheap shock-absorbers!

The old dampers are the original ones, even down to "Girling" being stamped into the semi-dead rubber bushes! So, out with the old, in with the new - £20 off ebay, including a new set of bushes! (And of course every says they're awful,
but: they're really, really cheap, they can't be worse than what's on there, and it's £20 for two instead of £120 for one squeaky koni or whatever (and I know they squeak, at some point someone fitted bright yellow spax or konis to the jag, squeaks over bumps

).

Which pretty much brings you up to now, one shock is on, the bracket needs drilling and the union needs to be removed so that the local classic car garage that opened earlier this year and is in cyclable distance (YEY!) can sort it out
Sorry if any of these are sideways, the laptop's on it's way out and under no circumstances am I buying a new one, so it's going to last! STOP OVERHEATING! Thank you!
Anyway, whilst doing that inevitably bad repair to the honda, I whipped off the two rear shocks and popped one new one on
Typical Spitfire pose, couldn't resist!

Nice rear

Ready to go on; it's rather tight!

Other side, old one popped off after dad attacked it. Useful occasionally, dad

Spot the difference?

And hooked on

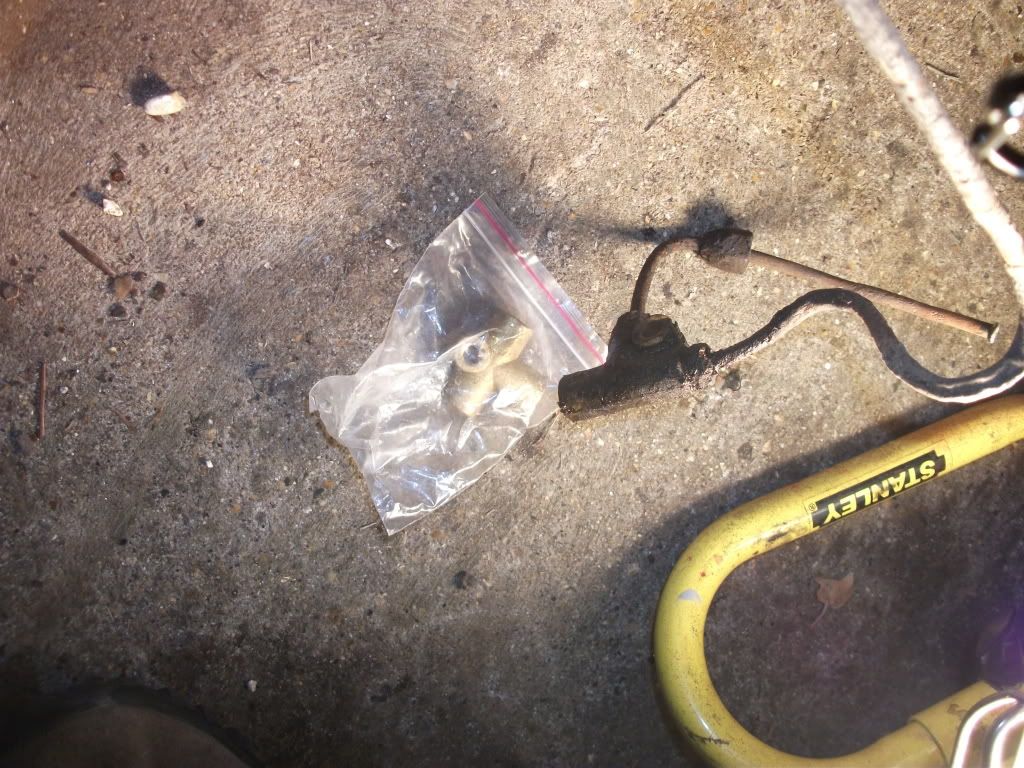
Also fitting a pair of HS4s to a mate Mini tomorrow, along with his mental exhaust manifold and side-exit...! (He's jealous of my car's noise... I'm jealous of his car's mechanical reliability!). Anyway, nice bit of success today, got the brake union off, along with that little bit of pipe that needs replacing... and a slightly longer bit of pipe that also needs replacing!
Lovely union....
Cruddy little clip... need to get some more!

Might end up replacing this aswell
New union's different! feck
Drilled through the bracket, didn't thing it was going to work, then spotted a little wiggle in it - stop drilling, whipped out the hammer and out it came!

Then more good news came when the shock absorber slipped on and everything was good!

Check it out! Look what £20 gets you

Also saw a 1938 Bently whilst there
All on; tightened and clipped up


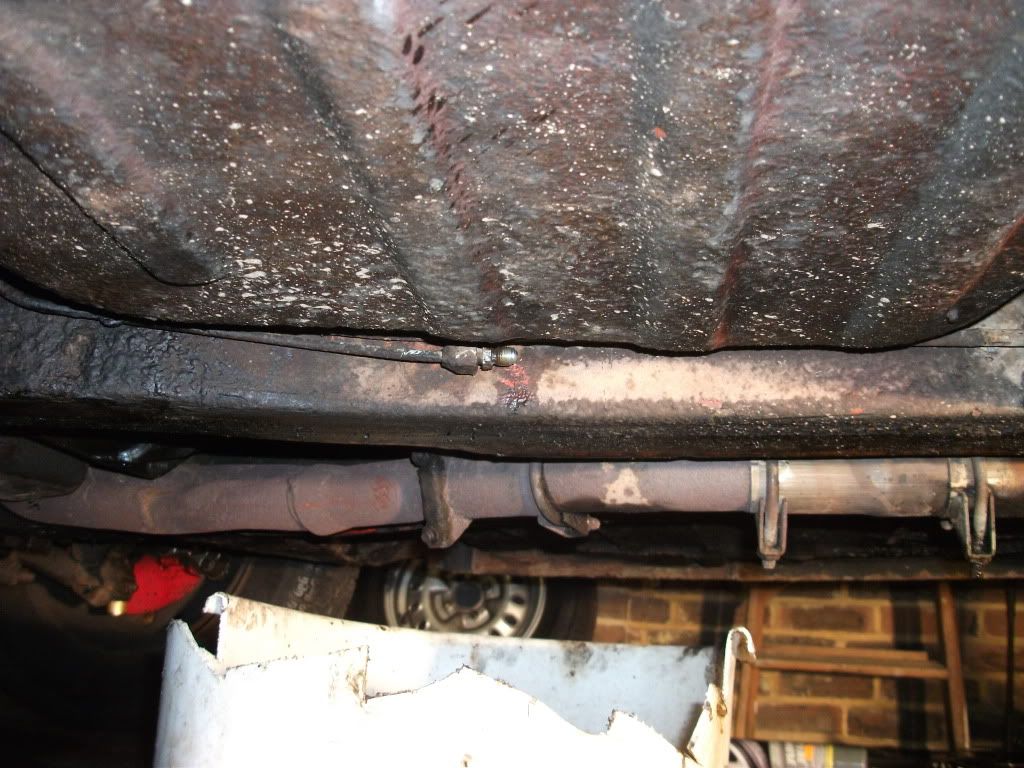
Slightly worried about how well the long brake line is held onto the chassis; it looks secure but I don't trust it!
Brakes all bled; no leaks, nice, clean fluid coming out, full of DOT 4. Firm pedal too
Found a few (unused) clips fitted to the other chassis rail; I assume for the US market; so I popped them off and I'll fit them too for a bit of reassurance! Will also top up the waxoyl levels into the hole the clip came out of :p
I've been given a brand new set of carpets, so that's ready to fit (yey for the TSSC and it's lovely members!
) at some stage, after a good clean (they've come out of a car he was scrapping; that had been fitted with £250 worth of carpets for no apparent reason!). Welding should happen wednesday/thursday; hardtop needs to go on too
Aaron
 (Note also my working radio!


