Page 3 of 20
Re: In the workshop at present
Posted: Thu Dec 08, 2016 10:09 am
by Grumpy Northener
Nearside inner & outer sill completed
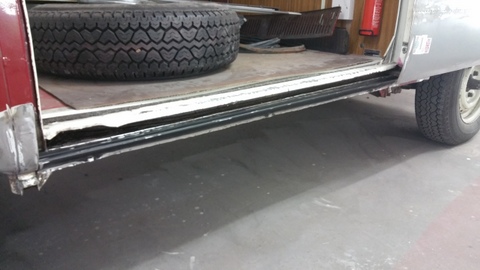
- 20161207_155427.jpg (51.28 KiB) Viewed 3846 times

- 20161207_155446.jpg (43.65 KiB) Viewed 3846 times
Re: In the workshop at present
Posted: Thu Dec 08, 2016 10:12 am
by Grumpy Northener
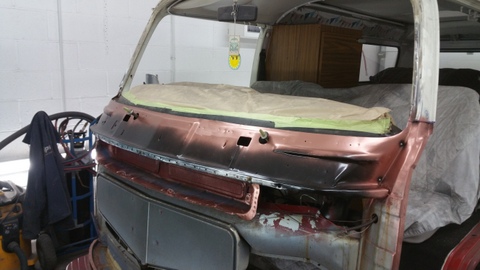
These old things really do like to rust, don't they?
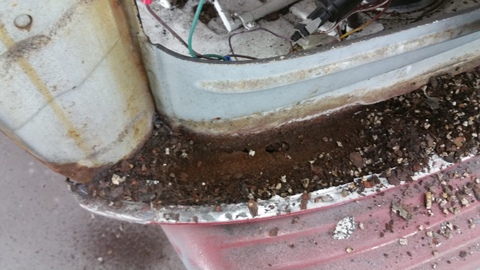
Well funny you should say - New front panel arrived today so I cut & removed the old one to find this can of rust worms
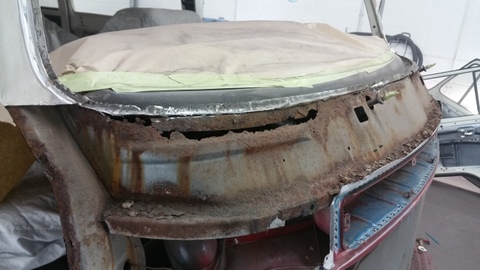
- 20161207_180633.jpg (59.63 KiB) Viewed 3845 times
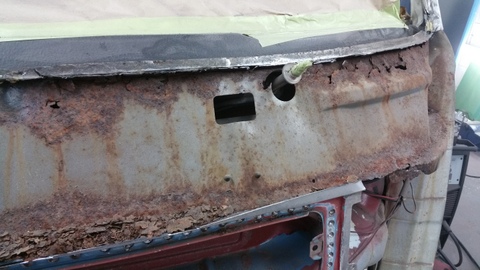
- 20161207_180648.jpg (66.06 KiB) Viewed 3845 times
- 20161207_180657.jpg (70.83 KiB) Viewed 3845 times
Re: In the workshop at present
Posted: Thu Dec 08, 2016 10:21 am
by Grumpy Northener
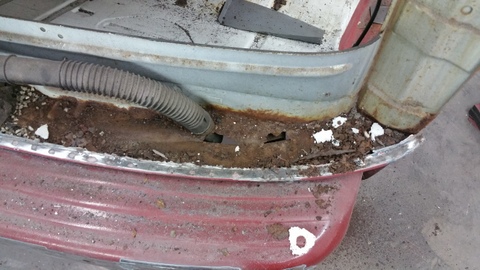
- 20161207_180703.jpg (70.17 KiB) Viewed 3845 times
- 20161207_183226.jpg (57.39 KiB) Viewed 3845 times
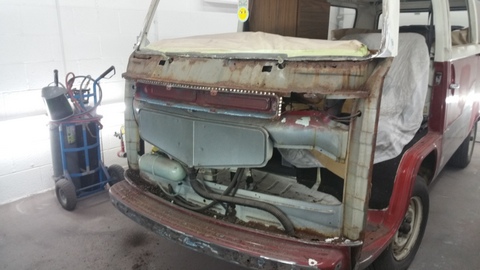
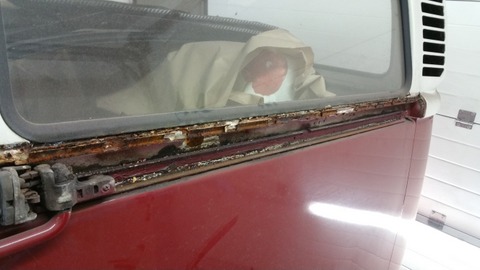
One hell of a good example as to why you should never dismiss / leave a leaking windscreen to fester or put off as one those jobs to do later - the front inner panel requires replacement along with the screen retaining edge - I will probably have to remove the dashboard to access / facilitate the repair - the lower sections that abut to the cab floor are just flat so I can piece these in from sheet steel - fortunately the inner panel & retaining edge are available as replacements but by the time these and the front panel are fitted there is not much change out of £800 - £1000 - all for the sake of a having a windscreen resealed - an expense of probably £25 to £50 at the most
Re: In the workshop at present
Posted: Thu Dec 08, 2016 12:20 pm
by vulgalour
Another great example of why shiny paint doesn't always mean solid bodywork too! That' rather a lot more rot than it looked like could be hiding in there.
Re: In the workshop at present
Posted: Sun Dec 11, 2016 10:49 pm
by Grumpy Northener
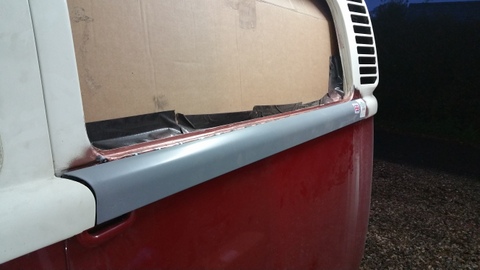
So whilst waiting for delivery of the inner front panel I tackled the side trim retaining rail on the nearside rear wing
- 20161209_110643_001.jpg (35.29 KiB) Viewed 3811 times
the rail was totally rotten - so window out and rail removed
- 20161209_162140.jpg (52.13 KiB) Viewed 3811 times
New rail welded in
- 20161209_162255.jpg (45.42 KiB) Viewed 3811 times
new side trim (old one was again rotten) trailed for panel fit
Re: In the workshop at present
Posted: Sun Dec 11, 2016 11:12 pm
by Grumpy Northener
Back to the front panel

- 20161209_182044.jpg (52.02 KiB) Viewed 3809 times
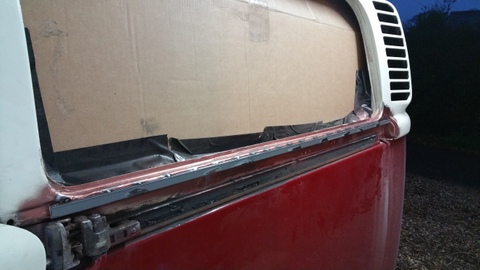
some clown who had undertook a previous repair thought that applying a thick bead of sealer between the inside of the screen rubber and the dash panel would resolve the water ingress issues


- 20161210_113158.jpg (48.9 KiB) Viewed 3809 times
Annoyingly the new inner front panel comes without the dash mounting brackets and these have to be recovered - cleaned up and spot welded to the new panel - I say annoyingly has this would add all of £1.50 to the price of the panel if was done at the factory - it's bad enough that a non over sized / non over complicated steel pressing is £150 in the first place
- 20161210_123137.jpg (56.57 KiB) Viewed 3809 times
tacked in and ready for trial fitting of the outer panel
Re: In the workshop at present
Posted: Sun Dec 11, 2016 11:31 pm
by Grumpy Northener
- 20161211_141856_001.jpg (40.96 KiB) Viewed 3809 times
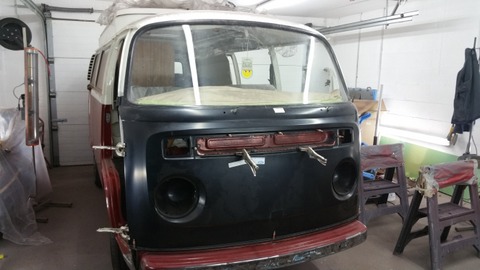
Front panel trial fitted / clamped in place - importantly -the windscreen was refitted to check the aperture - hell of a fight to get the panel fitted around the A pillars - screen removed and both panels fully welded - welds dressed back and just minor finishing required tomorrow before I fit the lower closing panels to the bottom of the A pillars

- 20161211_203013.jpg (54.58 KiB) Viewed 3809 times
Re: In the workshop at present
Posted: Mon Dec 12, 2016 12:25 am
by vulgalour
Once again, a shame that your work is all hidden when you're done. What was panel alignment like on these? It doesn't look like you had too much of a fight in the pictures.
Re: In the workshop at present
Posted: Mon Dec 12, 2016 2:07 pm
by Grumpy Northener
Fitting the front panel was a swine - it's way too narrow in width - I had to open each side up and work the A posts back to get it to slip over - net result is that the fact that you can now drive a bus through the door gaps and I am going to have to put a few hours remedial work on the aperture gapping to get them to look anything like what they should - they were not brilliant before I started and the doors have been replaced with pattern replacements at some stage in the vans life which are not a brilliant fit - none the less I will still have to do something about the front aperture gaps - I will post a couple of images up when I get on to them - I have an old trick in mind for sorting them

Re: In the workshop at present
Posted: Mon Dec 12, 2016 11:12 pm
by JPB
Chris, a lesser man would have set the damned thing on fire by now!

Your patience is impressive.
I'm looking forward to seeing your approach to adding metal to door edges. Does the work involve building up the leading or trailing edge of a door with welding rods. Or maybe with human bones carved out of the people who sign off these ill-fitting modern repro parts as fit for purpose.