The ICS emulator is fairly easy to use:
http://pocketnow.com/android/ice-cream- ... r-yourself
I have it running to test apps for the firm i work for (along with some real android devices) I have never tried using bluetooth with it though.
My normal OBDII reader is an OLD bluefin for my focus which comes with a code reader and clearer built in.
If you can clear the codes (after you have fixed the fault) your check engine light should go out.
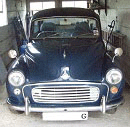
V6 into a RHD Chrysler Neon mk1
Re: V6 into a RHD Chrysler Neon mk1
Understeer: when you hit the wall with the front of the car.
Oversteer: when you hit the wall with the back of the car.
Horsepower: how fast you hit the wall.
Torque: how far you take the wall with you.
Oversteer: when you hit the wall with the back of the car.
Horsepower: how fast you hit the wall.
Torque: how far you take the wall with you.

Re: V6 into a RHD Chrysler Neon mk1
When mother had me out shopping (before she got the volvo) she
had ordered replacement fire bricks for the wood burner in the front
room, and we had to collect them from the industrial estate next to
large Tescos on the out skirts of Durham.
Just opposite the the fire place centre was a garage that had a sign,
which stated that they had a dyno. I recently remembered about it
when looking through some posts on Neons.org about some peoples
runs on the dynos .
A quick google, and I sent a quote request from their website, about
a price to put the neon on their Rolling Road Dyno. I got a reply.
TurboPACS Ltd
Unit 4 Dragonville Industrial Park
Dragon Lane
Durham, DH1 2XJ
Tel: 0191 386 3422
http://www.turbopacs.com
So after the MOT test I will pop up to Durham, and put har on the
dyno. This is to see if there is anything I have cocked up with,
which wouldn't fail the car on an MOT test, but could cause me
trouble down the line. And before I go gallivanting around the
country side to car shows and meets.
had ordered replacement fire bricks for the wood burner in the front
room, and we had to collect them from the industrial estate next to
large Tescos on the out skirts of Durham.
Just opposite the the fire place centre was a garage that had a sign,
which stated that they had a dyno. I recently remembered about it
when looking through some posts on Neons.org about some peoples
runs on the dynos .
A quick google, and I sent a quote request from their website, about
a price to put the neon on their Rolling Road Dyno. I got a reply.
Their details.Hi
Good to hear from you.
A power run on the Dyno is £45 plus vat.
Hope that this helps,
Kind regards
Marc Dellapina
TurboPACS Ltd
Unit 4 Dragonville Industrial Park
Dragon Lane
Durham, DH1 2XJ
Tel: 0191 386 3422
http://www.turbopacs.com
So after the MOT test I will pop up to Durham, and put har on the
dyno. This is to see if there is anything I have cocked up with,
which wouldn't fail the car on an MOT test, but could cause me
trouble down the line. And before I go gallivanting around the
country side to car shows and meets.
I'm Diabetic,& disabled BUT!! NOT DEAD YET!!
Re: V6 into a RHD Chrysler Neon mk1
Just found some photos of the last time I was out in the
neon for just a drive without maps or sat nav's and 2 full
tanks of fuel. So these are about 1.5 to 2 years old!
The pictures are of the North York Moors and Scarborough.
http://s587.photobucket.com/albums/ss31 ... he%20neon/
Just thought I'd post something as I've done nothing on
the car at the moment.
I'm Diabetic,& disabled BUT!! NOT DEAD YET!!
Re: V6 into a RHD Chrysler Neon mk1
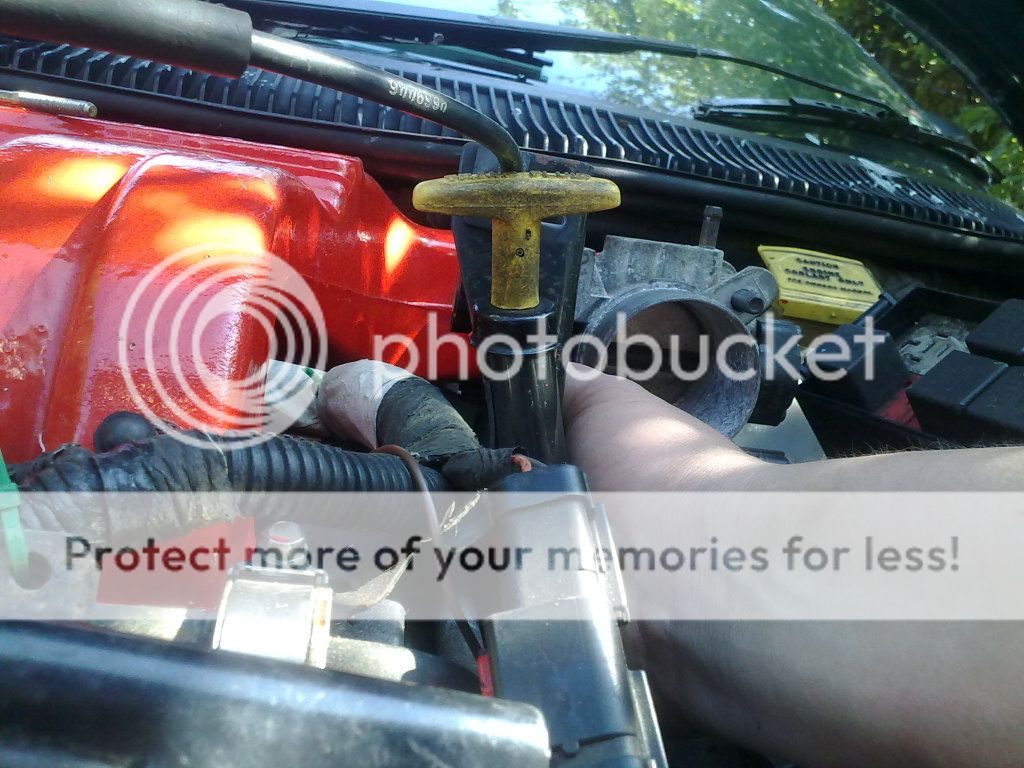
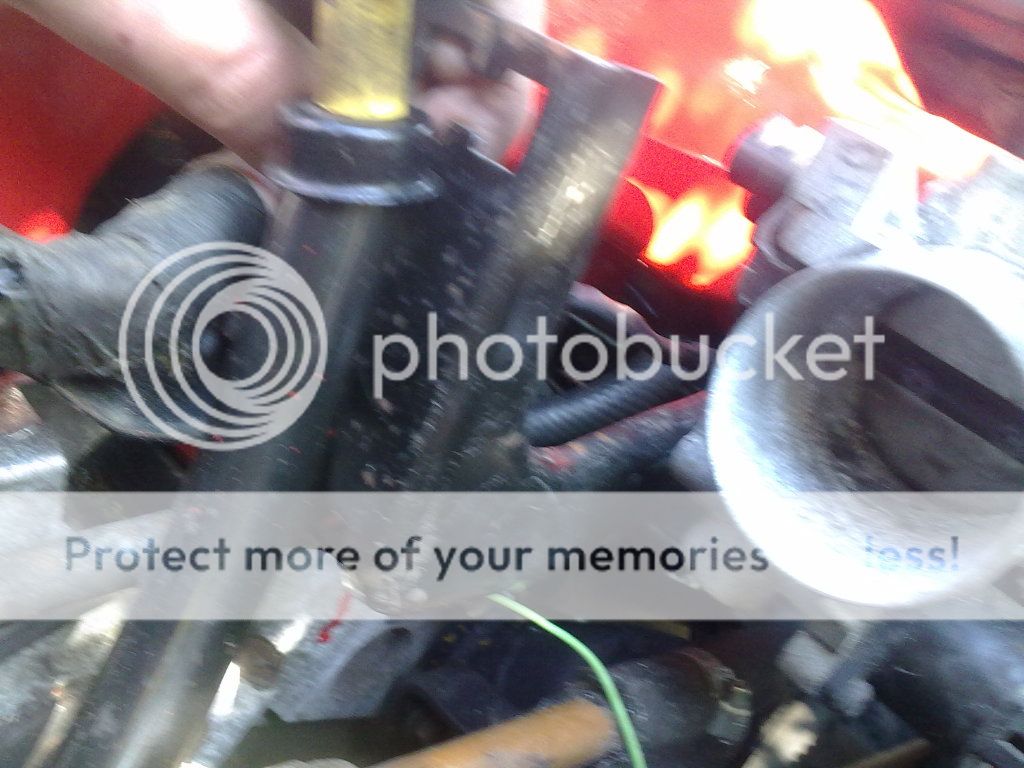
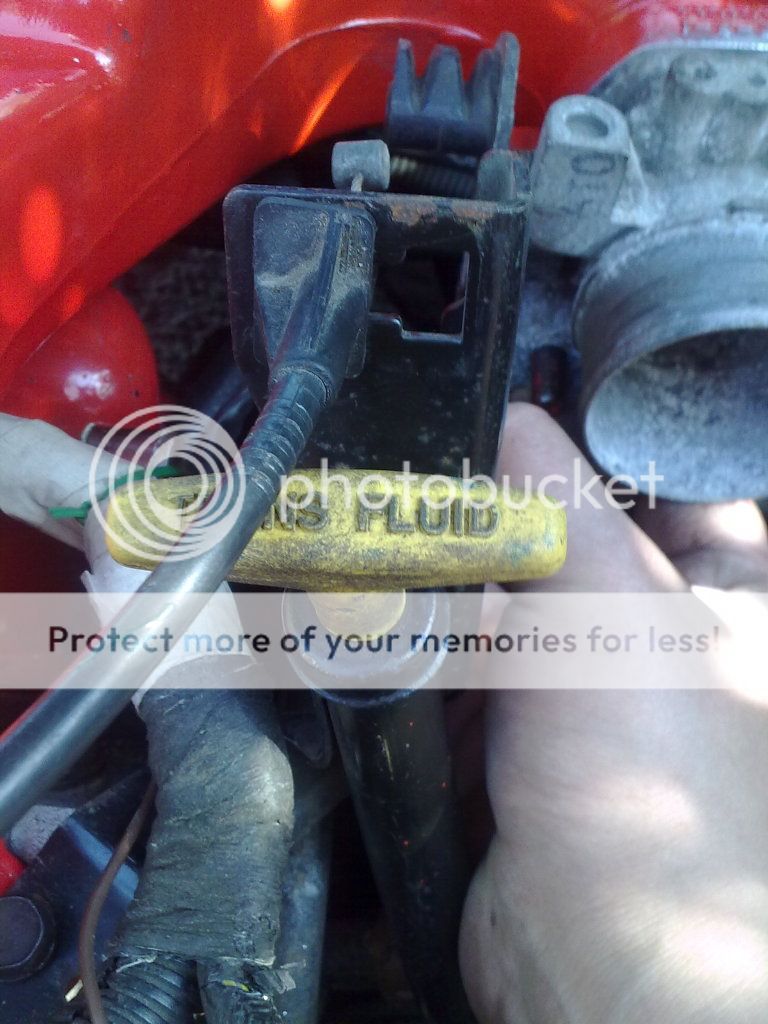
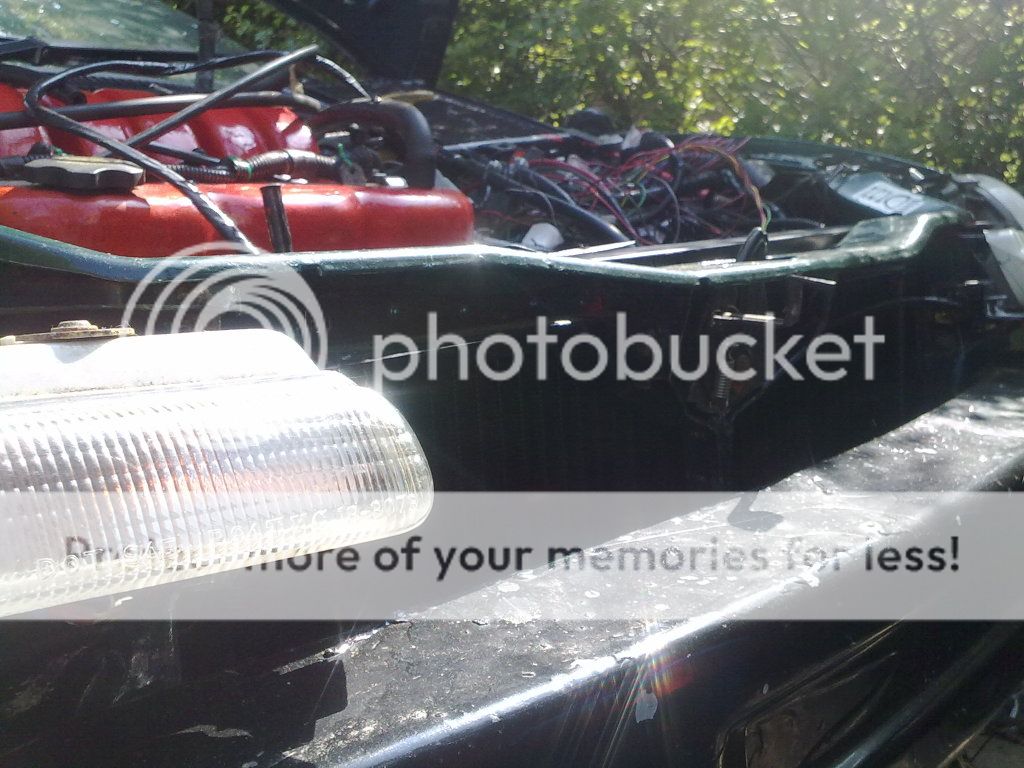
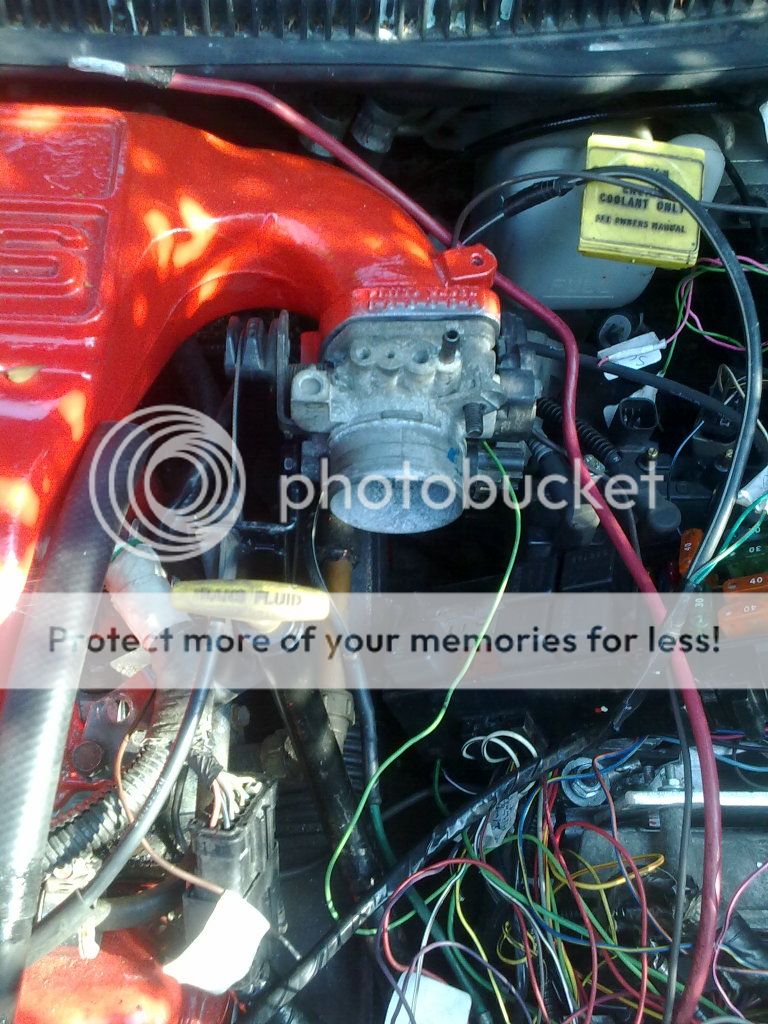
Yes work done on Christine!!
Brake vacuum hose connected, all none used vacuum pipe connections plugged
Map sensor plugged in and intake manifold fitted with gasket.
I was going to run the breather pipe for the rear rocker cover under the intake
manifold, but the pipe was too thick, so I'm running it behind. And it will join up
to a breather pipe from the front rocker cover and go to it's own little filter and
not be connected to the intake manifold.

It's a bit of a squeeze but I can get my hand around the back of the engine under
the intake manifold. So I won't need to take the intake manifold off to put the
spark plug wires on.
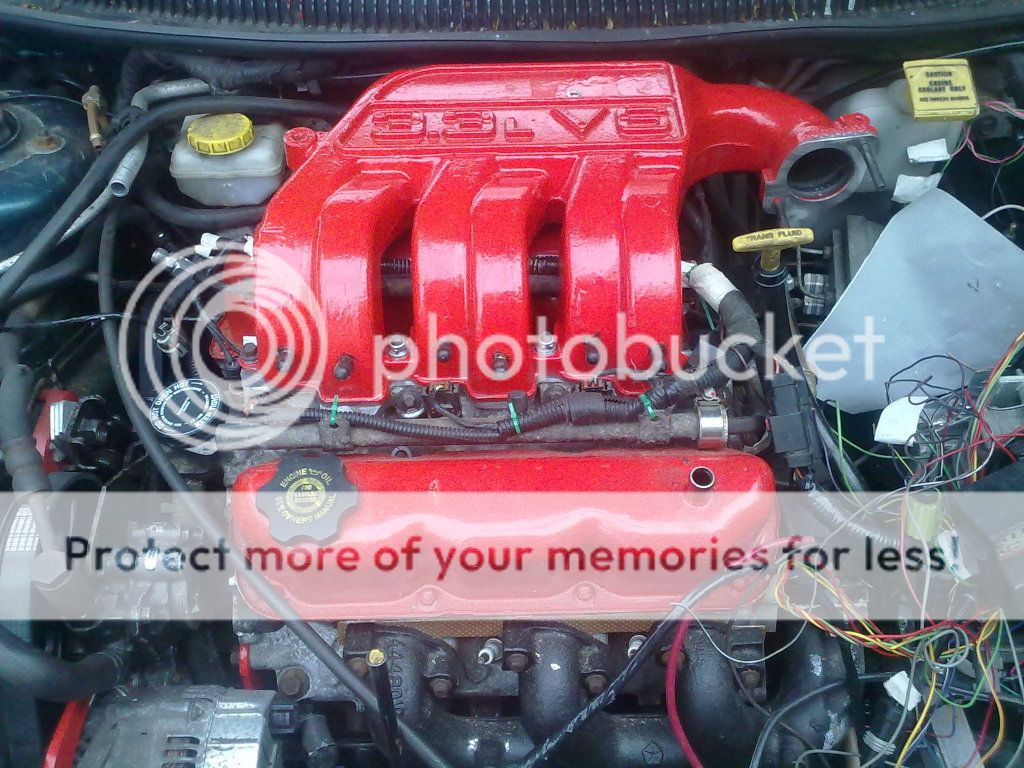
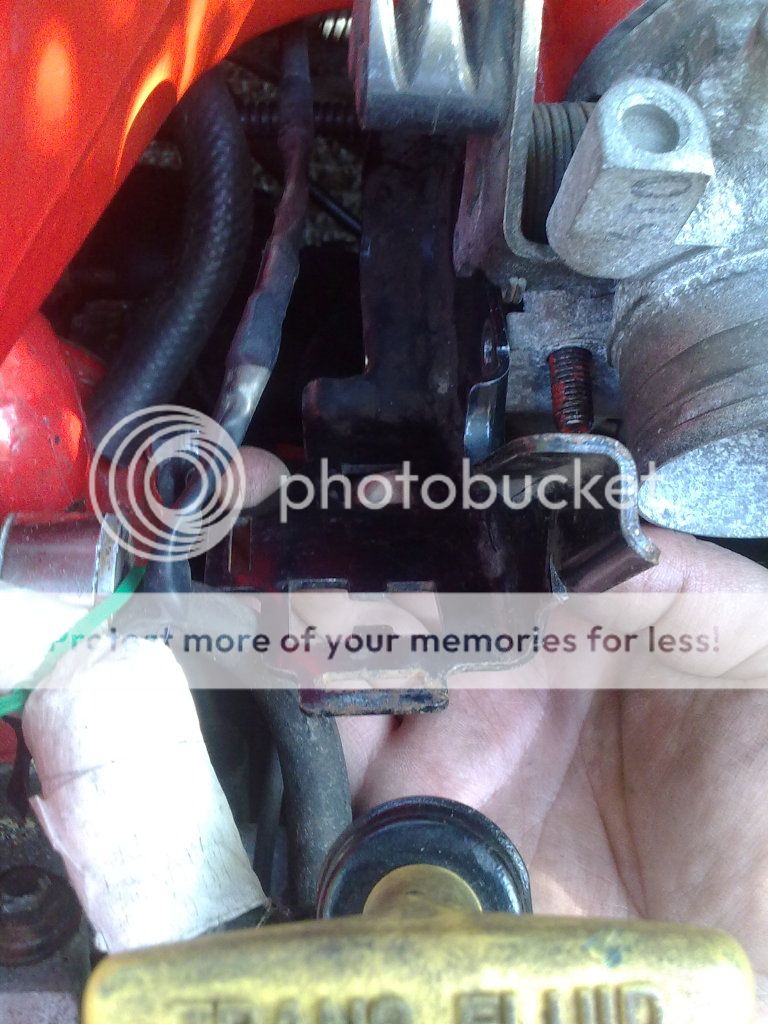
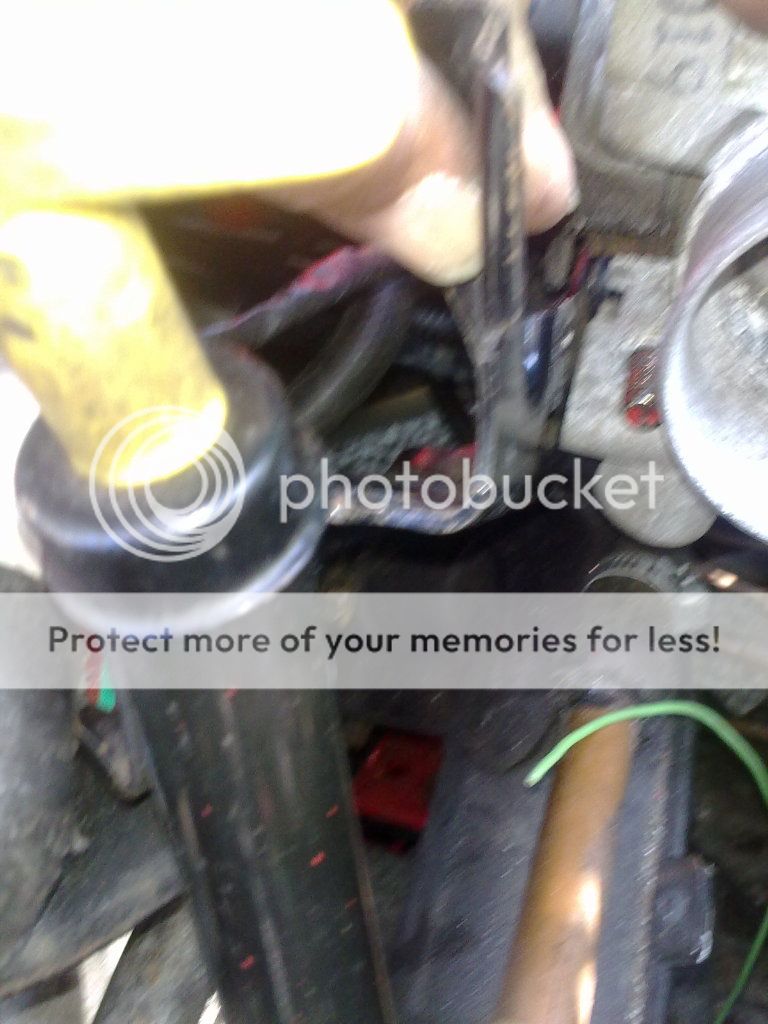
Coil pack fixing plate bolted to transmission mount bracket through existing holes in
the bracket. There is plenty of space underneath for any plumbing needed for the
lpg connecting into the cooling system.

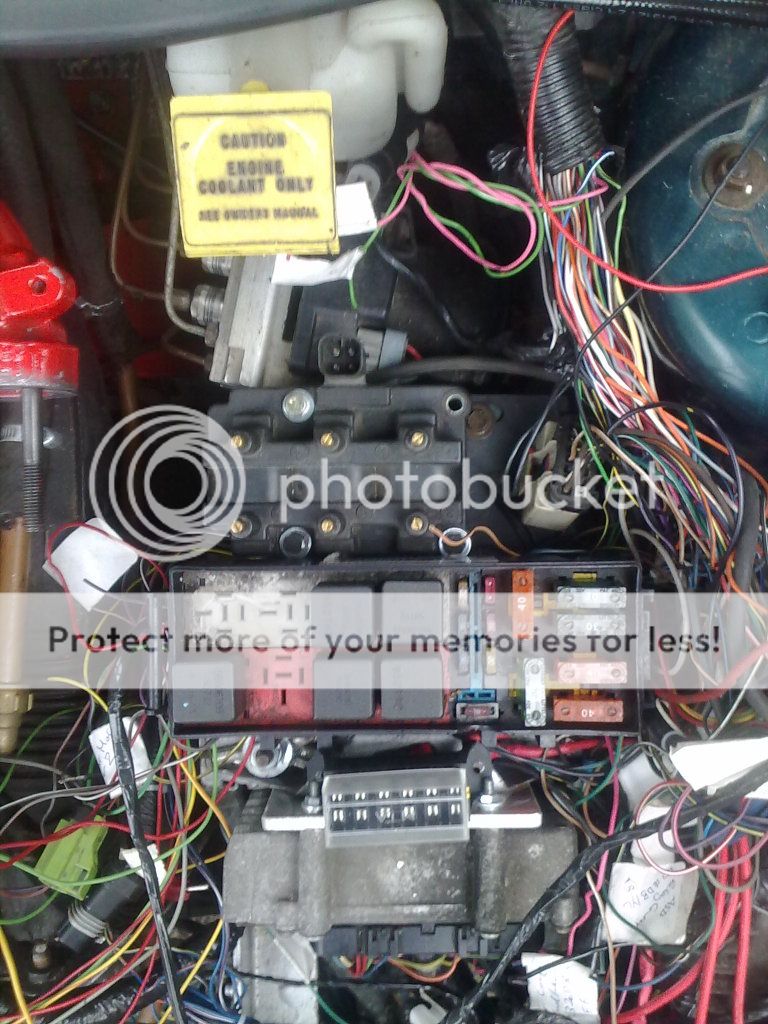
If the weather is nice tomorrow, I will be starting back on the wiring again.
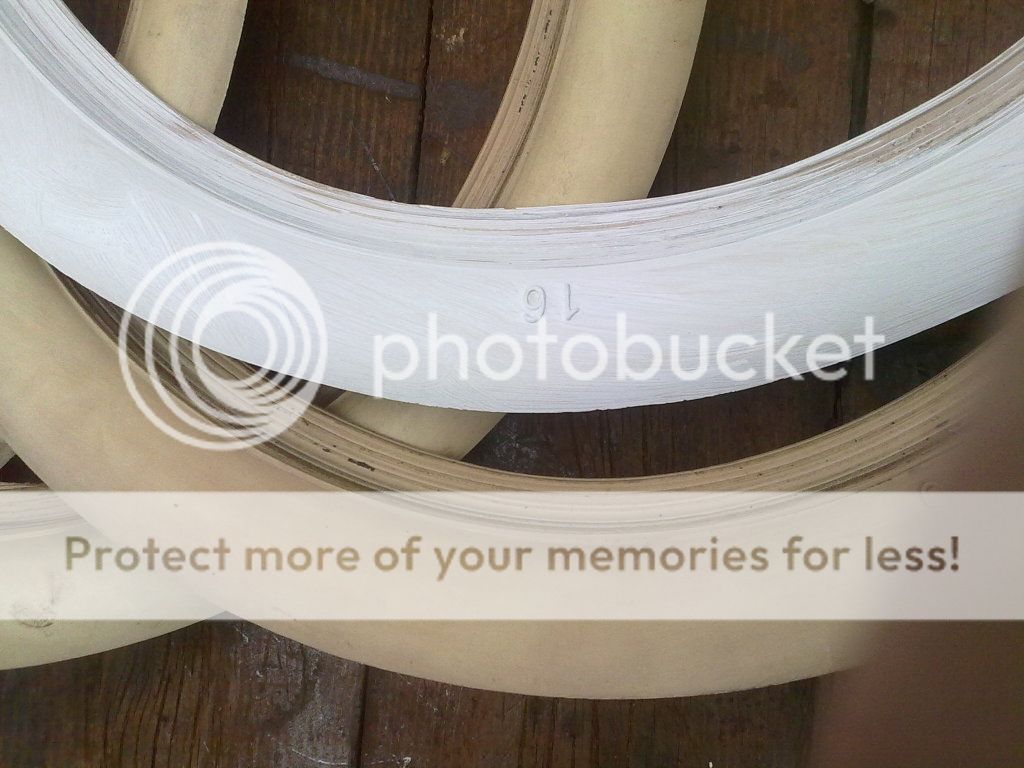
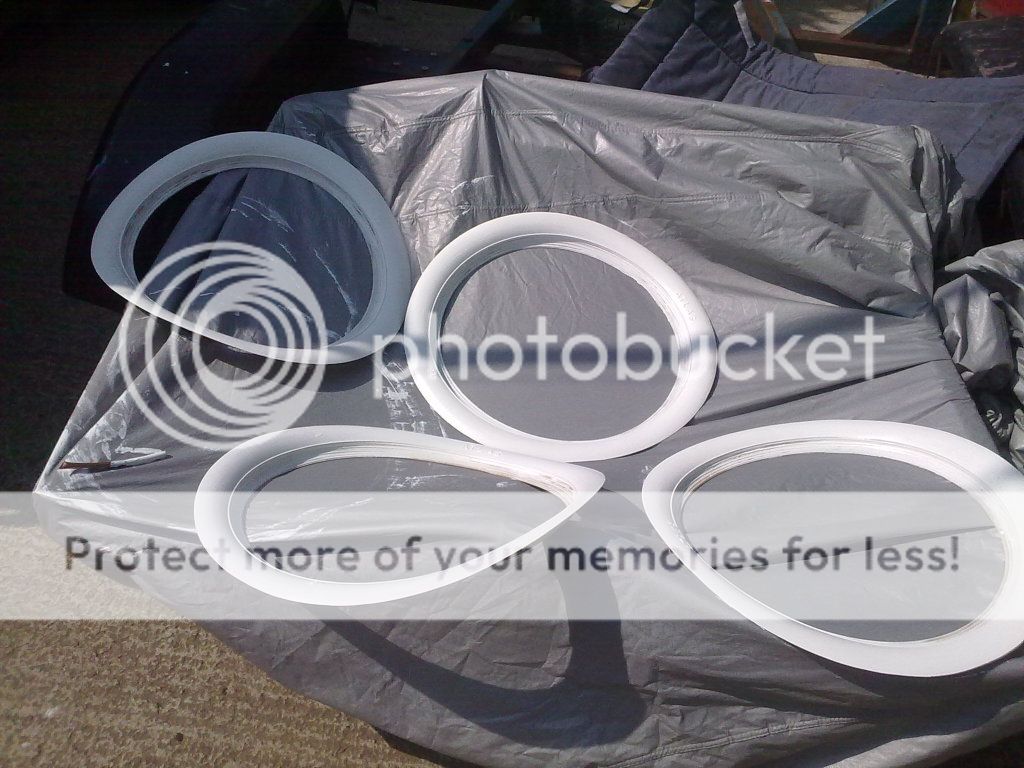
Three of the white wall tyre clip-ons cleaned but not as white as I wanted!!
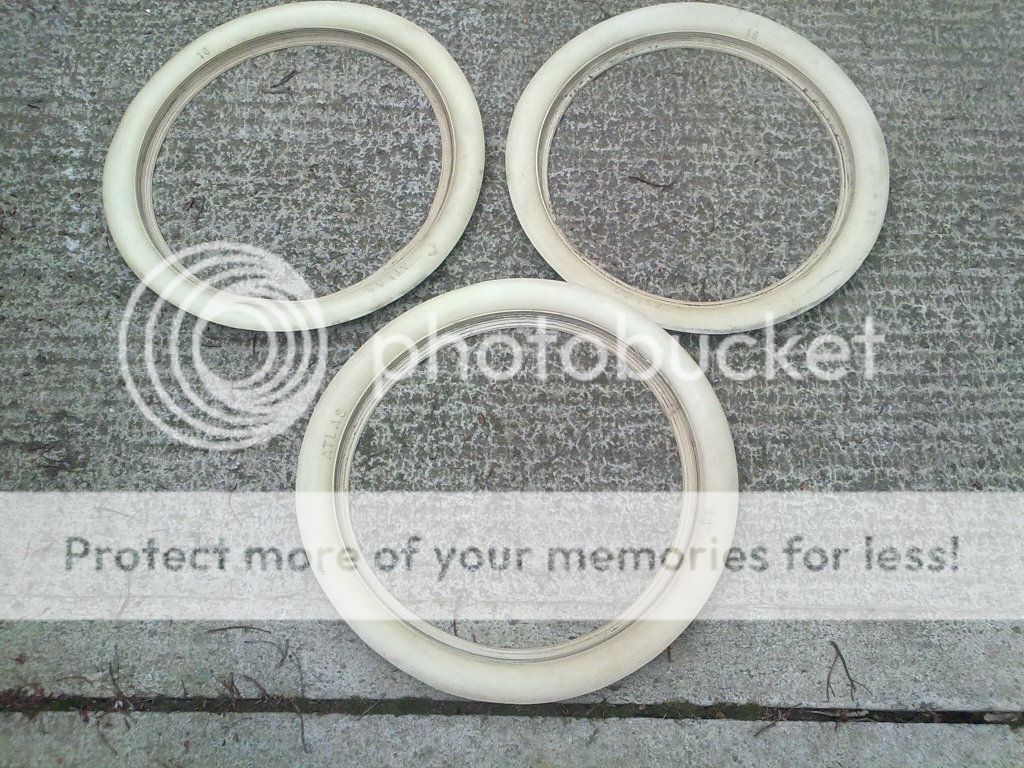
Least night since I couldn't sleep, I took one of the Clip-ons and gave it one coat of
white wall tyre paint(it's clearly on the left)
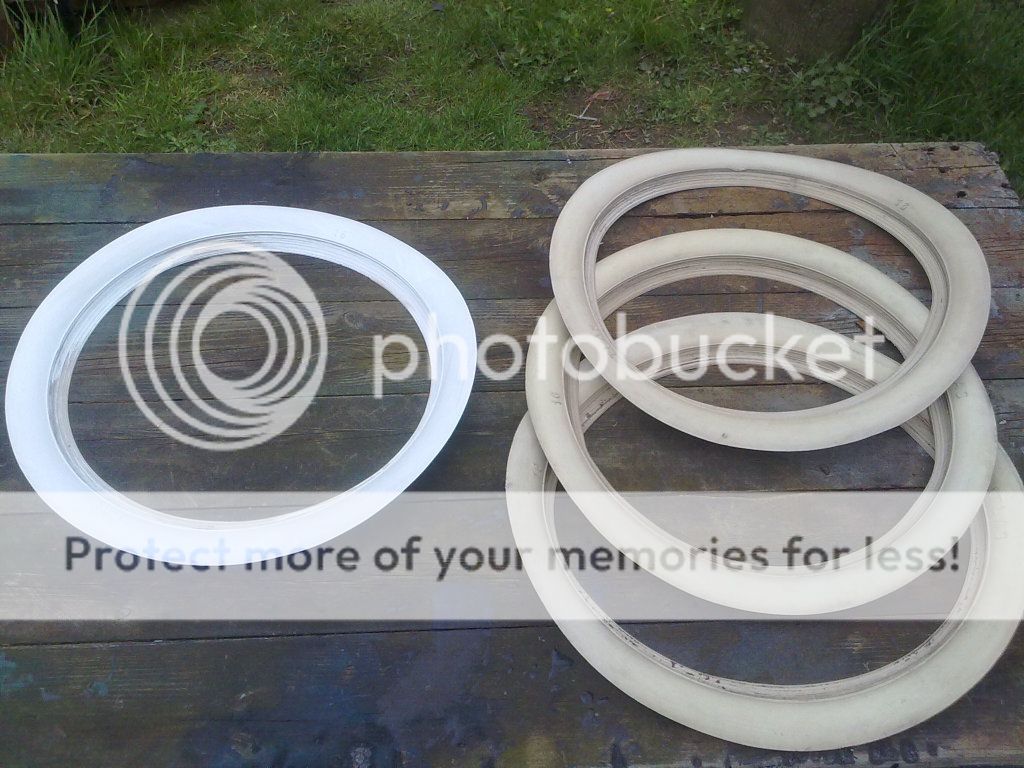
A good close-up shows the difference in colour. Tonight I will be giving the other three
their first coat, then tomorrow night all four will get their secnd coat of three coats.
Brake vacuum hose connected, all none used vacuum pipe connections plugged
Map sensor plugged in and intake manifold fitted with gasket.
I was going to run the breather pipe for the rear rocker cover under the intake
manifold, but the pipe was too thick, so I'm running it behind. And it will join up
to a breather pipe from the front rocker cover and go to it's own little filter and
not be connected to the intake manifold.
It's a bit of a squeeze but I can get my hand around the back of the engine under
the intake manifold. So I won't need to take the intake manifold off to put the
spark plug wires on.
Coil pack fixing plate bolted to transmission mount bracket through existing holes in
the bracket. There is plenty of space underneath for any plumbing needed for the
lpg connecting into the cooling system.
If the weather is nice tomorrow, I will be starting back on the wiring again.
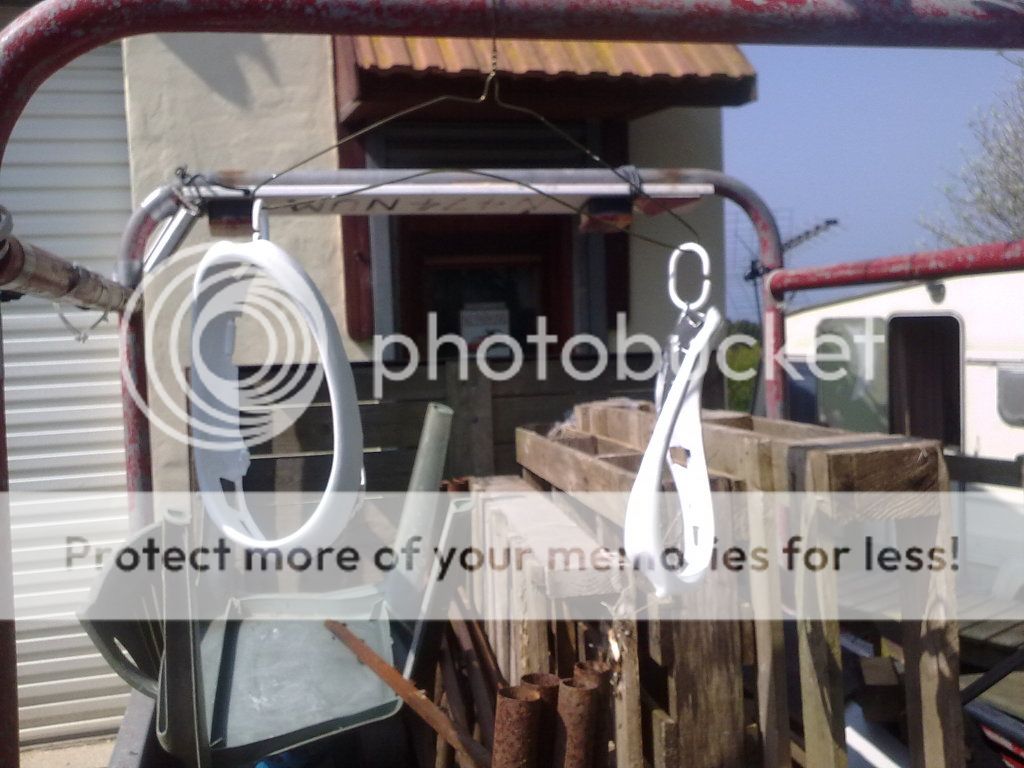
Three of the white wall tyre clip-ons cleaned but not as white as I wanted!!
Least night since I couldn't sleep, I took one of the Clip-ons and gave it one coat of
white wall tyre paint(it's clearly on the left)
A good close-up shows the difference in colour. Tonight I will be giving the other three
their first coat, then tomorrow night all four will get their secnd coat of three coats.
I'm Diabetic,& disabled BUT!! NOT DEAD YET!!
Re: V6 into a RHD Chrysler Neon mk1
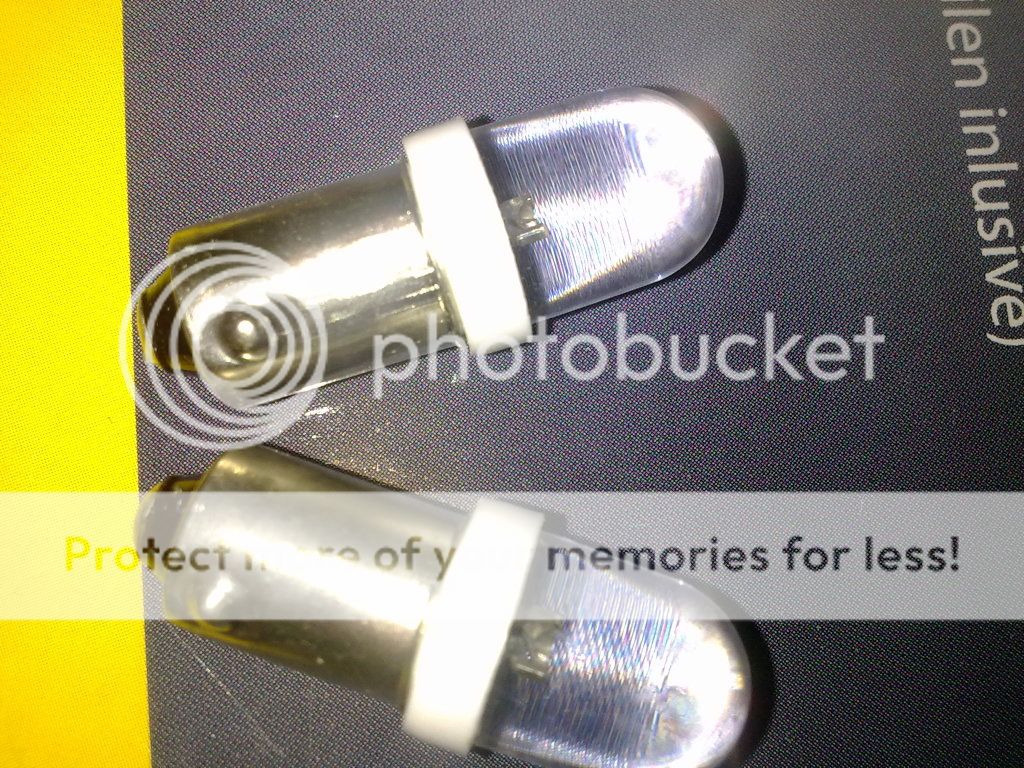
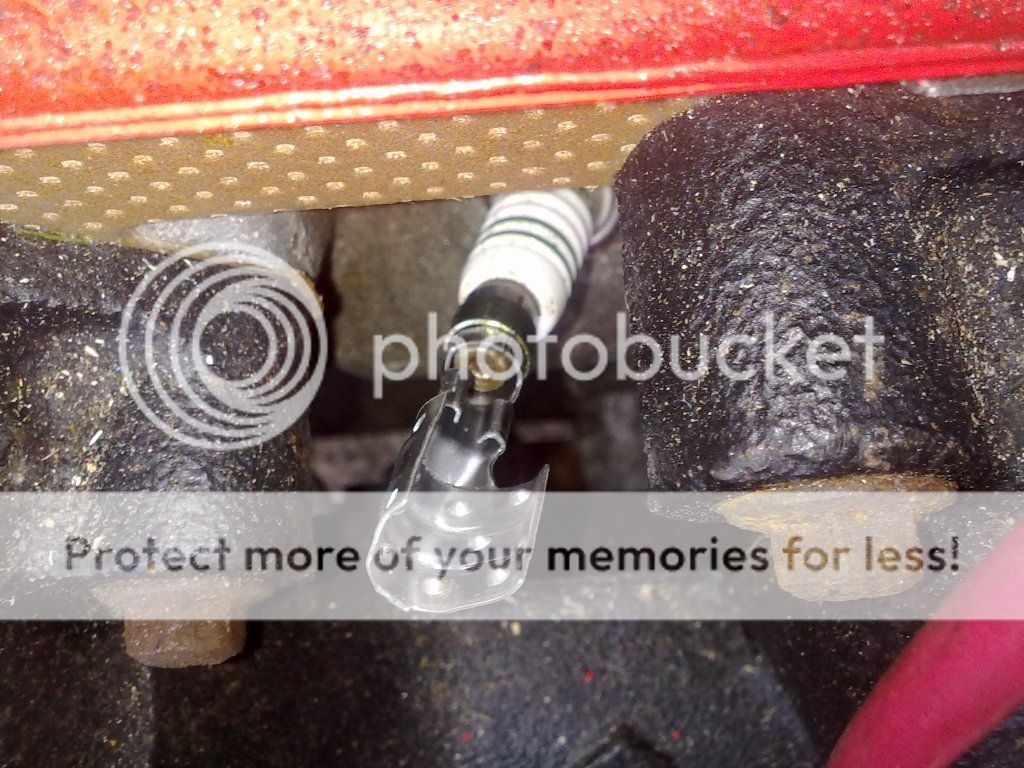
The contents of the morning post, the LED slide light bulbs, and
the pack of bits for making up my own spark plug leads.
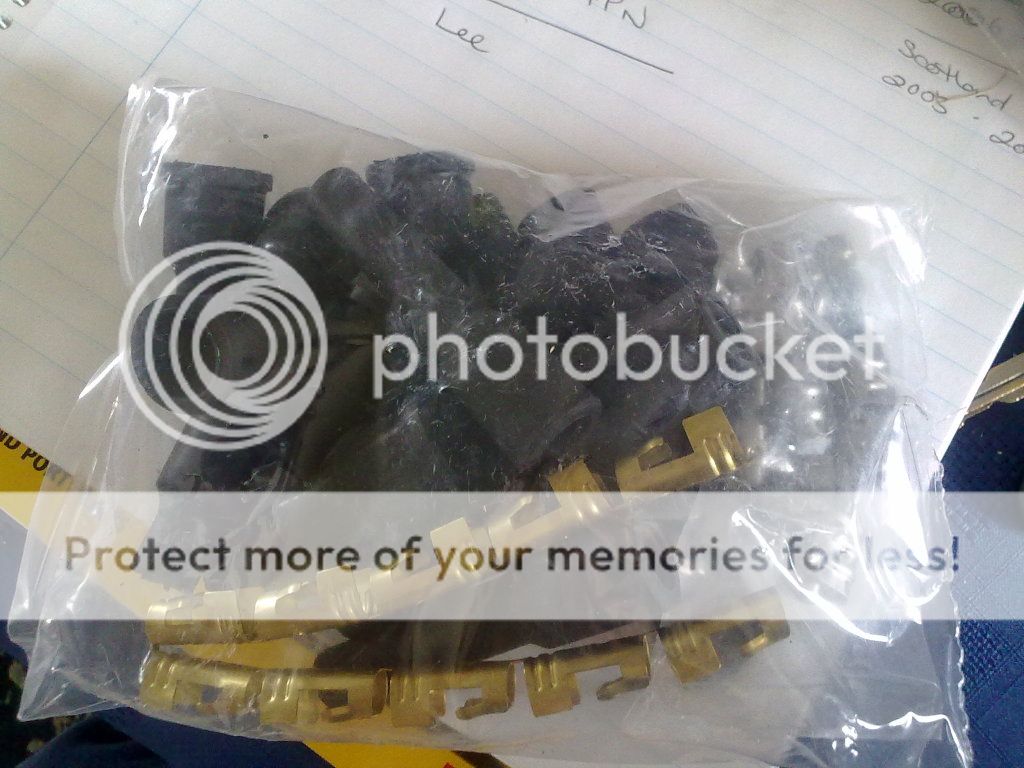
Just to make sure I got the right bits I thought it best to try the
connection out on the right bits. The spark plug ends are perfect,
BUT the brass ends for a distributor will not fit the terminals on the
coil pack. I will do more bay of E hunting tonight for the correct
bits.
Then I tried the LED bulbs and damaged one leaving part of it in the
headlight. As I had an electrical fault with the right side front
indicators I thought 'kill two birds with one stone' remove the headlight
and check the wiring and turn the headlight upside down and remove
the broken bulb.
As you can see, an old war wound of Christine!
When my car was returned to me after an incident on the A19 before
chritmas a couple of years ago. When it was returned it was compact
ice and snow in the street and when it was coming off the trailer, we
couldn't stop it in time, and she hit the gate post of reinforced steel
and concrete!
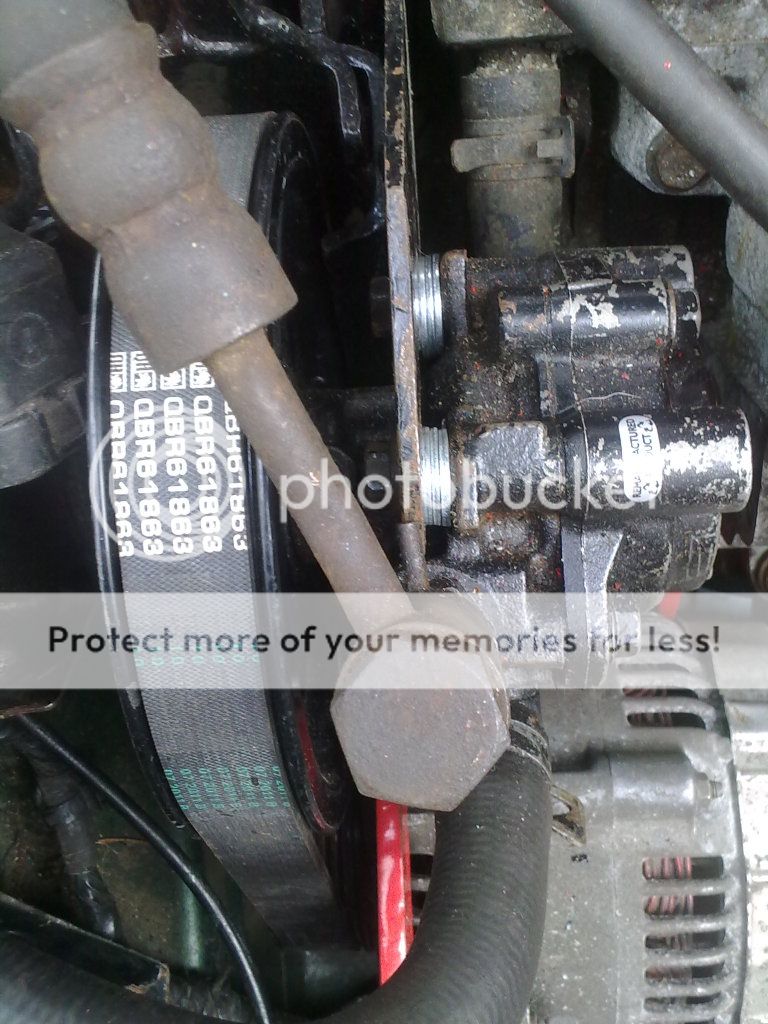
The bit cut out of the back is for the belt and pulley clearances.

While the headlight was out I noticed that when the engine has been
turning over off the battery, the belt had moved and straightened up
but moved over on the power steering pump pulley.
To correct this so it didn't happen again, I unbolted the pump from the
bracket and used 3 washers as spacers between the pump and the
bracket. Hopefully that is another problem sorted!
While the headlight was off I noticed the rubber gasket that goes
around the headlight was a mess. So I took both off!
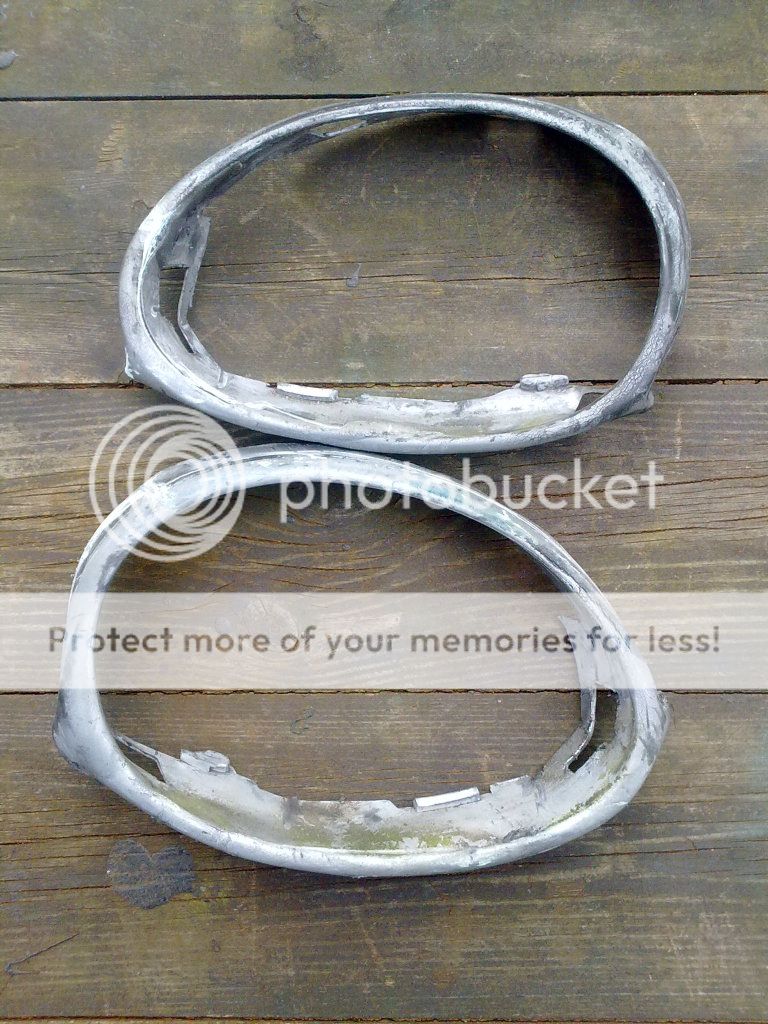
After a good wash and scrub down, I think the rubber gaskets could
possibly need replacing.
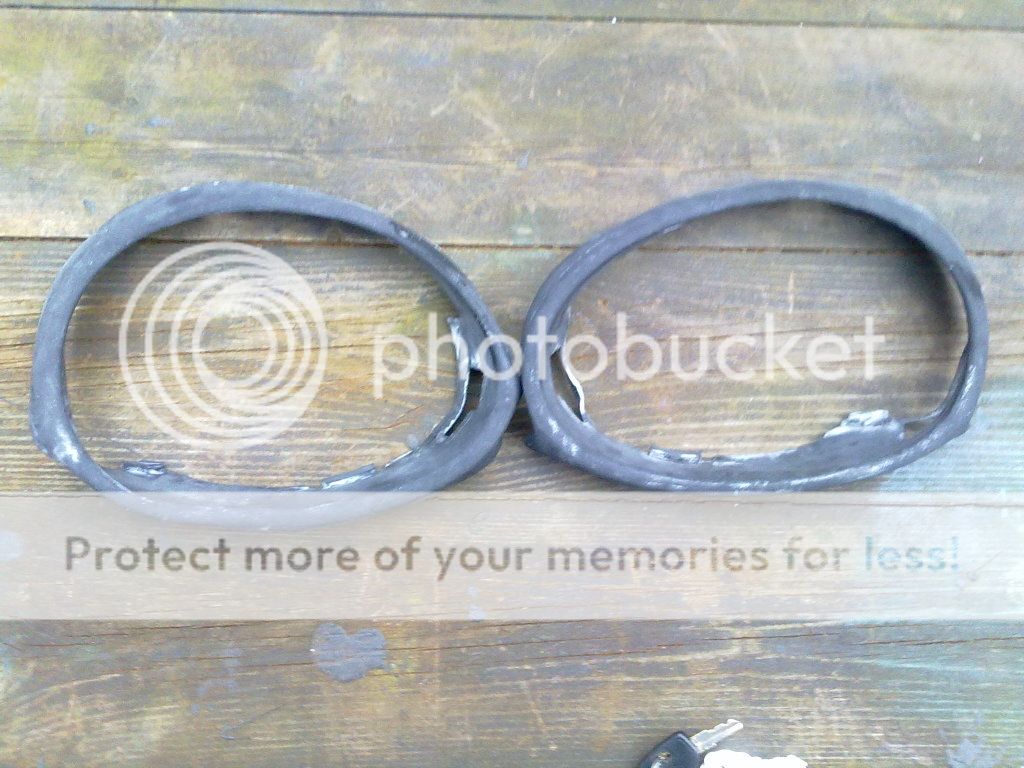
I will give them a couple of coats with the white wall tyre paint before
I try some silver tyre paint. In this case the white is the primer.
While everybody else in the UK is getting warmer brighter weather, what
do I get? FOG!!!
the pack of bits for making up my own spark plug leads.
Just to make sure I got the right bits I thought it best to try the
connection out on the right bits. The spark plug ends are perfect,
BUT the brass ends for a distributor will not fit the terminals on the
coil pack. I will do more bay of E hunting tonight for the correct
bits.
Then I tried the LED bulbs and damaged one leaving part of it in the
headlight. As I had an electrical fault with the right side front
indicators I thought 'kill two birds with one stone' remove the headlight
and check the wiring and turn the headlight upside down and remove
the broken bulb.
As you can see, an old war wound of Christine!
When my car was returned to me after an incident on the A19 before
chritmas a couple of years ago. When it was returned it was compact
ice and snow in the street and when it was coming off the trailer, we
couldn't stop it in time, and she hit the gate post of reinforced steel
and concrete!
The bit cut out of the back is for the belt and pulley clearances.
While the headlight was out I noticed that when the engine has been
turning over off the battery, the belt had moved and straightened up
but moved over on the power steering pump pulley.
To correct this so it didn't happen again, I unbolted the pump from the
bracket and used 3 washers as spacers between the pump and the
bracket. Hopefully that is another problem sorted!
While the headlight was off I noticed the rubber gasket that goes
around the headlight was a mess. So I took both off!
After a good wash and scrub down, I think the rubber gaskets could
possibly need replacing.
I will give them a couple of coats with the white wall tyre paint before
I try some silver tyre paint. In this case the white is the primer.
While everybody else in the UK is getting warmer brighter weather, what
do I get? FOG!!!
I'm Diabetic,& disabled BUT!! NOT DEAD YET!!
Re: V6 into a RHD Chrysler Neon mk1
I had no choice but to empty out the shed and try and get some
sense of order as there are car parts in there tht I need!
As dad had moaned about the steel rims being out side the shed
door, so they had to be put in the limited space of the shed.
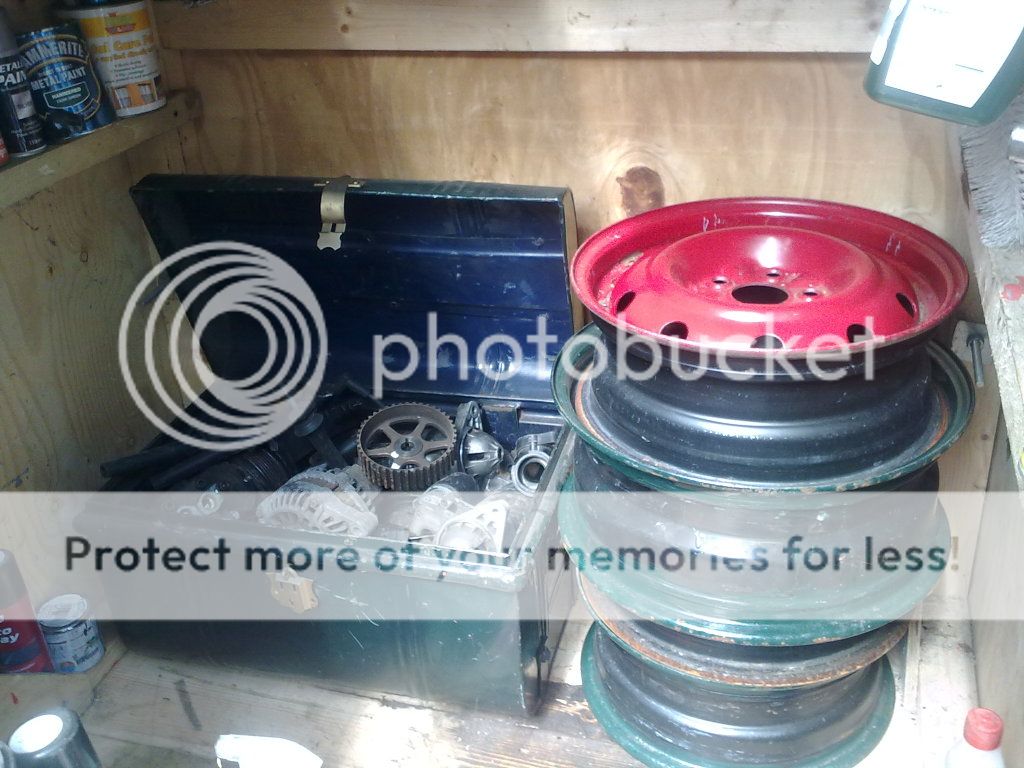
Just in that tin trunk are
3 A/C compressors
2 Alternators
4 Starter Motors
3 brake callipers
1 LPG Vaporiser
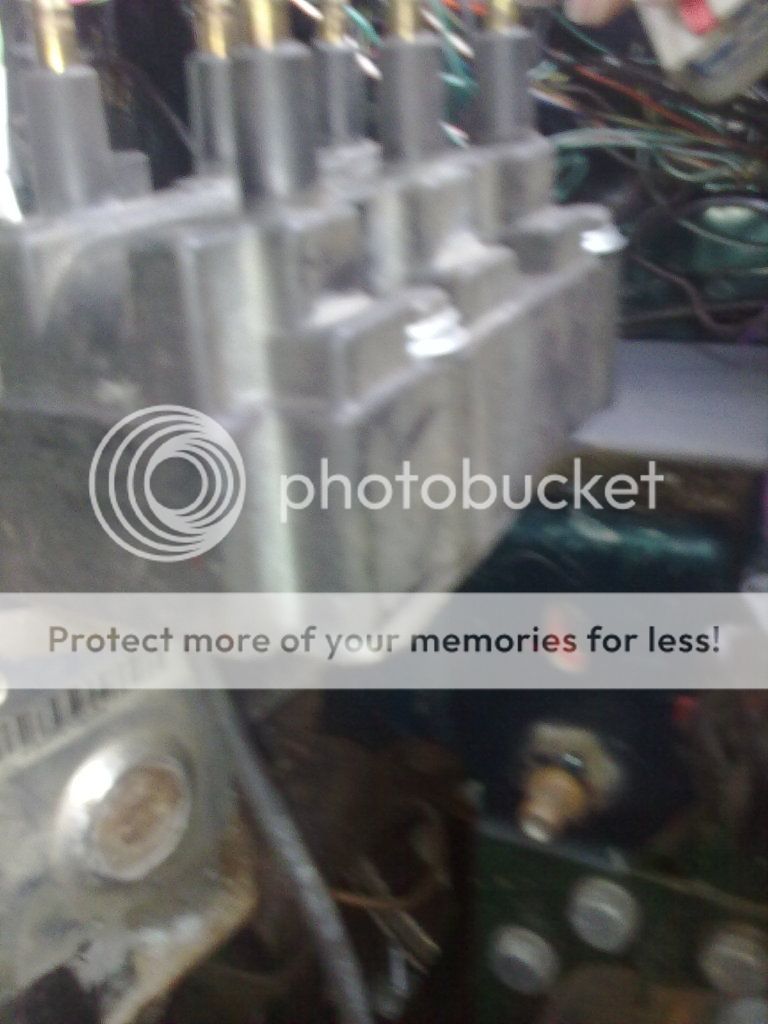
2 Coil Packs for neon engines
1 Cam Cog
1 Electric window motor.
There was more stuff in other boxes, I seem to have a bit of stock
of neon parts.
(just incase I end up with a standard 2L auto down the line)
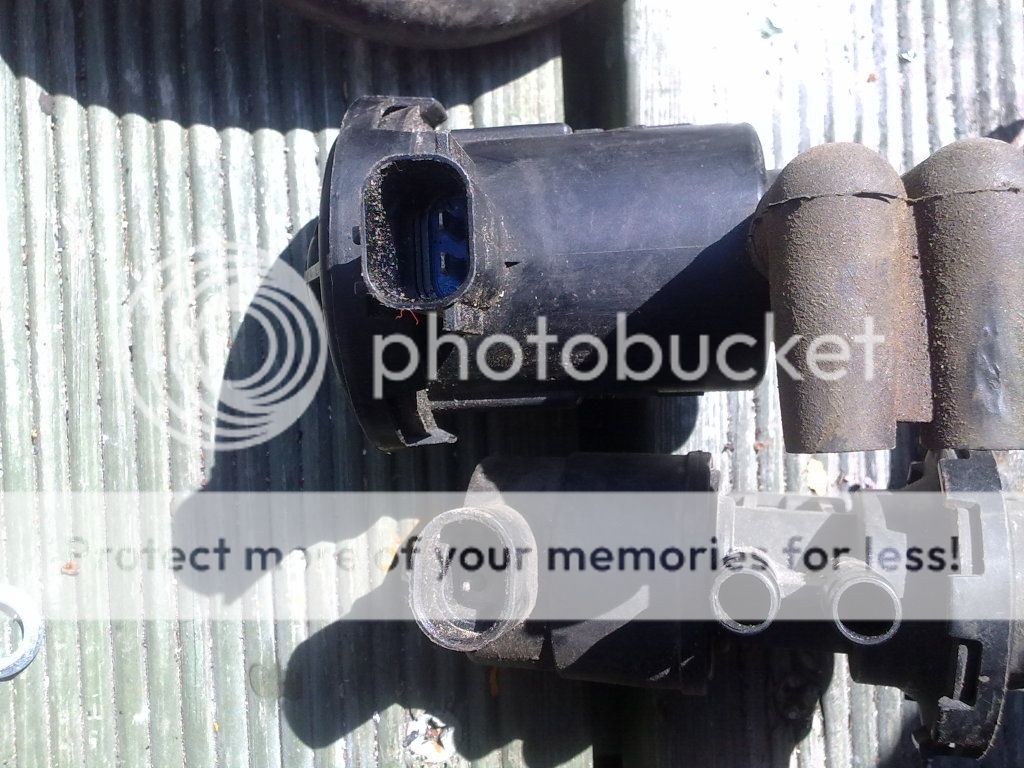
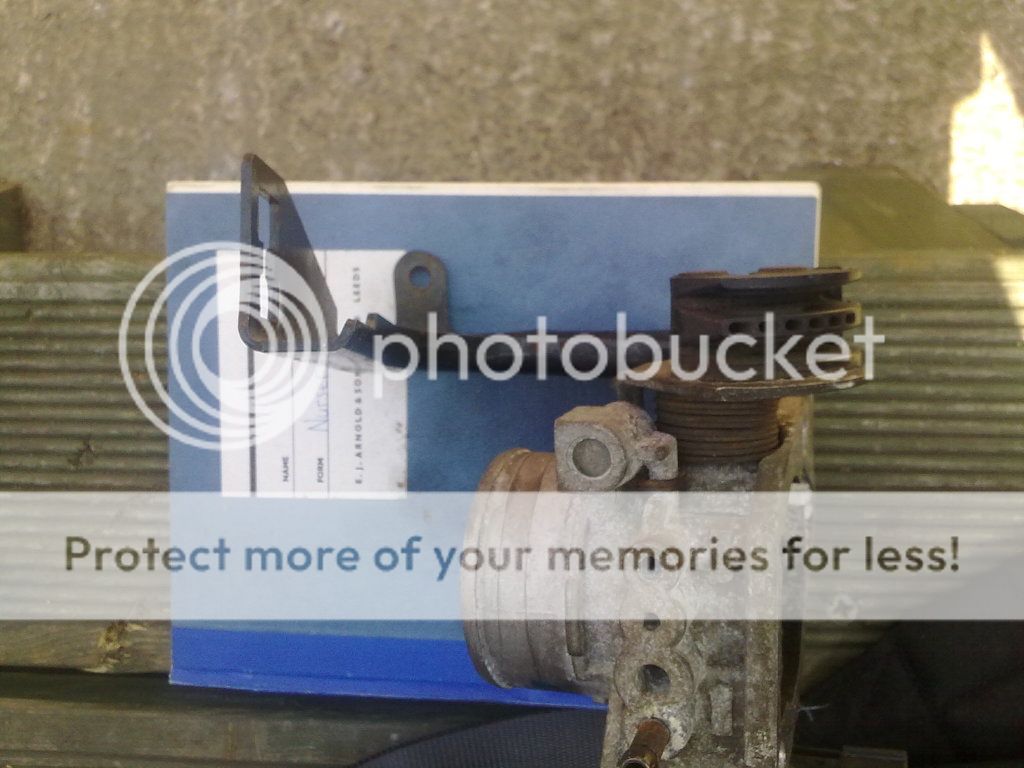
Then I found one of the parts I was looking for the Evap Solenoid.
The top is the Voyager and the bottom is mk1 neon. Now I just need
to remember if the plug is on the voyager loom or not, as some of
the labels have come off .
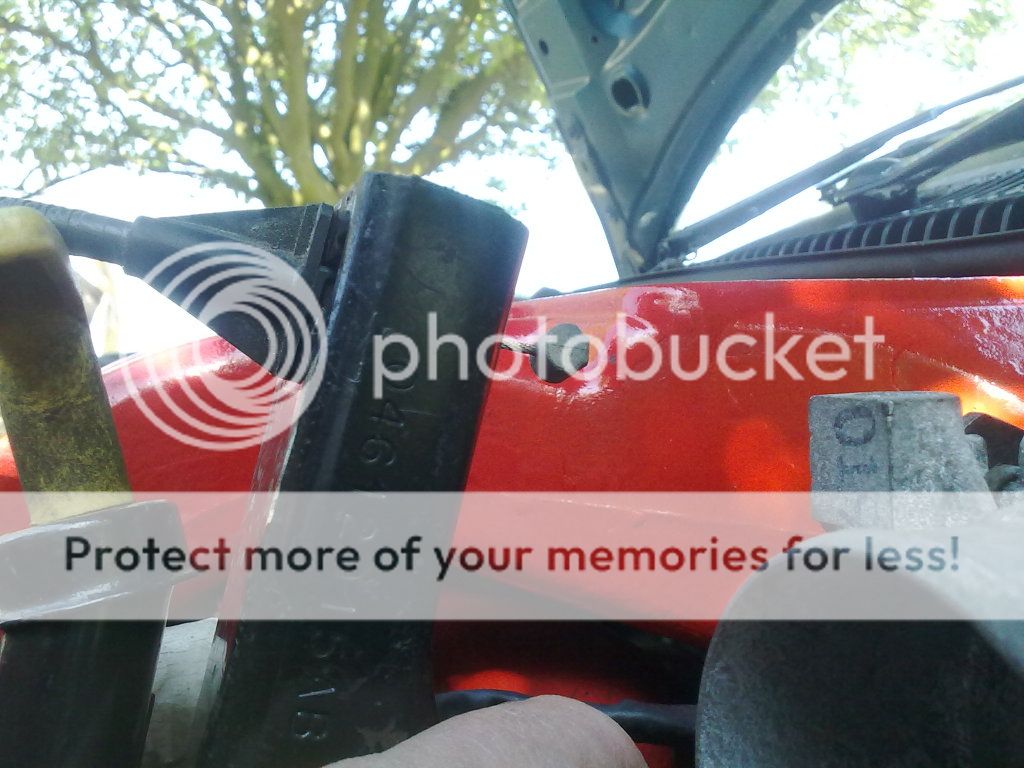
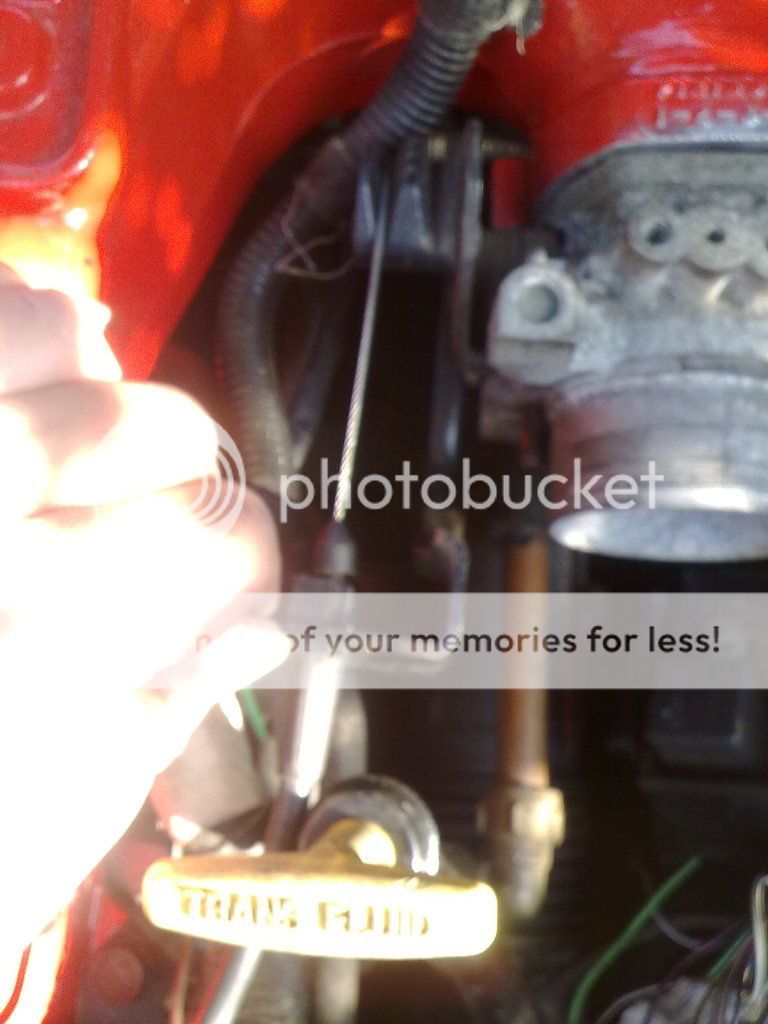
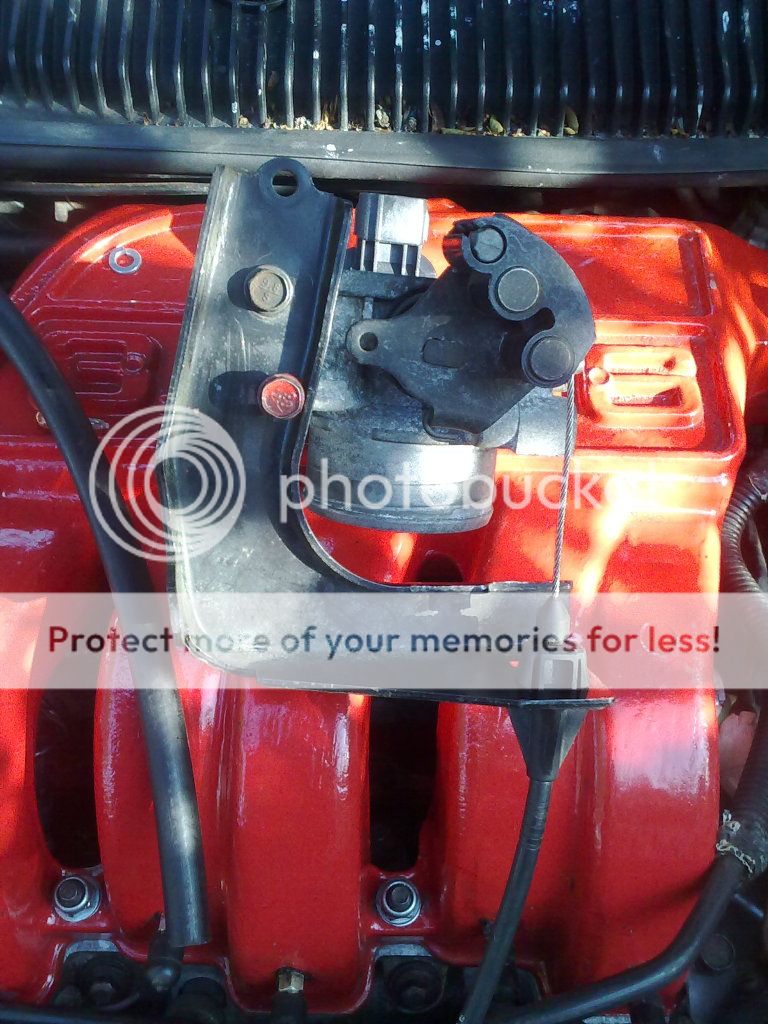
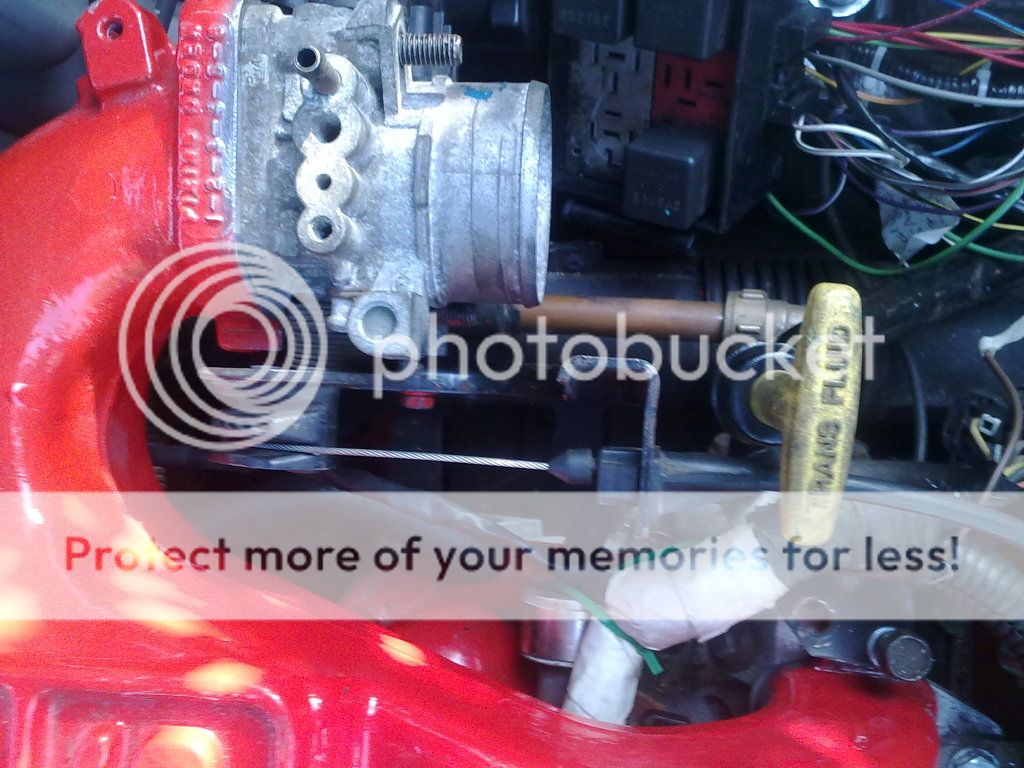
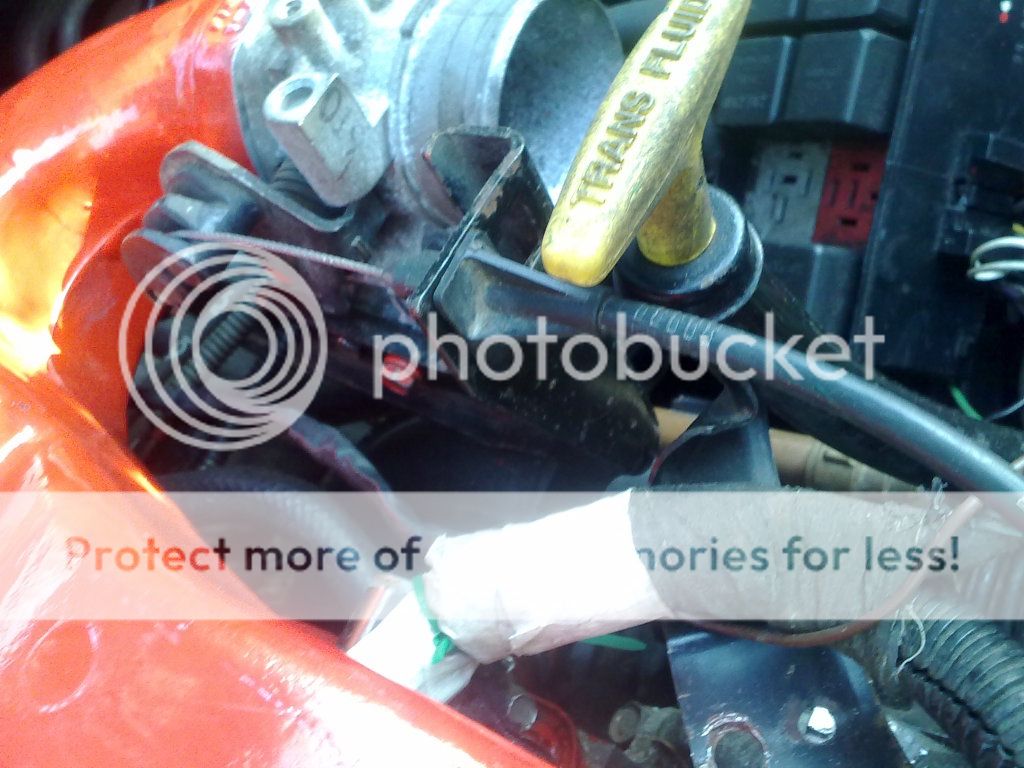
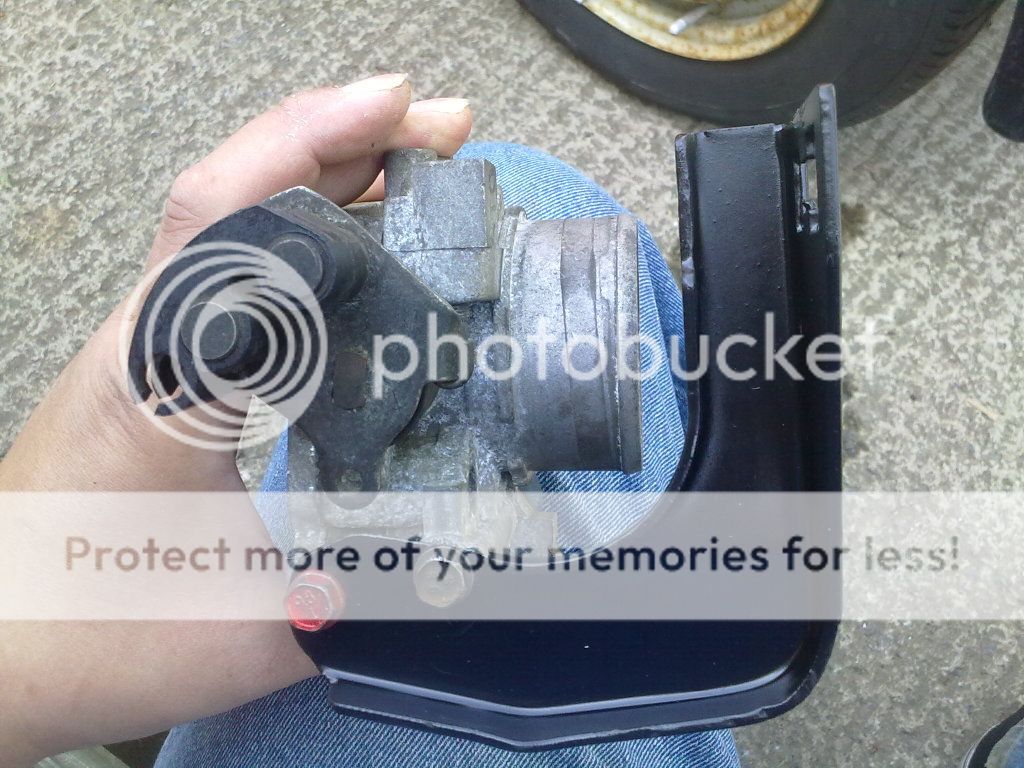
I then found the other parts I was looking for the throttle bodies of
both the neon and the voyager and their relevant throttle cable
brackets. As I needed to see what works with what space is available.

The throttle body can't be flipped over as the throttle cable isn't long
enough! And there are sutil differences between the neon an voyager
throttle bodies. If I tried using the cable holder of the neon it would
be far too low. If I tried to use the Voyager's it is too high and could
hit on the underside of the bonnet. Never mind the the transmission
dipstick.
I think I will be doing a few templates before I alter the voyager
throttle cable bracket. And the Dipstick might need to be moved about
half an inch to away from the engine, any further away and it will
interfere with the pipe from the throttle body to the air filter.
As luck would have it 3 of the original spark plug wires are long enough
to use, so I only need make up 3 new ones when the crimper arrives.
sense of order as there are car parts in there tht I need!
As dad had moaned about the steel rims being out side the shed
door, so they had to be put in the limited space of the shed.
Just in that tin trunk are
3 A/C compressors
2 Alternators
4 Starter Motors
3 brake callipers
1 LPG Vaporiser
2 Coil Packs for neon engines
1 Cam Cog
1 Electric window motor.
There was more stuff in other boxes, I seem to have a bit of stock
of neon parts.
(just incase I end up with a standard 2L auto down the line)
Then I found one of the parts I was looking for the Evap Solenoid.
The top is the Voyager and the bottom is mk1 neon. Now I just need
to remember if the plug is on the voyager loom or not, as some of
the labels have come off .
I then found the other parts I was looking for the throttle bodies of
both the neon and the voyager and their relevant throttle cable
brackets. As I needed to see what works with what space is available.
The throttle body can't be flipped over as the throttle cable isn't long
enough! And there are sutil differences between the neon an voyager
throttle bodies. If I tried using the cable holder of the neon it would
be far too low. If I tried to use the Voyager's it is too high and could
hit on the underside of the bonnet. Never mind the the transmission
dipstick.
I think I will be doing a few templates before I alter the voyager
throttle cable bracket. And the Dipstick might need to be moved about
half an inch to away from the engine, any further away and it will
interfere with the pipe from the throttle body to the air filter.
As luck would have it 3 of the original spark plug wires are long enough
to use, so I only need make up 3 new ones when the crimper arrives.
I'm Diabetic,& disabled BUT!! NOT DEAD YET!!
Re: V6 into a RHD Chrysler Neon mk1
Okay I can't sleep and it's 3:00 am and the brain is still going
strong even if the body isn't!
As I had brought the throttle bodies in from the shed earlier I
got them out and started comparing the two side by side.
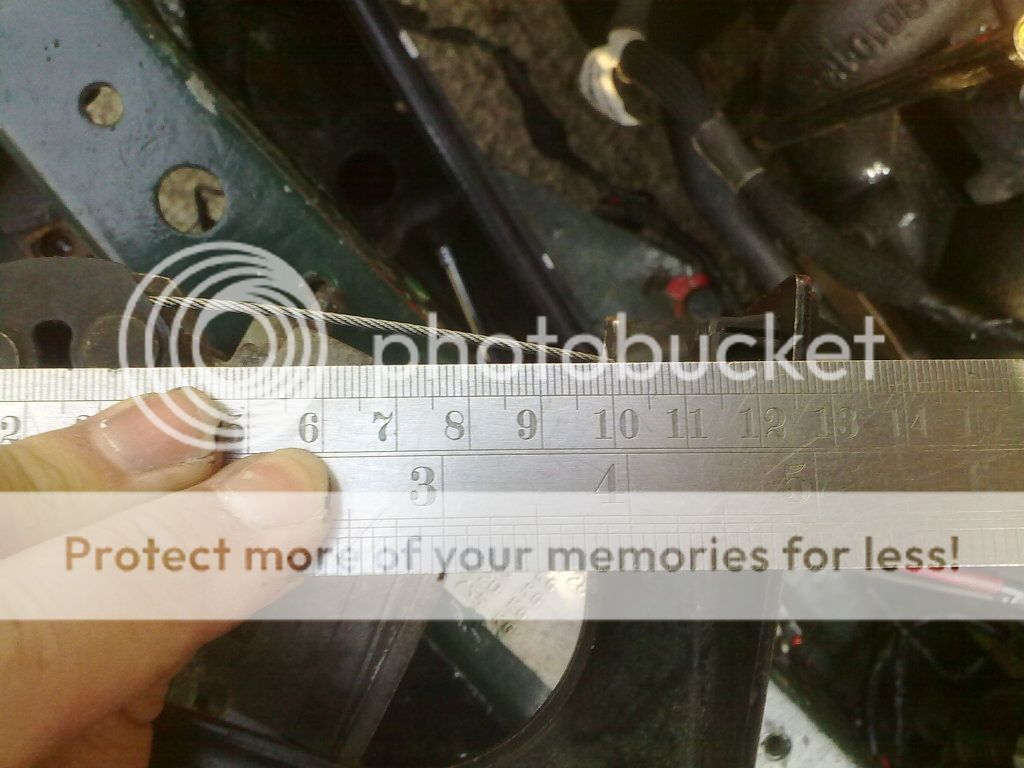
After a little rummage in the computer desk draw I found some
string and an old worn ruler.
With these it made it easier to do a bit of measuring.
I found that with there respective throttle cable brackets
mounted there is a difference in length of cable run. There is
over half an inch difference. Added to which the springs are very
different in regards to how hard it is to move the clip to open the
butterfly valve, The Neon's old throttle is easier to move
compared to the voyager's.
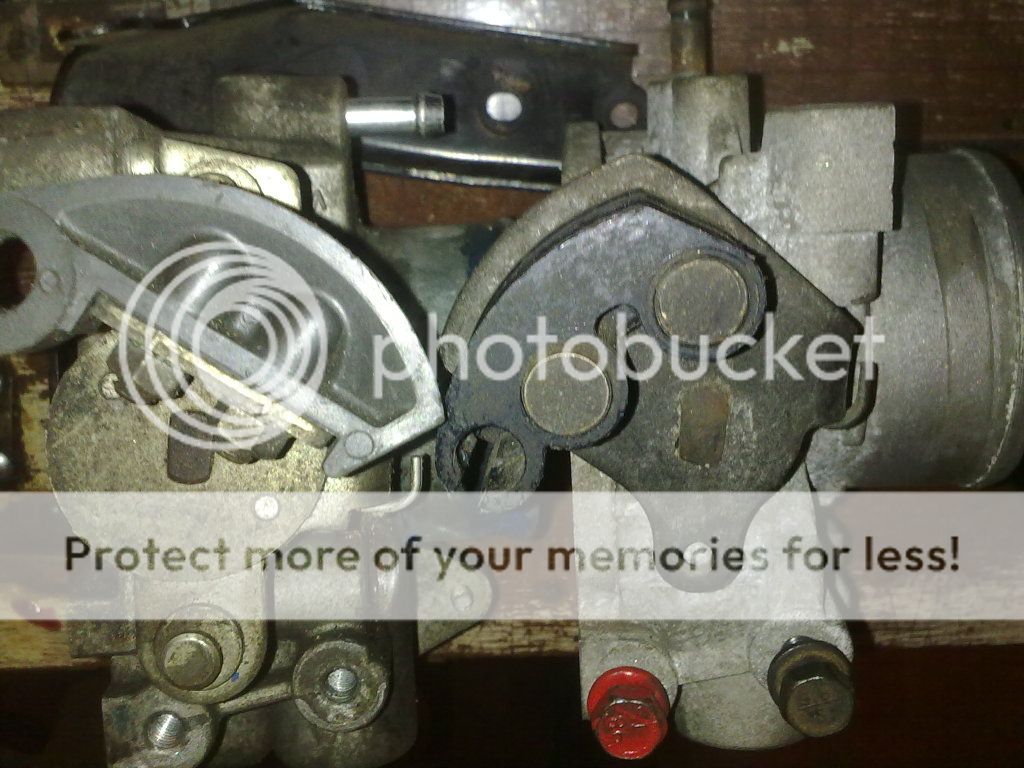
(Neon left, Voyager right)
The position of the clip on the ends of the butterfly valves are
different, there is 90 degrees of rotation. I will have another look on
the car tomorrow, as this might just mean moving the holes for
mounting the voyager cable bracket on the voyager throttle body.
But knowing my luck I might still have to move the Transmission Oil
Dipstick.
What are peoples thoughts on replacing the Voyagers spring with that
of the neon's to make it lighter on my poor feet on the accelerator?
strong even if the body isn't!
As I had brought the throttle bodies in from the shed earlier I
got them out and started comparing the two side by side.
After a little rummage in the computer desk draw I found some
string and an old worn ruler.
With these it made it easier to do a bit of measuring.
I found that with there respective throttle cable brackets
mounted there is a difference in length of cable run. There is
over half an inch difference. Added to which the springs are very
different in regards to how hard it is to move the clip to open the
butterfly valve, The Neon's old throttle is easier to move
compared to the voyager's.
(Neon left, Voyager right)
The position of the clip on the ends of the butterfly valves are
different, there is 90 degrees of rotation. I will have another look on
the car tomorrow, as this might just mean moving the holes for
mounting the voyager cable bracket on the voyager throttle body.
But knowing my luck I might still have to move the Transmission Oil
Dipstick.
What are peoples thoughts on replacing the Voyagers spring with that
of the neon's to make it lighter on my poor feet on the accelerator?
I'm Diabetic,& disabled BUT!! NOT DEAD YET!!
Re: V6 into a RHD Chrysler Neon mk1
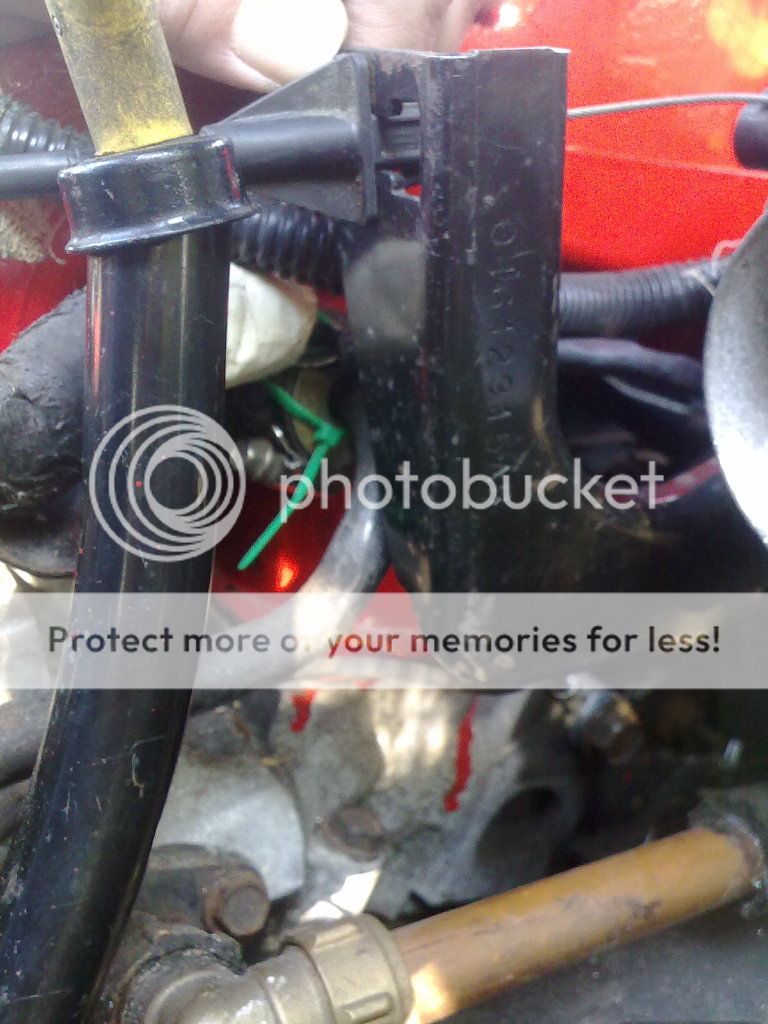
A measurement from the end of the throttle cable to the bracket
on the neons throttle assembly.
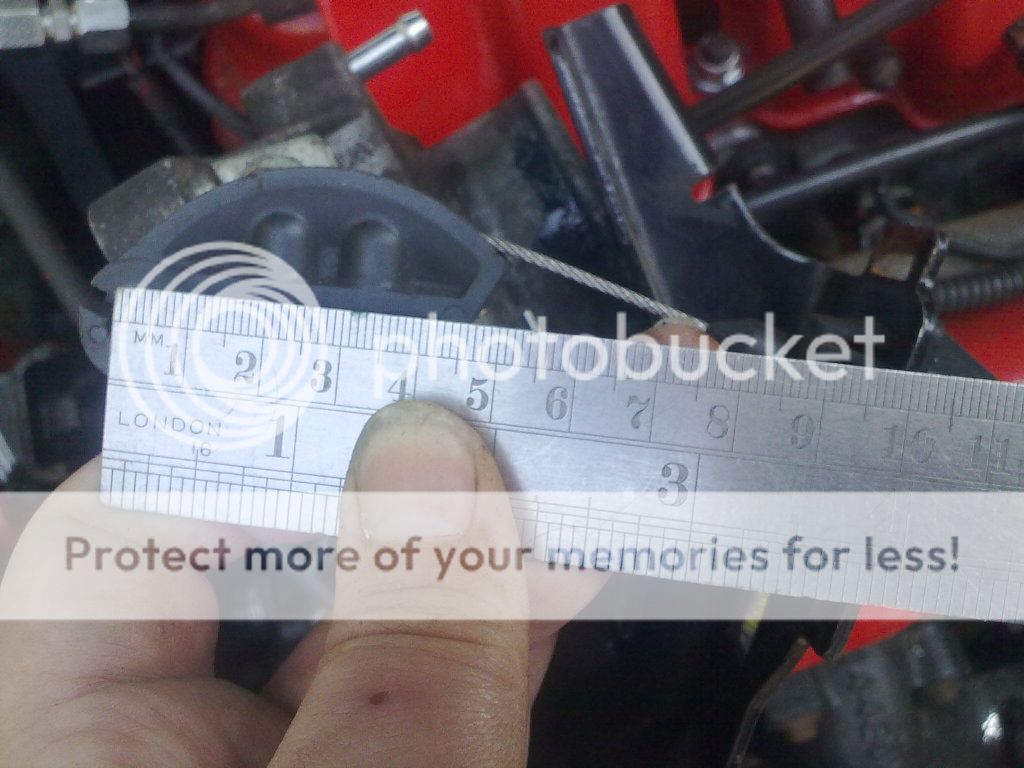
Is it any wonder that my clalculations were off with the Voyager
throttle assembly when the bracket has been twisted a bit!
So I clamped one end to the bench and a few good hits with a
hammer sorted it out. Then measurement from the same places
as the neons throttle assembly.
Another problem I found was that with an unmodified Voyager
throttle assembly, is the the accelerator peddle was pulled up
higher in the foot well.
A few shoots of freehand mocking up on how to position the
bracket with the cable helping to keep the right distances.
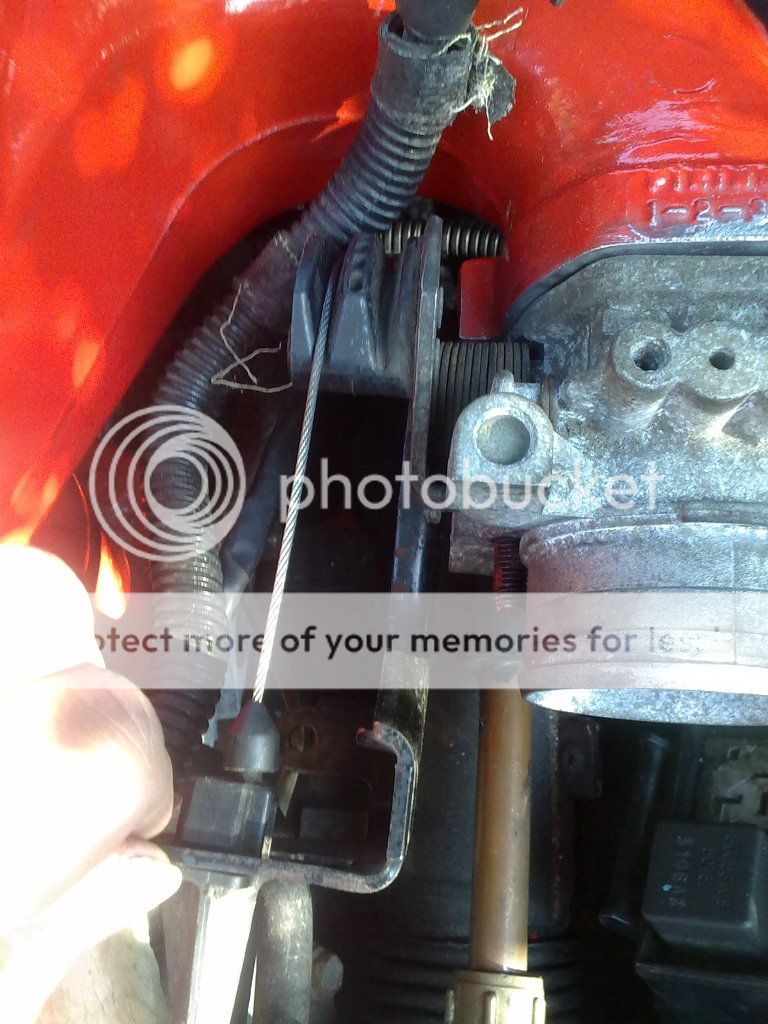
I ended up using one of the existing holes and drilled another further
forward as the bracket has been moved back and tilled down a bit.
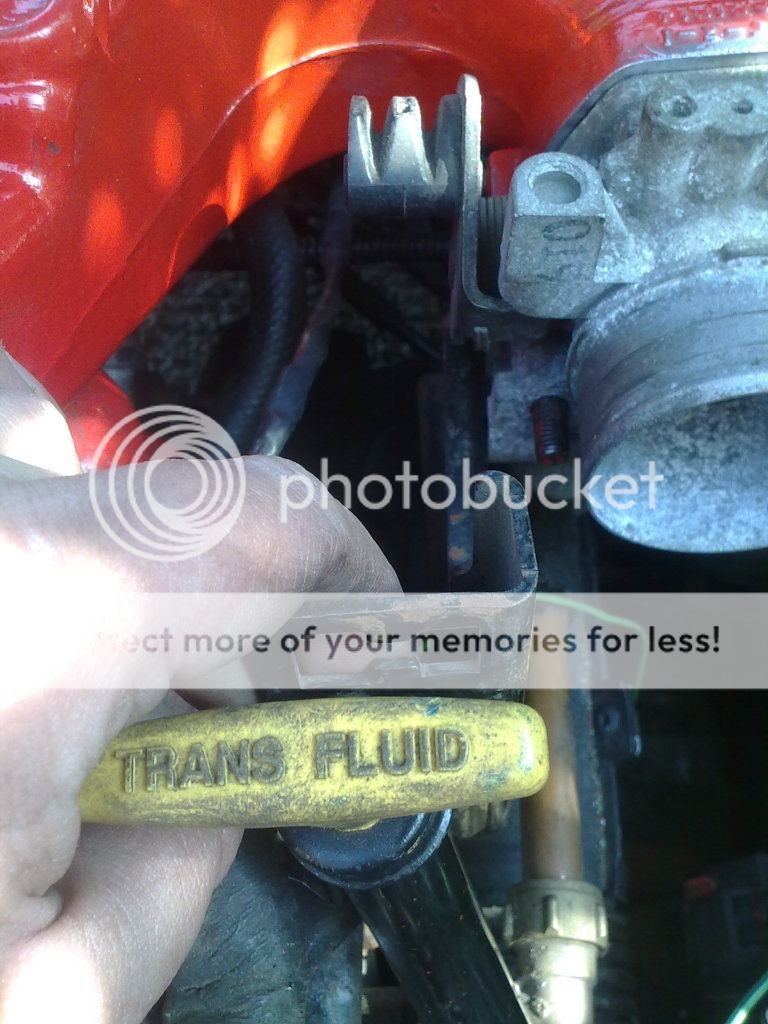
I also moved the transmission fluid dipstick by drilling a new hole in it's
support bracket.
The red headed bolt isn't sitting straight as the curve in the form of
the bracket, this will be sorted out tomorrow as I need to get it level
for that bolt and trim the excess bracket.
I won't be fitting the cruise control for two reasons.
1) It would mean fitting a replacement coil spring in the steering wheel.
2) There is very little space available at the moment and I want to get
the engine bay wiring sorted first..
on the neons throttle assembly.
Is it any wonder that my clalculations were off with the Voyager
throttle assembly when the bracket has been twisted a bit!
So I clamped one end to the bench and a few good hits with a
hammer sorted it out. Then measurement from the same places
as the neons throttle assembly.
Another problem I found was that with an unmodified Voyager
throttle assembly, is the the accelerator peddle was pulled up
higher in the foot well.
A few shoots of freehand mocking up on how to position the
bracket with the cable helping to keep the right distances.
I ended up using one of the existing holes and drilled another further
forward as the bracket has been moved back and tilled down a bit.
I also moved the transmission fluid dipstick by drilling a new hole in it's
support bracket.
The red headed bolt isn't sitting straight as the curve in the form of
the bracket, this will be sorted out tomorrow as I need to get it level
for that bolt and trim the excess bracket.
I won't be fitting the cruise control for two reasons.
1) It would mean fitting a replacement coil spring in the steering wheel.
2) There is very little space available at the moment and I want to get
the engine bay wiring sorted first..
I'm Diabetic,& disabled BUT!! NOT DEAD YET!!
Re: V6 into a RHD Chrysler Neon mk1
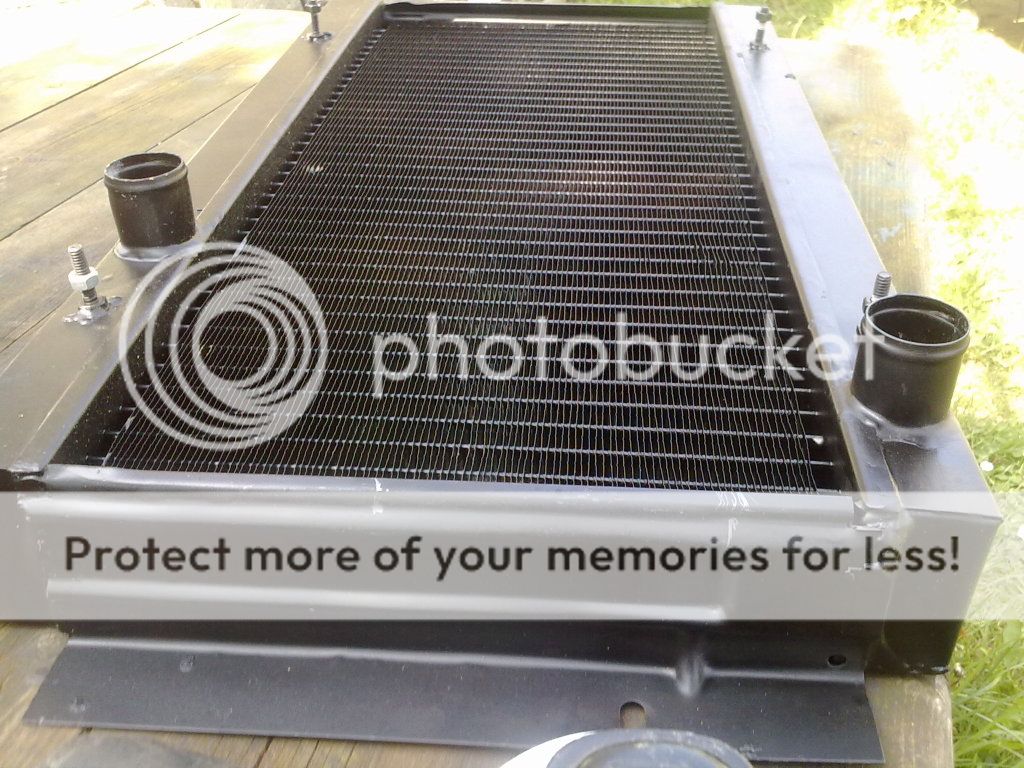
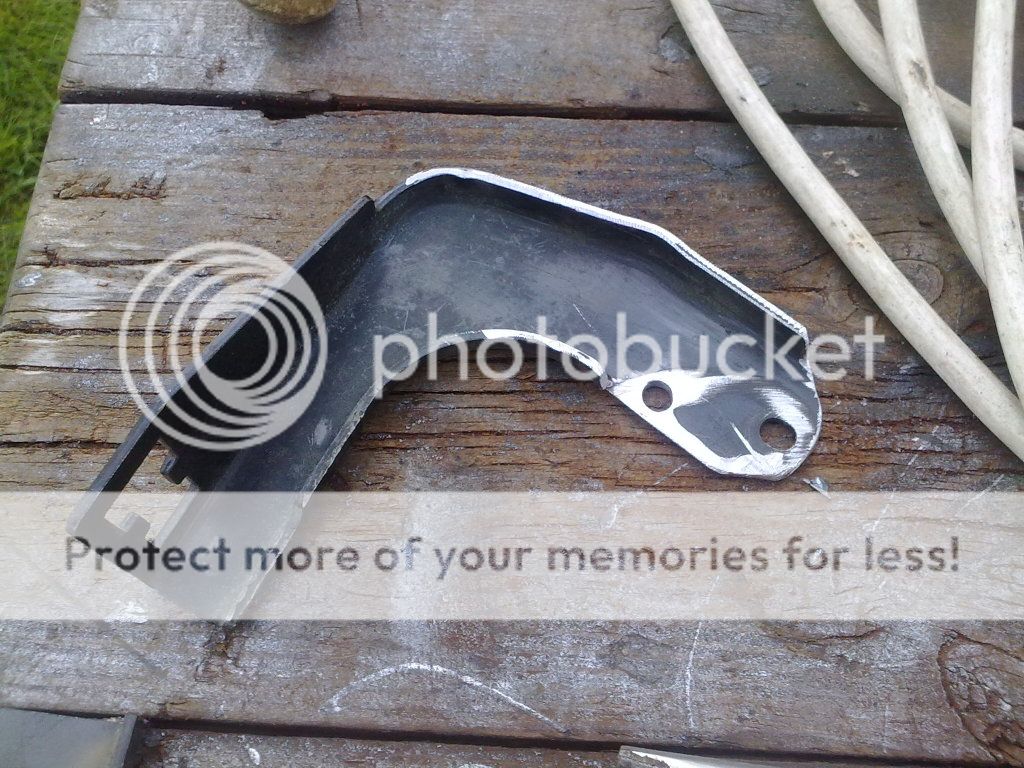
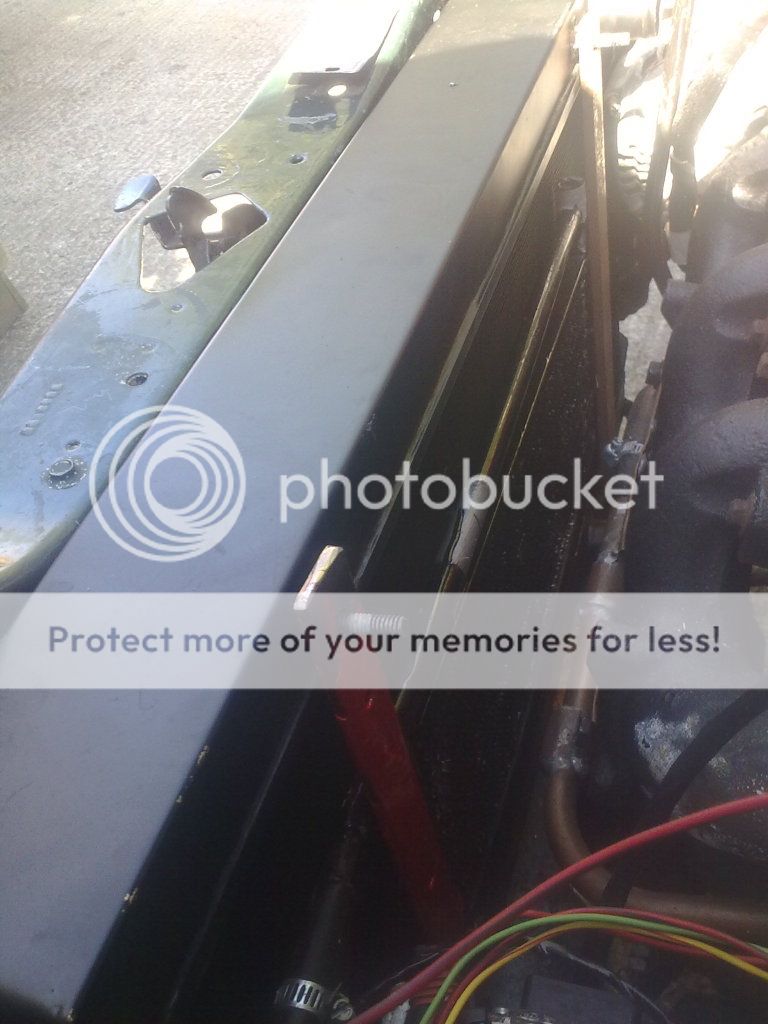
As the grinder was coming out to play, I thought I may as well give the side panel
of the radiator a little trim so that the alternator does not rub against it and
cause any damage.
The pre grinder shot of the radiator.
Also a pre grinder shot of the throttle cable bracket.
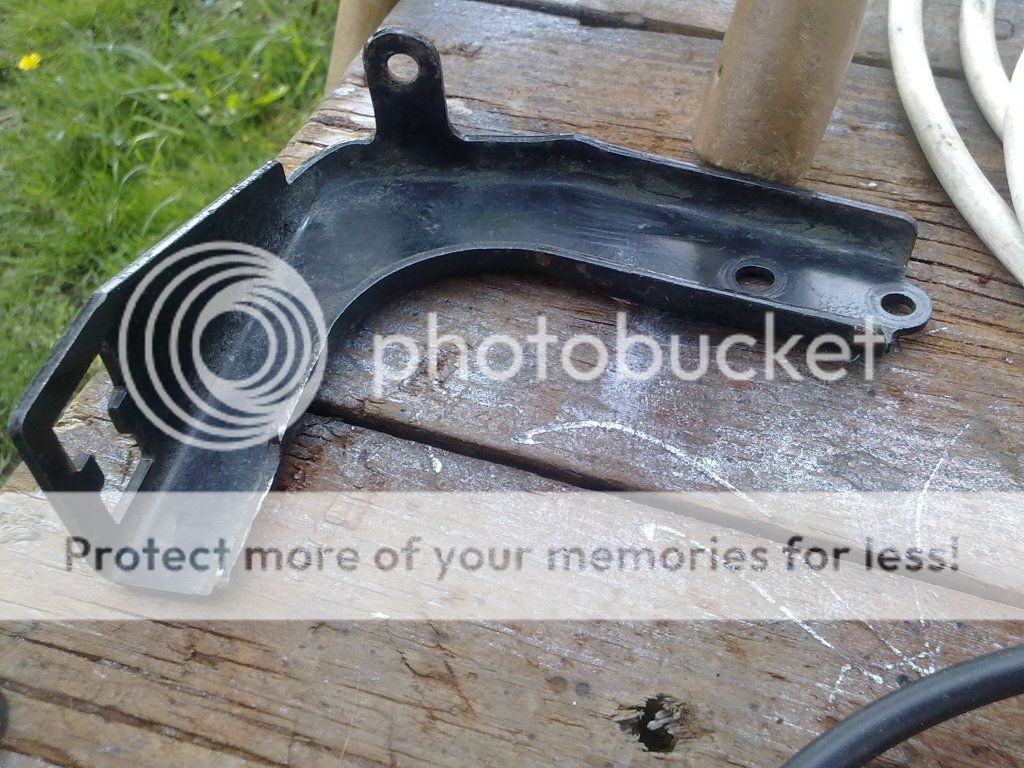
It's amazing how even a shallow trim like this can make so much of a difference.
I removed a bit that was sticking out along the bottom of the bracket which may have
been for clipping cables to as it was getting in the way. Also shortened the length
making it neater.
A little Satin Black spray paint, to tidy thinks back up.
Yes other end of the spectrum White satin tyre paint, the white wall tyre clips got
their third coat of paint. And the head light gaskets got their second coat.
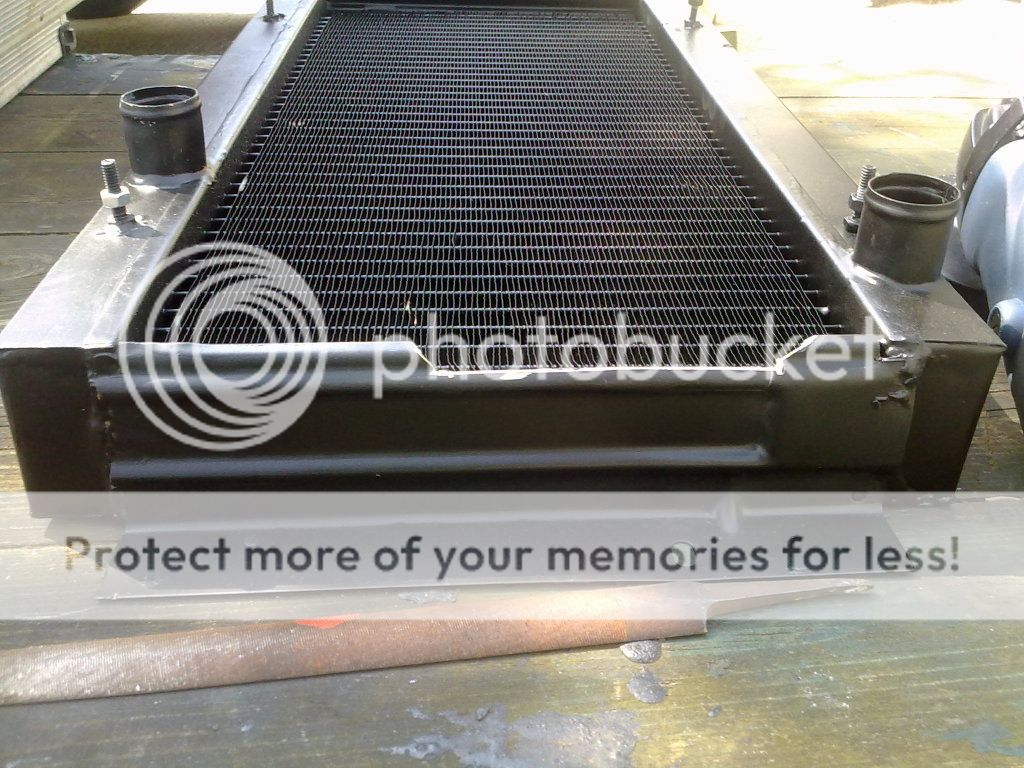
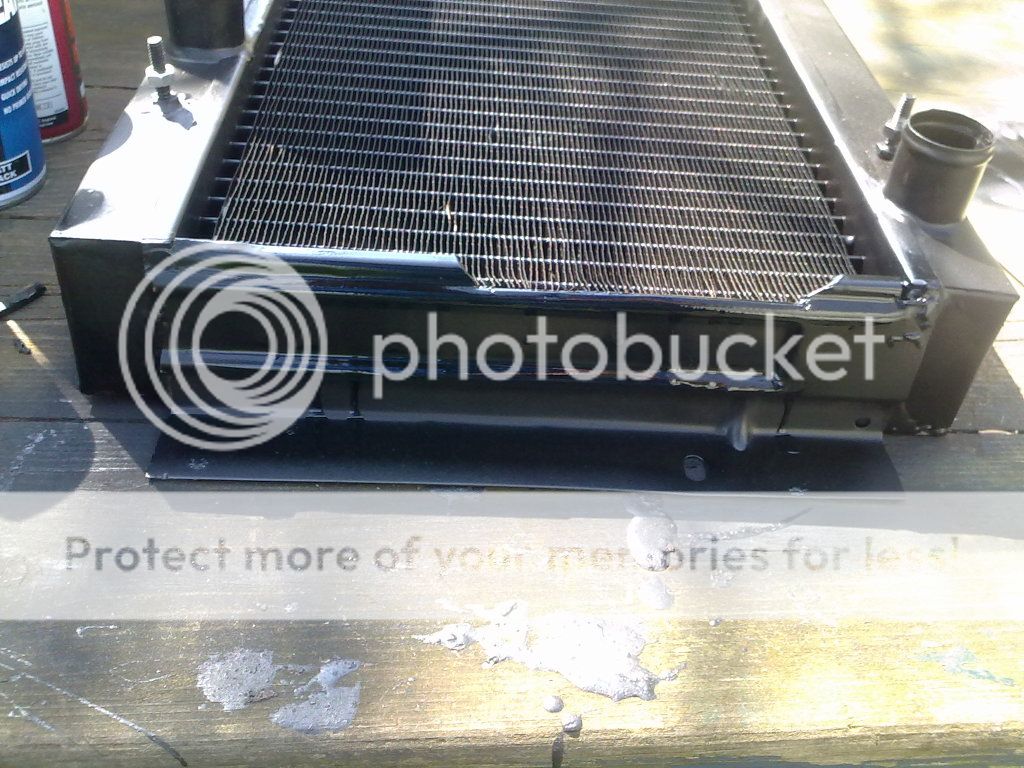
The radiator was popped back in without the need to move, or remove the battery tray
or the alternator.
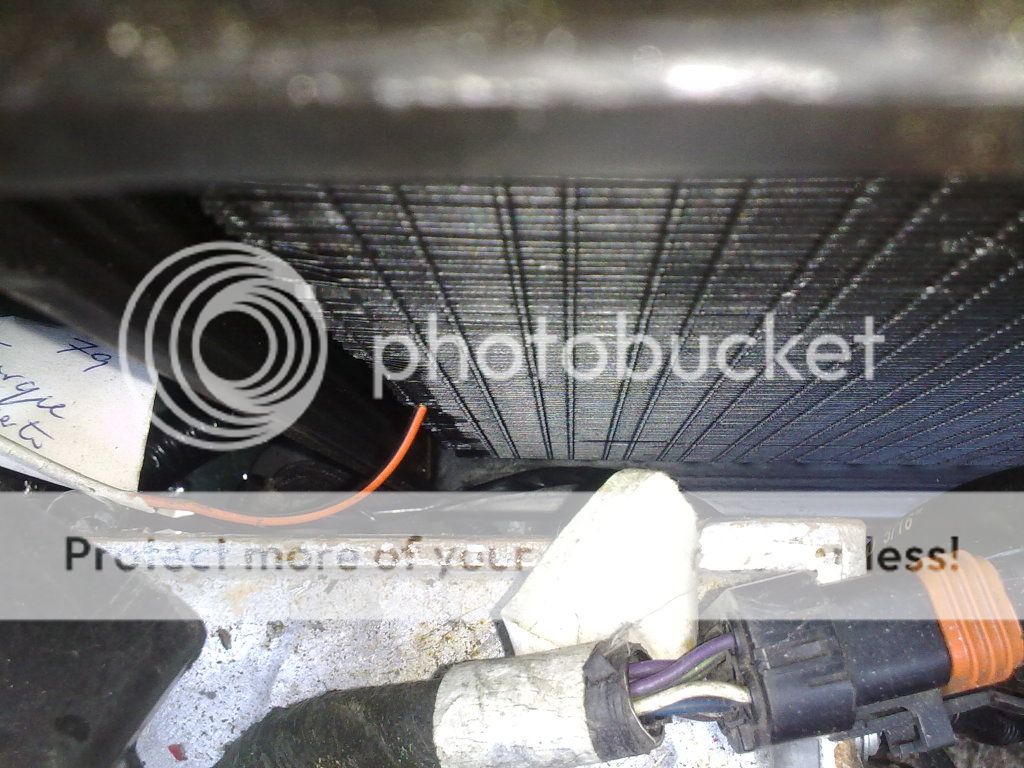
The radiator wasn't slitting cprrectly, and it wasn't flat against the slam panel.
So the space between the alternator and the radiator will be a little more!
Although not fixed against the slam panel you get the I dea of how low the rdiator is!
With the weather being warm enough the paint had dried very quickley and had even
taken a second coat before I bolted the bracket back together.
Now for a coat of silver on the headlight gaskets.

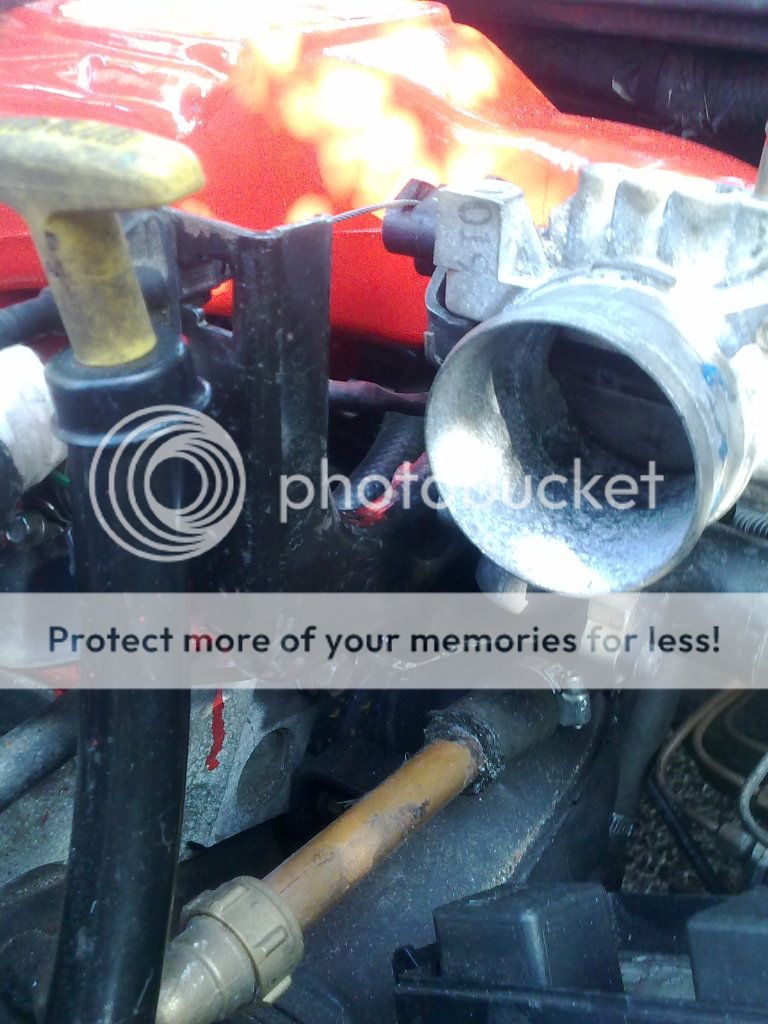
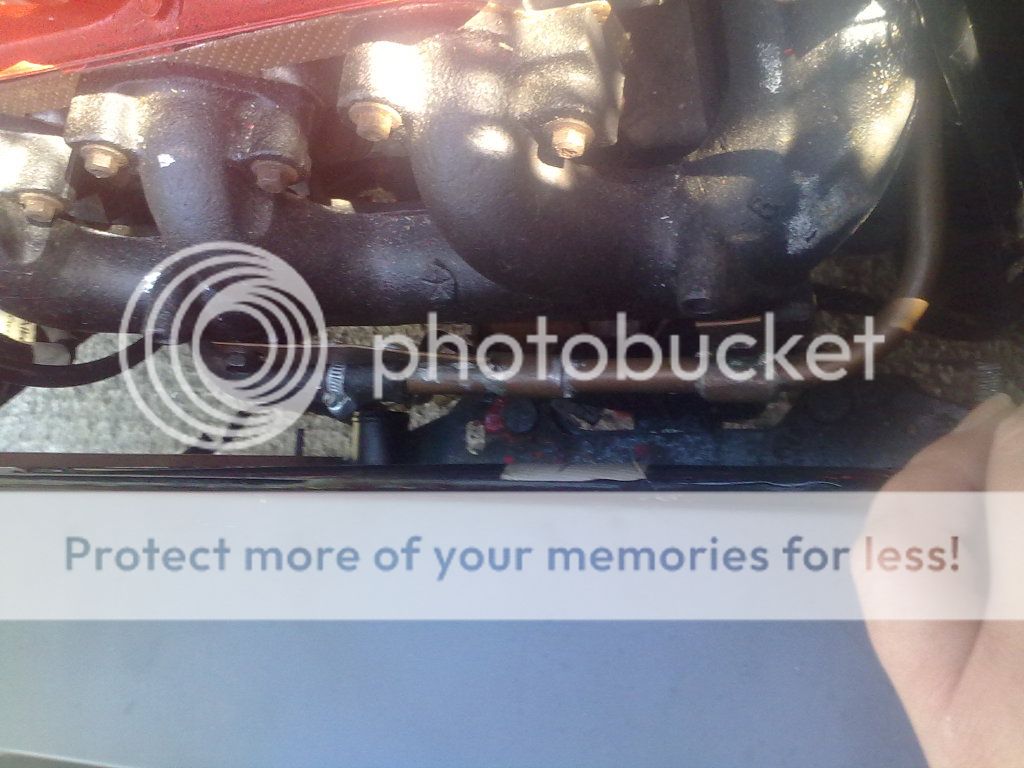
The throttle body will not be bolted onto the manifold yet even though it's on
there at the moment. This is so I can slide it forwards so it is easier for me
to reach behind.
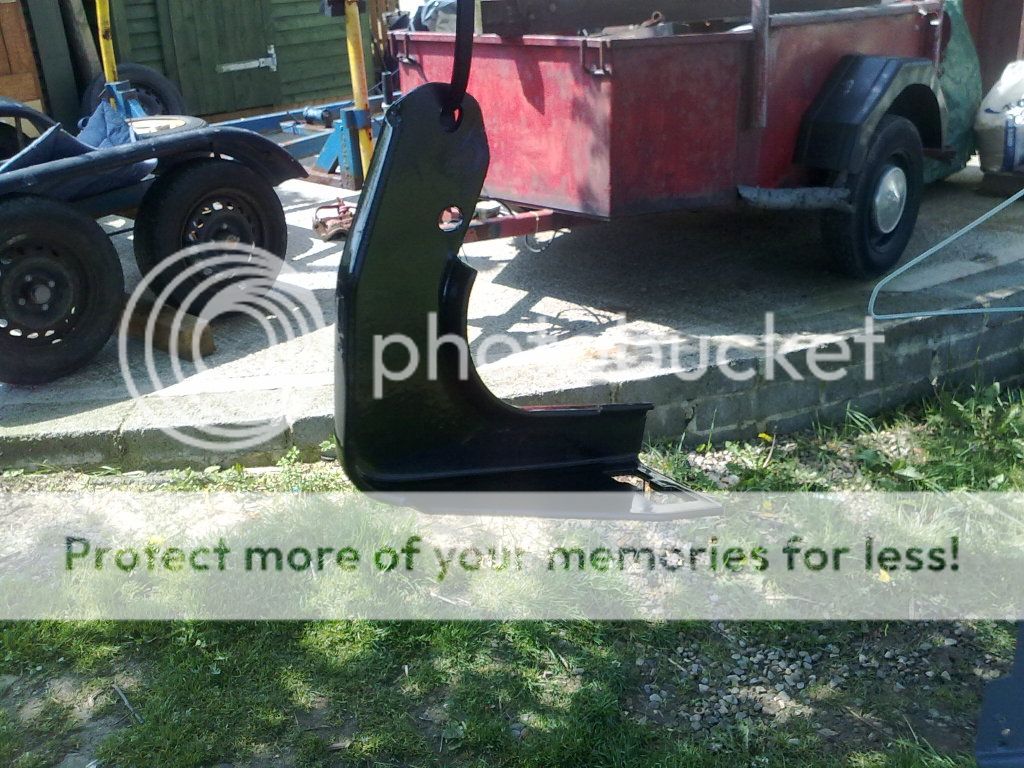
Shortly after taking the above photo, I went to unbolt the bumper reinforcement
bar. And as I had been pushing myself, and went down spinning. as one leg gave
way when I was turning around. I went down banging ito the side of the tool shed,
and head first into the chain link fence between ours an next doors.
(please note the chain link fence has hawthorn bushes growing through it)
This Muppet didn't help, he came over, sneezed in my face, and thought I was
playing!

While I was still on the floor recovering, I was able to see why the radiator wasn't
sitting against the slam panel. The bolt heads for the fan brackets were one problem.
The other problems were, the side panels of the radiator were resting on the wiring
loom. The side panels aren't uniform and one is 1/2 an inch wider at the top, and this
stopped it fitting past the back of the headlight bulkhead/backing.
IF I'm okay tomorrow I will deal with trimming the radiator side panels. And look at
making some cardboard templates for tidying up around the sides where I had cut for
the fans.
of the radiator a little trim so that the alternator does not rub against it and
cause any damage.
The pre grinder shot of the radiator.
Also a pre grinder shot of the throttle cable bracket.
It's amazing how even a shallow trim like this can make so much of a difference.
I removed a bit that was sticking out along the bottom of the bracket which may have
been for clipping cables to as it was getting in the way. Also shortened the length
making it neater.
A little Satin Black spray paint, to tidy thinks back up.
Yes other end of the spectrum White satin tyre paint, the white wall tyre clips got
their third coat of paint. And the head light gaskets got their second coat.
The radiator was popped back in without the need to move, or remove the battery tray
or the alternator.
The radiator wasn't slitting cprrectly, and it wasn't flat against the slam panel.
So the space between the alternator and the radiator will be a little more!
Although not fixed against the slam panel you get the I dea of how low the rdiator is!
With the weather being warm enough the paint had dried very quickley and had even
taken a second coat before I bolted the bracket back together.
Now for a coat of silver on the headlight gaskets.
The throttle body will not be bolted onto the manifold yet even though it's on
there at the moment. This is so I can slide it forwards so it is easier for me
to reach behind.
Shortly after taking the above photo, I went to unbolt the bumper reinforcement
bar. And as I had been pushing myself, and went down spinning. as one leg gave
way when I was turning around. I went down banging ito the side of the tool shed,
and head first into the chain link fence between ours an next doors.
(please note the chain link fence has hawthorn bushes growing through it)
This Muppet didn't help, he came over, sneezed in my face, and thought I was
playing!
While I was still on the floor recovering, I was able to see why the radiator wasn't
sitting against the slam panel. The bolt heads for the fan brackets were one problem.
The other problems were, the side panels of the radiator were resting on the wiring
loom. The side panels aren't uniform and one is 1/2 an inch wider at the top, and this
stopped it fitting past the back of the headlight bulkhead/backing.
IF I'm okay tomorrow I will deal with trimming the radiator side panels. And look at
making some cardboard templates for tidying up around the sides where I had cut for
the fans.
I'm Diabetic,& disabled BUT!! NOT DEAD YET!!
Re: V6 into a RHD Chrysler Neon mk1
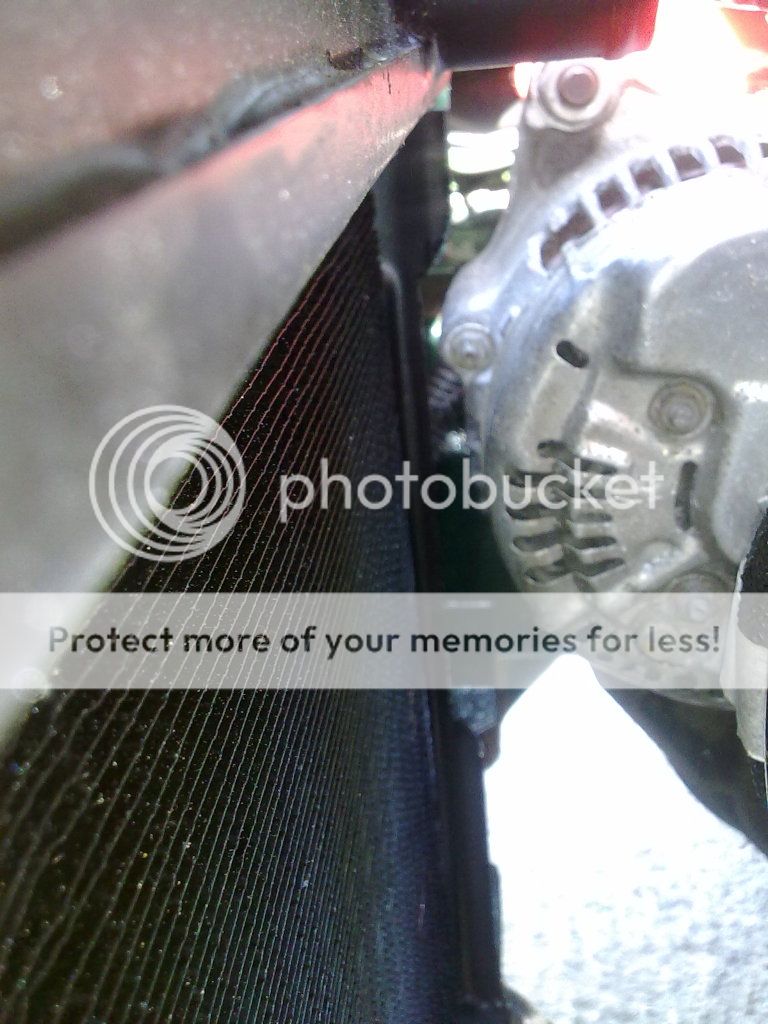
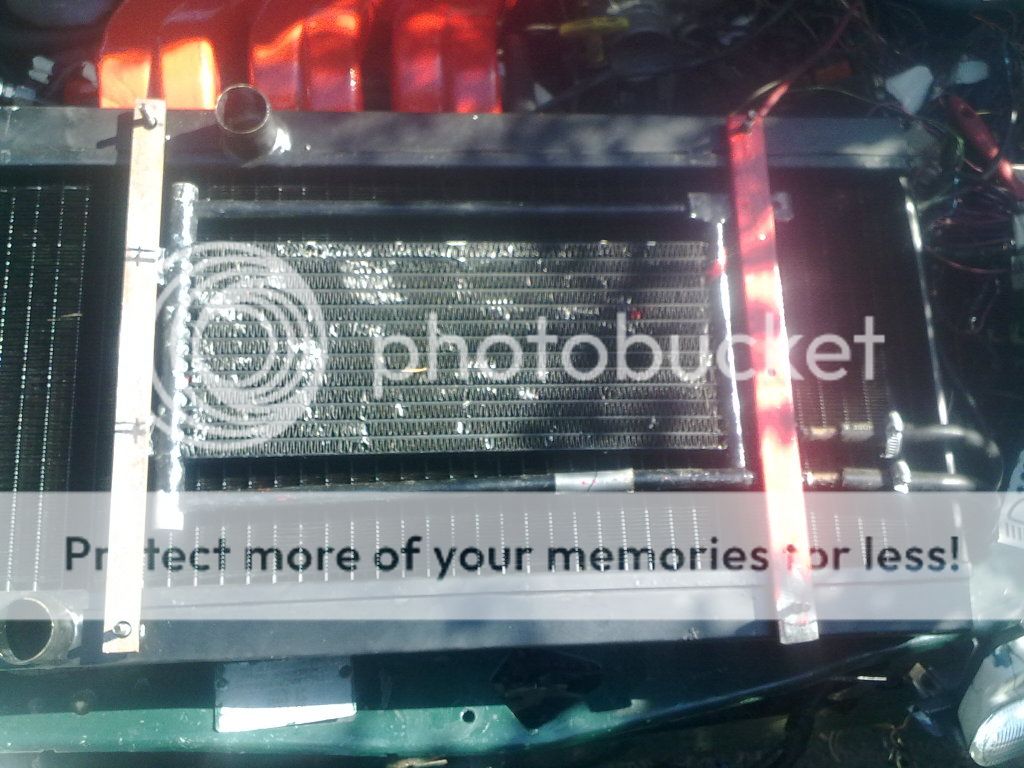
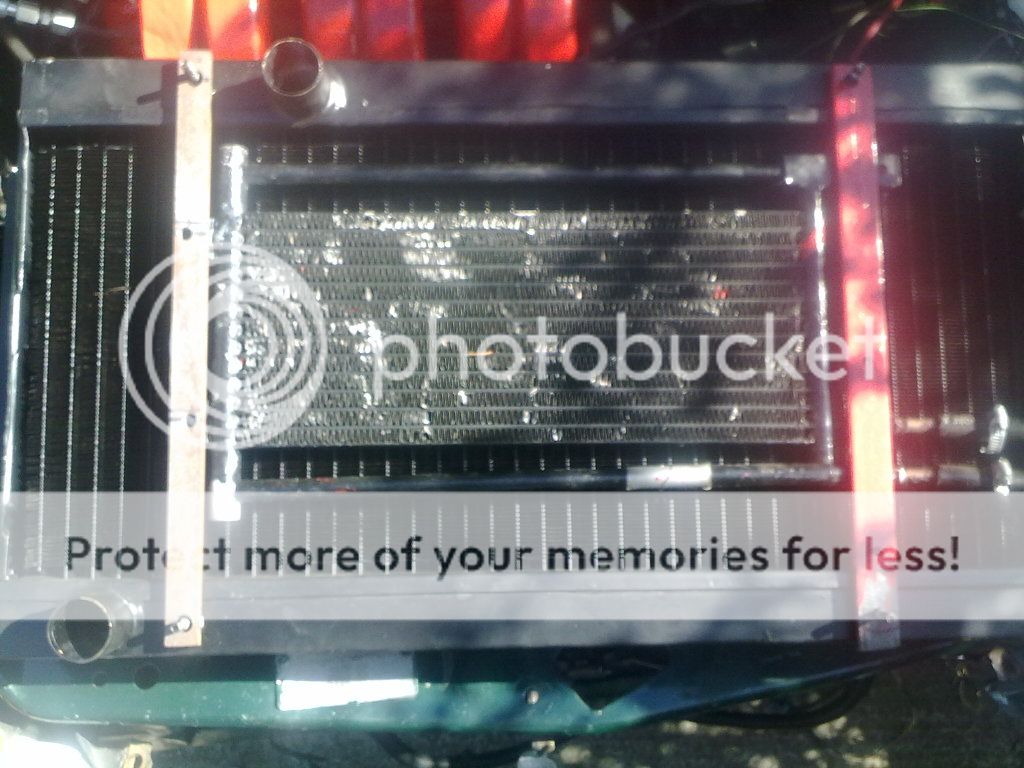
Well the headlight rubber gaskets were dry so they went on.
I popped the radiator in with a couple of metal strips, to check
on where the best position for mounting the oil radiator would
be.
A decent amount of space between the radiators and the
exhaust manifold. But not enough for putting fans in there.
With the radiators out and resting on the engine and the slam
panel. I marked up for holes.
All holes drilled it was then marked up ready for a little trimming
and rounding off of edges tomorrow.
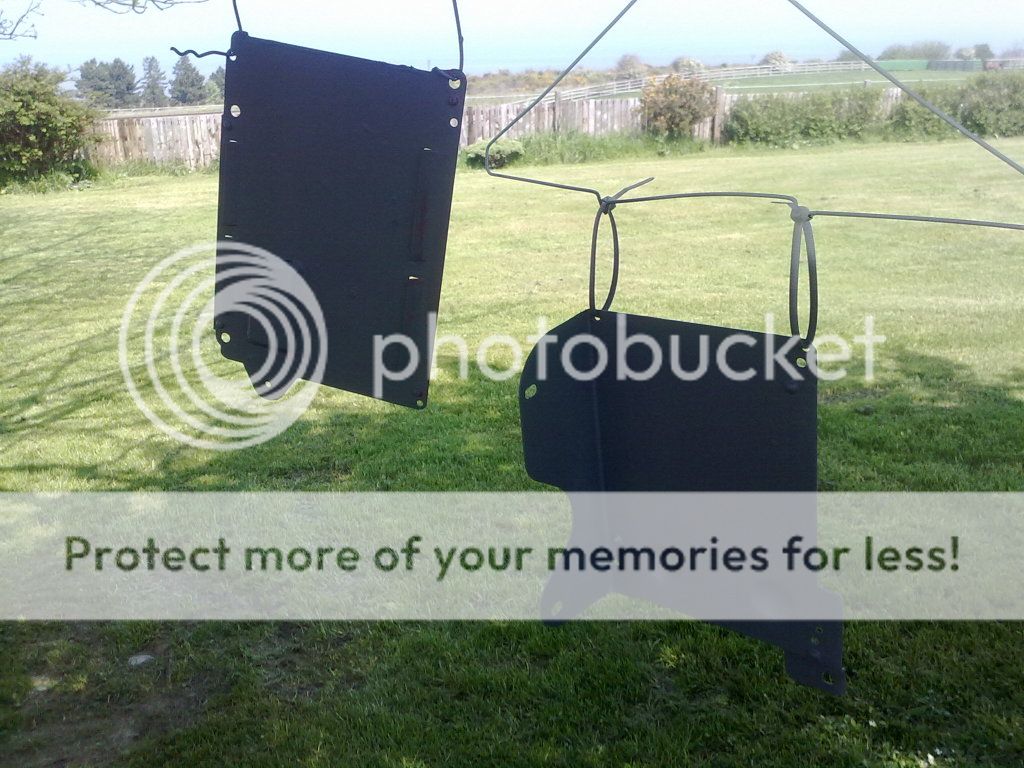
After making up a template for covering the slam panel and
directing the air through the radiators rather than around it!
I marked out a pair (one for each side) on a sheet of alloy plate
which I liberated from dad's metal stash.
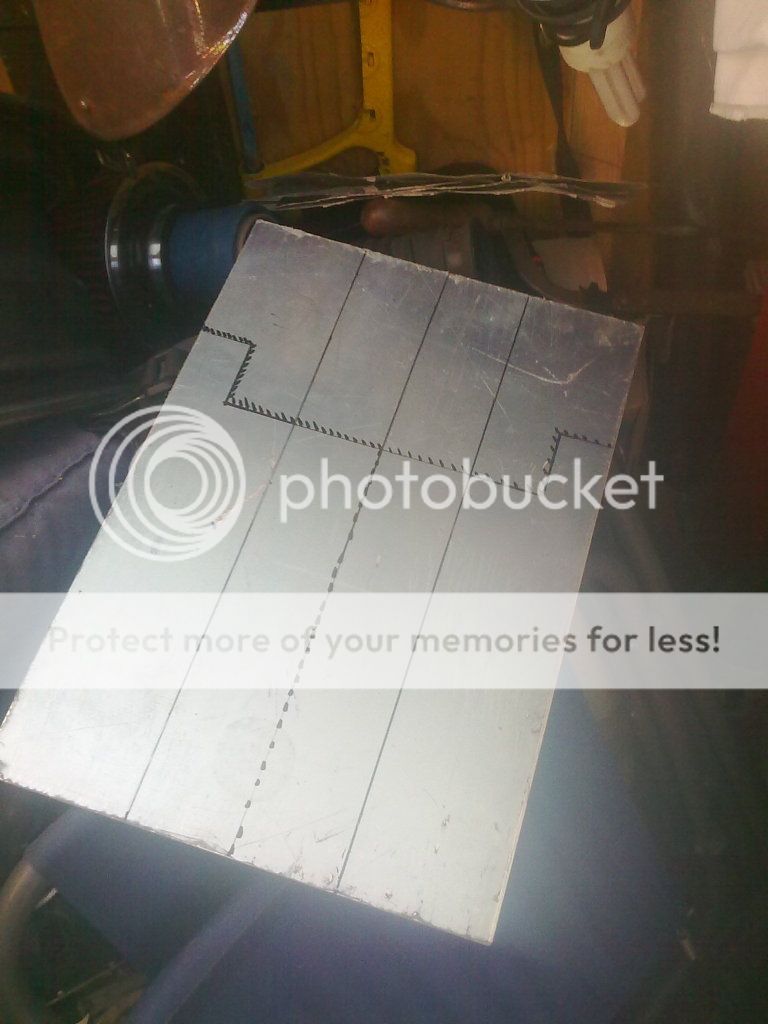
The alloy sheet of metal is thick but not too thick that is
shouldn't be impossible to bend.
I popped the radiator in with a couple of metal strips, to check
on where the best position for mounting the oil radiator would
be.
A decent amount of space between the radiators and the
exhaust manifold. But not enough for putting fans in there.
With the radiators out and resting on the engine and the slam
panel. I marked up for holes.
All holes drilled it was then marked up ready for a little trimming
and rounding off of edges tomorrow.
After making up a template for covering the slam panel and
directing the air through the radiators rather than around it!
I marked out a pair (one for each side) on a sheet of alloy plate
which I liberated from dad's metal stash.
The alloy sheet of metal is thick but not too thick that is
shouldn't be impossible to bend.
I'm Diabetic,& disabled BUT!! NOT DEAD YET!!